How to Make Your Voice Sound Better in Audacity?

Thanks to our computers and smartphones, it’s very easy to capture audio during various activities and use it to create multimedia content. This frequently includes recording your voice, either while you are reading a prepared text or while you are organically talking into the microphone.
Best Audacity Settings
In most instances, the raw footage will have numerous deficiencies. For one, people who are not trained actors or vocal performers tend to struggle to get their voices to sound good. Fortunately, some tools can help in this regard and allow you to edit your voice so that it sounds more professional and more confident. For example, if you learn how to use Gemoo Recorder in conjunction with Audacity, you could get some very interesting results. This article will give you some actionable tips that require very little technical knowledge but allow you to modulate your voice in many ways.
Also read: How to Trim Audio in Audacity and Explore Alternatives >
What is Audacity and Why You Should Use It?
Because it’s free and open source, Audacity is one of the most popular software applications for audio recording and editing. It’s available for practically every major PC operating system including Windows, MacOS, and Linux. This tool brings a collection of functions that are very easy to master and that let the user control every aspect of the sound recording down to minute detail. It has been in the market since 2000, and has a huge and fiercely loyal customer base consisting of both regular people and creative professionals.
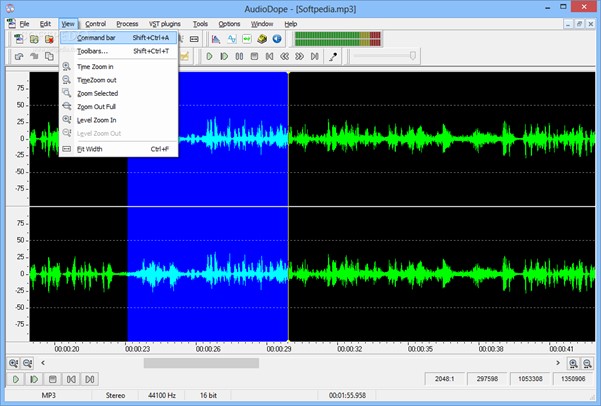
Audacity Alternative – AudioDope
Once you become familiar with this extraordinary sound processing software and learn how to manipulate audio recordings with it, you can find numerous applications for it. It’s a great choice as your default voice recorder, and even better as a makeshift sound editing studio for simple jobs. Thanks to a variety of settings that are relatively simple to control, it provides you with lots of options that can be quickly and precisely executed. As such, Audacity can be very valuable when you are recording podcasts, voiceovers, audio training materials, and a wide variety of other multimedia formats.
How to Quickly Record Your Voice?
The first and most important step in audio design is making a clear, high-quality recording. Audacity supports this function, but some experienced users prefer to do it with a specialized tool like Gemoo Recorder. Using Gemoo to record your voice on a PC is probably a smart decision since it guarantees that you will be able to capture every word, even if you are working in a noisy environment.
After you install Gemoo Recorder on your computer, it won’t take you too long to figure out how to activate the audio recording function. You simply need to switch to Audio-only mode, and after that, you can start recording at any moment, whenever you are ready.
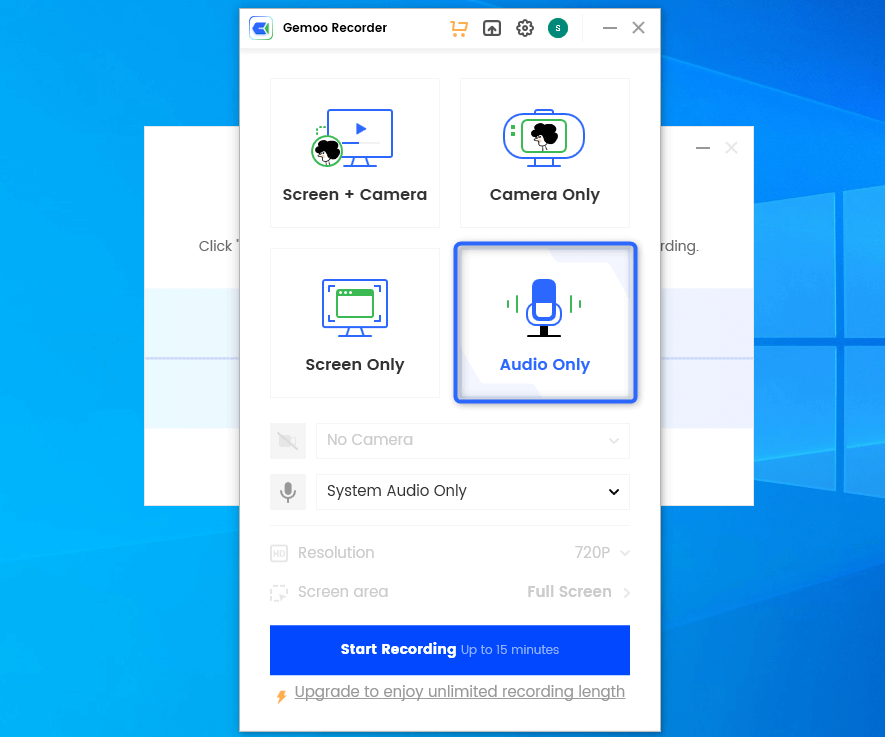
Select Audio Only Recording Mode
The app has a countdown that gives you a chance to clear your throat and prepare, which is a simple but useful feature that could make a difference and spare you from repeated attempts to start on a good note. After you finish your speaking part, it takes only one click to save the audio in a format that can be easily recognized by another audio software, such as Audacity.
How to Set Up the Best Audacity Settings for Voice Over?
Getting the raw recording of your voice is just the start, and you shouldn’t use it as a voiceover without first editing it with Audacity. This step is mandatory if you intend to use the audio for professional purposes, and is probably a good idea even if you are just playing around with multimedia for your own pleasure. All of the operations you need to complete to make your voiceover better are quite simple and intuitive, so you shouldn’t encounter any technical difficulties. Here are the recommended steps that will allow you to choose the best audacity settings for voice-over:
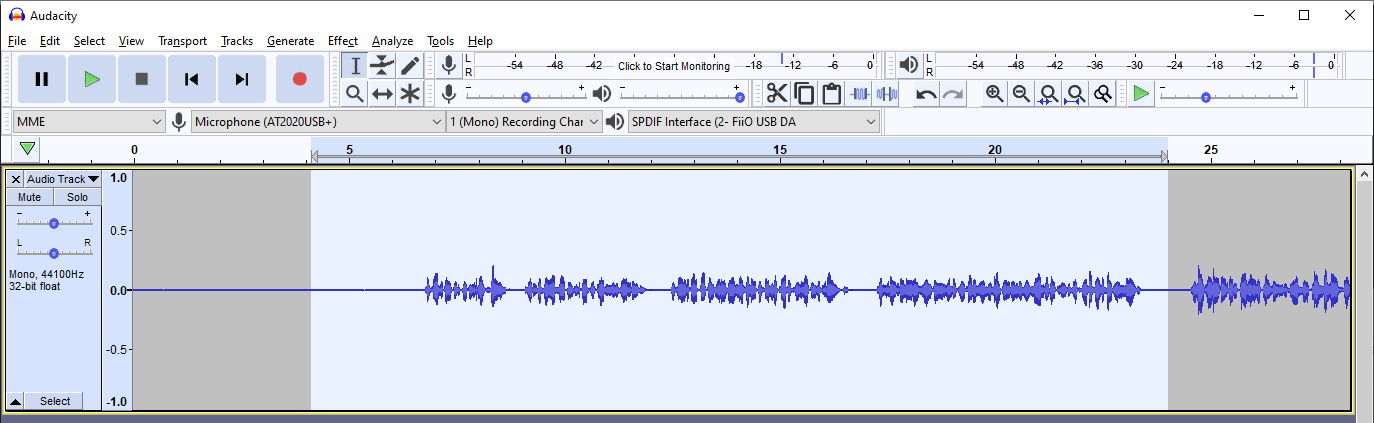
Step 1. Import your audio
The first thing you need to do is import the audio recording into Audacity so that you can edit it with this software. MP3, WAV, and AIFF formats are supported, while you can expand the range of formats if you install the FFmpeg library. If you use Gemoo to capture audio, the MP3 format is recommended.
Step 2. Remove background noise
Repeat Noise Reduction Option
You can find the Noise reduction function in the Effects menu. This function can help you clean up the recording and eliminate most of the background sounds that might be interfering with the intended content of the audio file. You will first need to get the noise profile so that Audacity knows what to remove, and you can do that by selecting a noise sample in the track. After that, just use the Repeat Noise Reduction option to cover the entire recording.
Step 3. Amplify the sound with normalization
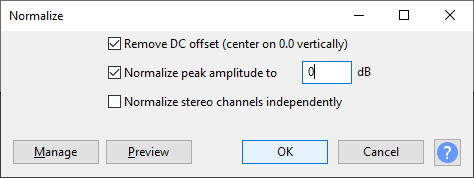
Adjust the Normalization Option
The next step is to ensure your voice is loud enough so that everyone can hear it. Sound normalization can help in this regard, and Audacity lets you perform this transformation with ease. Just go to the Effects menu and find the Normalization item, then change the peak amplitude to the value of 0 db. This will increase the volume without causing any sound distortions, effectively making the voiceover clearer.
Step 4. Compress the audio
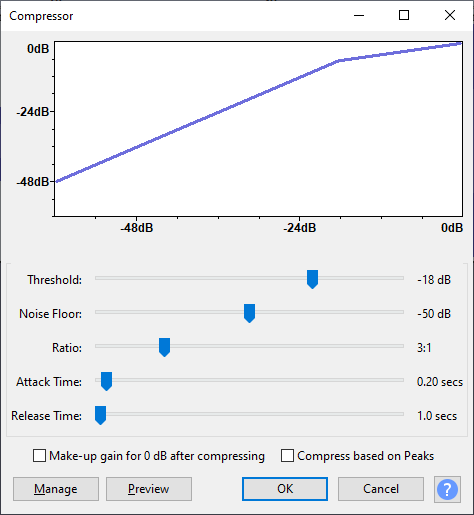
Compress the Audio
After amplifying the audio as much as you can, you can re-establish a better balance with compression. You can find this function in the Effect menu, and it’s best to apply it to the entire track. Audacity gives you the power to control numerous factors related to compression, but it may be best not to tinker too much with those settings unless you are an expert. A typical user will be well served with 2:1 or 3:1 compression with default settings, but you can always preview the audio to check if it sounds well.
Step 5. Change the sound with one of the presets
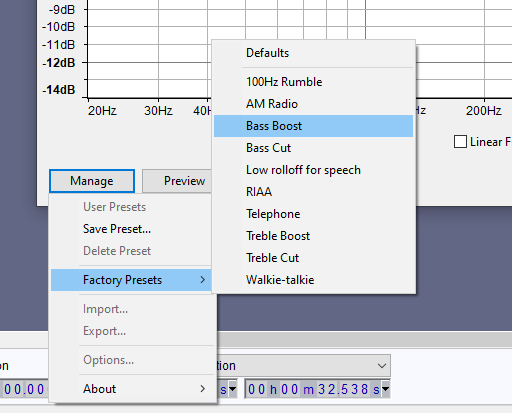
Change Sound with One of Presets
If you still don’t like how your voice sounds and want to change the balance of high, mid, and low channels, you can do that in Audacity. Since manual adjustment of channels might be too technically demanding, it may be better to use prepared Factory presets that fit what you would like to achieve. There are plenty of interesting options to choose from, so you can play around until you hear exactly what you want.
Frequently Asked Questions about Best Audacity Settings for Voice Overs
Can Audacity help to make my recording cleaner and my voice easier to understand?
Yes, Audacity has several tools that can alter the recording in such a way that your voice becomes crystal-clear and easy to hear and understand. The most important of those is noise reduction, which can improve recordings made under imperfect conditions to the point they become professionally usable.
How much sound design knowledge do I need to get optimal results from Audacity?
This is a tricky question, since the answer depends on your definition of optimal. Even beginners can achieve solid results by applying methods described above, but experienced sound technicians can make much better use of the available editing tools in Audacity.
Can I export my voiceover from Audacity to other multimedia software solutions?
Of course, it’s very easy to export edited voiceovers to whatever multimedia software or online platform you want to use for further work. You just need to save the file in a format that’s recognized by the target app, and Audacity lets you choose between several widely accepted formats.
Final Words
Understandably, inexperienced users might be hesitant to try and improve an audio recording on their own, but Audacity is not all that difficult to master. With some preparation and a little bit of practice, you can successfully learn how to control its audio settings and improve the quality of a voice recording. Of course, there is no perfect way to set up the key parameters, and instead, you have to use the trial and error method to get it right. If you are using Audacity regularly, please share your experiences in the comments and provide more actionable insights about this software tool.