How to Trim Audio in Audacity and Explore Alternatives

Audacity is a versatile audio editing software that allows users to perform various tasks, including trimming audio files. Cutting audio removes unwanted sections, creates shorter clips, or extracts specific portions from a recording. In this article, we will guide you through trimming audio in Audacity. Additionally, we will explore alternative tools, such as Clippa and AConvert, for cutting audio.
How to Trim Audio in Audacity
Table of Contents: hide
How to Trim Multiple Tracks with Audacity
Cut Audio with Audacity Alternatives Clippa
How to Trim Audio in Audacity
With Audacity’s powerful editing features, you can remove unwanted sections, create shorter clips, or extract specific portions from your recordings. This step-by-step guide covers everything from importing audio to cutting and saving trimmed files. Discover the ins and outs of trimming audio in Audacity and unlock your editing potential.
Trimming audio in Audacity is a straightforward process. To effectively cut your audio files, please proceed with the following steps:
Step 1: Launch Audacity and import the audio file you want to trim. Go to the “File” menu and select “Import” to choose your audio file.
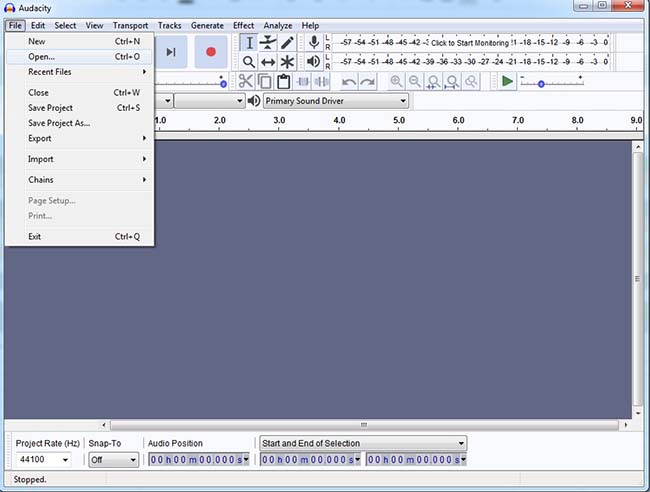
Import The Audio File
Step 2: Use the selection tool in Audacity to highlight the specific section of the audio you wish to trim. Using the zoom tool or the “View” menu, you can zoom in for precise selection.

Zoom in Audio
Step 3: Once you have selected the desired section, go to the “Edit” menu and click on “Delete” or use the shortcut “Ctrl + X” (Windows) or “Cmd + X” (macOS) to remove the selected portion.
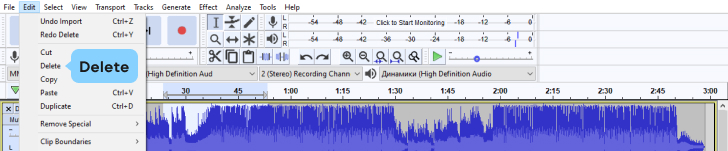
Click on Delete
Step 4: You can save the trimmed version after cutting the audio. Click on the “File” menu and select “Export” to choose the desired file format and location to save the trimmed audio file.
How to Trim Multiple Tracks with Audacity
Audacity also enables you to trim multiple tracks simultaneously. Our step-by-step instructions will walk you through importing multiple tracks, synchronizing them, cutting sections, and saving the trimmed tracks. Take your audio editing skills to the next level by mastering the art of decorating multiple tracks with Audacity.
Here’s how you can do it:
Step 1: Import all the tracks you want to trim into Audacity by selecting “Import” under the “File” menu. Each track will appear as a separate waveform.
Step 2: Use the Time Shift Tool to align the tracks if necessary. It ensures that the sections you want to cut are in sync across all tracks.
Step 3: Select the desired section on one track and use the “Ctrl + X” (Windows) or “Cmd + X” (macOS) shortcut to cut it. The cut section will be removed from all the selected tracks.
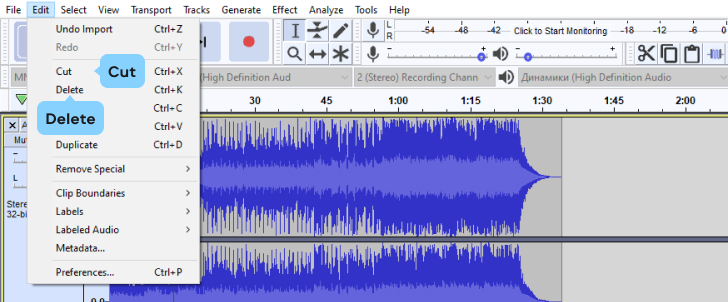
Trim Multiple Tracks with Audacity
Step 4: After completing the trimming process, save each track individually by selecting “Export” from the “File” menu. Choose the desired file format and location for each trimmed track.
Cut Audio with Audacity Alternatives Clippa
Are you looking for a user-friendly alternative to Audacity for editing your audio files? Follow these simple steps to trim your audio using popular Audacity alternatives. Clippa is a web-based Audio Editor that supports MP3, WAV, and CAF audio formats, eliminating the need for additional conversion tools and ensuring compatibility. One of its standout features is the ability to cut audio with precision. Whether you want to remove unwanted sections, extract specific portions, or create shorter clips, Clippa provides an intuitive platform to accomplish these tasks effortlessly.
With Clippa, you can upload your audio files, select the sections you want to cut, and seamlessly remove them. This powerful tool ensures that your audio editing needs are met efficiently and effectively.
It enables precise edits such as selecting, cutting, copying, pasting, and deleting specific sections of the audio. With Zoom functionality, detailed edits can be made effortlessly. The editor grants full control over the editing process, making it useful for podcast producers, audiobook narrators, and educators in e-learning for refining and enhancing audio content.
Clippa simplifies audio trimming. Follow these steps to cut audio using Clippa:
Step 1: Visit the Clippa website
Open your browser and go to the homepage of Clippa.
Step 2: Upload the Audio File
Click the “Upload” button and select the audio file you want to trim from your computer.
Upload The Audio
Step 3: Select the Section to Trim
Use the provided controls to specify the starting and ending points of the section you wish to cut.
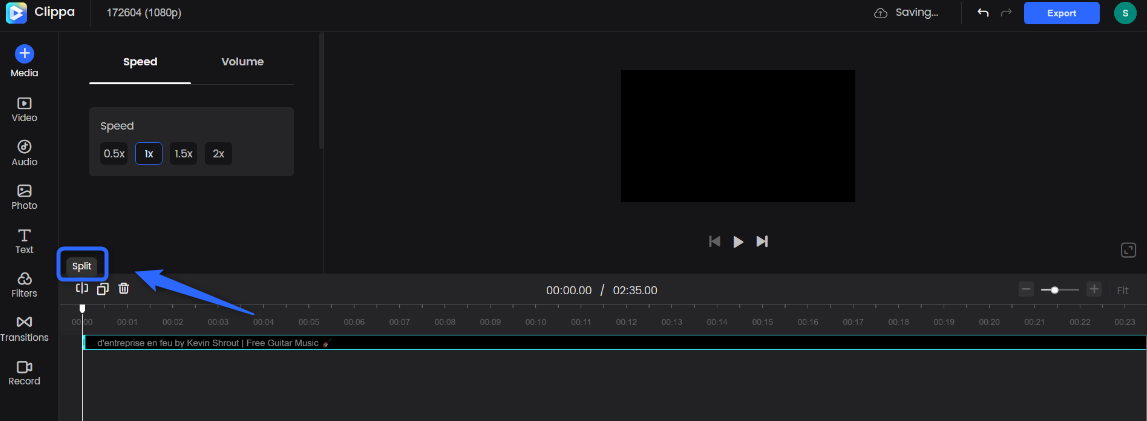
Step 4: Cutting the Audio
Click on the “Split” button to remove the selected portion from the audio file.

Cut the Audio
Step 5: Download the Trimmed Audio
Once the trimming process is complete, click the “Export” button to save the trimmed audio file to your computer. Or you can use a sharable link to share your video with others.
Additional Tips, Tricks, and Shortcuts for Audacity
Here are some additional tips, tricks, and shortcuts to enhance your experience with Audacity:
- Use “Undo” (Ctrl + Z/Cmd + Z) and “Redo” (Ctrl + Y/Cmd + Y) options or shortcuts to reverse or repeat editing actions in Audacity easily.
- Take advantage of the “Snap-To” toolbar option to precisely align your selection with audio cues like beats or waveforms.
- Streamline your editing process by familiarizing yourself with Audacity’s keyboard shortcuts, accessible in the “Edit” menu under “Preferences.”
Frequently Asked Questions about Trimming Audio in Audacity
- Can I undo the trimming if I make a mistake?
A: Yes, Audacity allows you to undo trimming actions. You can use the “Undo” option in the “Edit” menu or press Ctrl + Z (Windows) or Cmd + Z (macOS) to revert the trimming and restore the audio to its previous state.
- Can we preview the trimmed audio before finalizing the edits?
A: Yes, you can preview the trimmed audio in Audacity. Move the cursor to the start of the cut area, then press the spacebar to play the selection. It allows you to listen to the trimmed portion and make necessary adjustments before finalizing the edits.
- Will trimming audio affect the original file?
A: When you trim audio in Audacity, the original file remains untouched. Audacity creates a new audio file containing only the cut portion while keeping the original file intact. It ensures you can always return to the full audio if needed.
Conclusion
Audacity is a powerful audio editing software that allows users to trim audio files easily. Following the steps outlined in this article, you can effectively cut and save specific audio sections using Audacity. Alternatively, tools like Clippa and AConvert provide convenient online options for trimming audio files. With these techniques and tools, you can confidently edit and cut audio to create professional-quality audio content.