Taking a screenshot of your computer might come in handy for various purposes. There are nearly an unlimited number of uses for the humble screenshot, from swiftly demonstrating a problem you’re debugging to a colleague to gathering inspiration for a future endeavor to assisting a friend or family member by demonstrating a task. The process for doing so, however, varies from device to device and OS to OS.

Upload a Screenshot on Computer
Windows, macOS, Chrome OS, and many other programs include built-in screenshot capabilities. On a laptop, you can take screenshots using a variety of keyboard shortcuts. Scanned screenshots may be rapidly edited to remove irrelevant content or protect sensitive information.
It’s also easy to send the snapshot to someone else by email. This article will show you how to capture a screenshot on a laptop computer. If you’re having trouble taking screenshots on your smartphone, don’t worry; these guidelines have you covered.
Further Reading: Where Do Stardew Valley Screenshots Go?
Table of Contents: hide
How to Upload a Screenshot on Windows?
How to Upload a Screenshot on Mac?
How to Upload a Screenshot on Windows?
Want to upload a screenshot on Windows but find it hard to do so? Worry no more! Here are the two most used methods for uploading and sharing screenshots with others via Windows PC.
1. Use Snipboard to Upload a Screenshot on Windows
The simplest way to upload a screenshot on windows is to copy and paste it where you want it. Look at the steps below to learn how to do so.
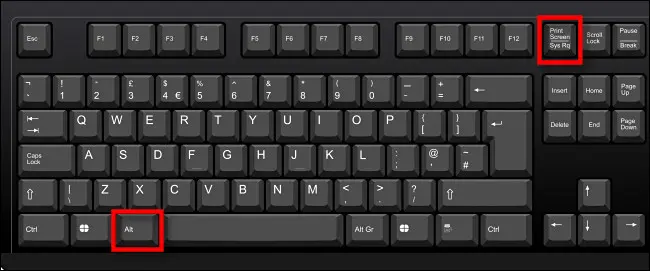
Take Screenshots via Alt Key and Print Screen Buttons
Step 1: Just choose the window you want to take a screenshot of.
Step 2: Use the Alt key and Print Screen buttons to take a screenshot. Simply returning to this page will do the trick.
Step 3: To upload the picture, use Ctrl + V.
2. Upload, Save, and Share a Screenshot via Gemoo Snap
Before uploading or sharing a screenshot, you may need to beautify or annotate your screenshot. For those who need to add symbols, numbers, or notes to the screenshot, simply taking a screenshot via keyboard shortcuts may fail to meet their demands. In this case, a professional screenshot tool – Gemoo Snap is worth your trying. As a professional screenshot software, Gemoo Snap enables you to edit your screenshot, and insert shapes, texts, notes, numbers, and other marks into your screenshot. When you finish taking the screenshot, your output will be uploaded automatically to the cloud, where you can copy and paste the image and share it with your friends or leave a comment if needed.
Now, free try Gemoo Snap and continue reading to learn how to screenshot and upload it via Gemoo Snap
Step 1. Open Gemoo Snap on your Windows or Mac computer and sign in to it via the instructions on the screen.
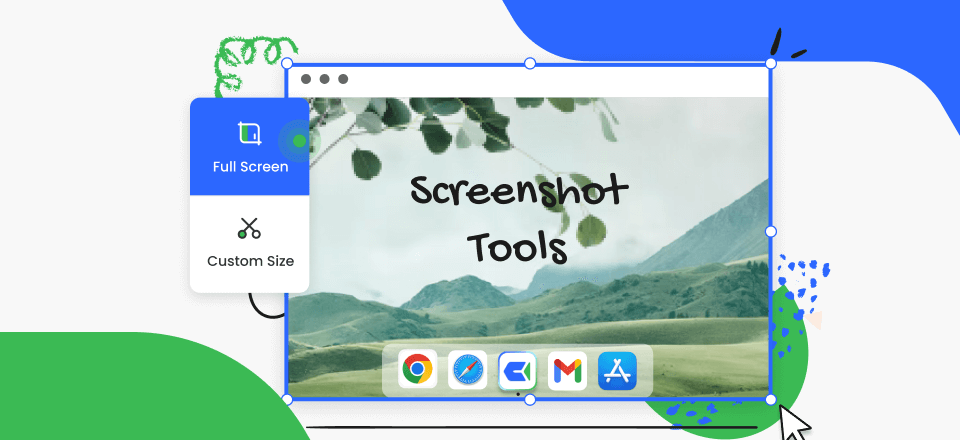
Gemoo Snap Interface
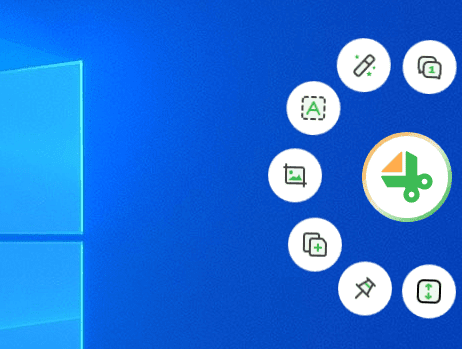
Step 2. Choose the Quick Screenshot mode and catch the area you need to take a screenshot.
Choose an area to screenshot
Step 3. Click on the view image link and you will see the uploaded screenshots in the cloud. Now you can edit the screenshot and then click on the Copy to the clipboard icon and share it with others.
Upload, Save, and Share a Screenshot via Gemoo Snap
3. Send the Screenshot via Email
The second method to upload your screenshot on windows is by capturing the screenshot on your keyboard and sending it to your desired location via email; let’s learn how to do this below:
Step 1: Simply open the window you want to capture a screenshot of, then hit the “Prt Scr” key on your keyboard.
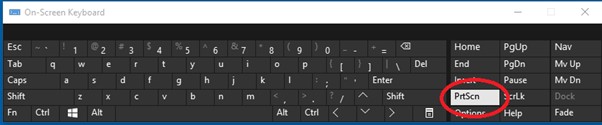
Press PrtScn
Step 2: Initiate a web browser session or your email client.
Step 3: Select “Paste” from the context menu when you right-click a blank spot in your creating email.
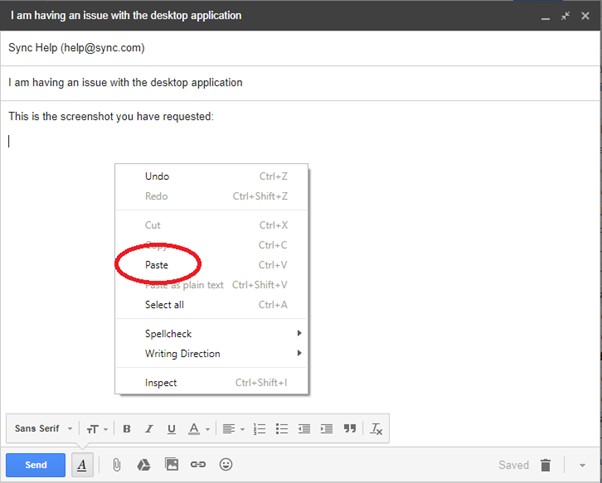
Paste Screenshot in Email
Step 4: The snapshot will be copied to the clipboard and sent to you in an email.
Send the Screenshot via Email
How to Upload a Screenshot on Mac?
Wondering how to upload a screenshot on Mac? Try the two easy methods given below!
1. Use iCloud Mail
Step 1: Hit “Command” + “Shift” + “3” (this will take a screenshot of your screen and save it to your desktop).
Step 2: Select the file you want to attach by clicking the Choose File button that appears in the “Add Attachment” section of the contact form.
Step 3: Go to your desktop, choose the appropriate screenshot, and select it.
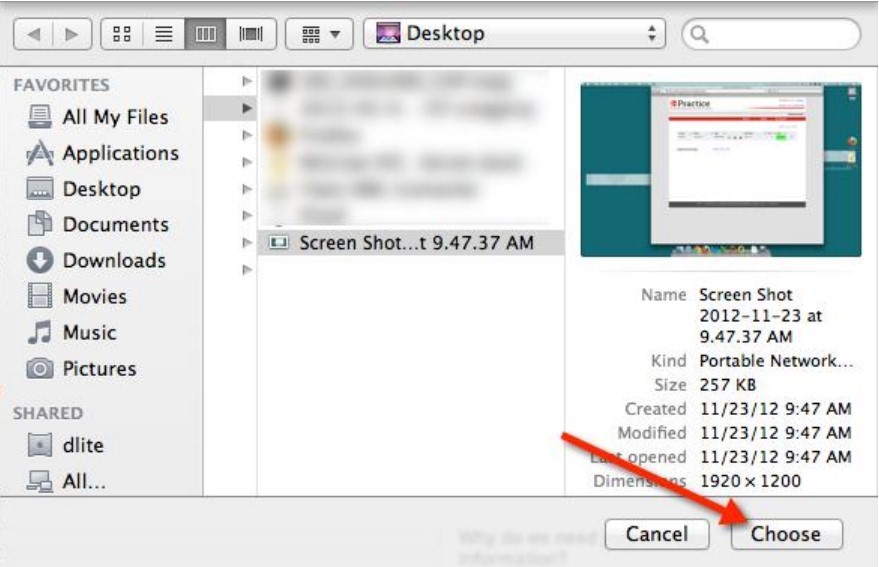
Choose Screenshot on Mac
Step 4: Await verification that the file is legitimate and click on the submit question.
2. Directly Paste Screenshots
Follow the steps below to paste any screenshot onto a document directly:

Open the Screenshot Toolbar via Keyboard Shortcut
Step 1: To start, press and hold Command () + Shift + 5 to activate the screenshot selection tool.
Step 2: Next, while still holding Control, click the item you want to choose on the screen.
Step 3: Choose where you wish to paste the selection and hit Command () + V.
How to Upload a Screenshot on Chromebook?
Do you have a Chromebook, by any chance? No problem! You shouldn’t feel left out just because you don’t own a Windows PC or a MacBook. Here’s how to upload a screenshot on Chromebook.
1. Copy to Clipboard
You can capture a video or take a screenshot of the screen on your Chromebook. After you have captured a picture or video of your screen, you can see it, make changes to it, delete it, and share it. The simplest way of doing so is by copying the image to the clipboard:
Step 1: To take a screenshot, simultaneously press the Ctrl and Show Windows buttons on your keyboard.
Step 2: The picture taken will appear in a thumbnail form in the screen’s bottom-right corner in a little box. A “Copy to Clipboard” option will be available in the box.
Step 3: You can copy the screenshot and paste it into a document if you click on it.
2. Find a Screenshot and Upload it to Drive
You can also upload the screenshot to Google Drive, OneNote, and One Drive via Chromebook.
Step 1: Click on Launcher from the left side of the screen and select Files from the options. You can also search for the Files in the search bar.
Step 2: Once you have access to File Manager, go to Downloads. You can find the Downloads on the left side of the screen under My Files.
Step 3: You can find all the captured screenshots there. Select the screenshot, sign in to Google Drive or One Drive and upload the screenshot you want. This way, you can upload and share the captured screenshot with anyone’s Chromebook or any other PC.
How Do I Send a Screenshot as a File?
Sometimes, you might want to share your screenshots with friends or colleagues to make them understand anything, or you’re complaining about something and want to show a screenshot of an error to the authorities. In any case, you might need a method to send a screenshot as a file. Here are two methods to do so!
1. Send a Screenshot as a File in Windows via Keyboard Shortcuts
Do you want to capture a picture of your complete screen and save it in a file on your computer? You may do this with the keyboard shortcut “Print Screen” without installing any other programs. With Windows 10, you may capture the whole screen by pressing Win and Print Screen at the same time.
Screenshots taken with this keyboard shortcut will be stored in a subfolder of the Pictures library in the user’s Pictures folder in Windows 10. Thus, the recommended folder structure for Windows 10 screenshots is C:\Users\Your User Name\Pictures\Screenshots.
Follow the steps below to send a screenshot:
Step 1: Use the “Prt Scr” key to take a screenshot.
Step 2: Navigate to an online email account or website.
Step 3: Click “Paste” from the context menu after right-clicking an empty section of the email you’re drafting.
Step 4: The snapshot will be copied to the clipboard and sent to you in an email.
2. Send a Screenshot as a File in Mac via Keyboard Shortcuts
From the beginning, taking a screenshot on a Macintosh computer has been a simple process. A screenshot is a picture that may be taken from your computer’s desktop or an active window. The following is a keyboard shortcut that you may use to take a screenshot of your screen and save it as a file using keyboard shortcuts:
Step 1: To take a screenshot, hit the Command key followed by Shift 4 on your keyboard. You will see a crosshair cursor, and you may click and drag the mouse to pick the area you want to take a screenshot of.

Take a Screenshot via Keyboard Shortcuts
Step 2: When you let go of the mouse button, the screenshot will be immediately saved as a PNG file on your desktop. The naming convention for this file will be the same as the one outlined in the first step of these instructions.
Save Screenshot on Desktop
Step 3: To copy an area of the screen to the clipboard, use the Command-Control-Shift-4 combination on your keyboard. You will see a crosshair cursor, and you may click and drag the mouse to pick the area you want to take a screenshot of.
Step 4: After you have released the mouse button, you will be able to copy the contents of the screen capture and paste them into another program.
Final Thought
Taking screenshots and recording movies from your computer screen is now easier than it has ever been, thanks to applications known as screen grabbers. Depending on what you need to record, we have outlined several of the most fundamental methods to take screenshots and screencasts on Chrome, Windows, and Mac OS. We have high hopes that anybody seeking further information regarding screen capture on their preferred operating system will find these recommendations helpful.