Screenshots can be used in many different contexts, from illustrating personal conversations with friends to creating tutorials and high-end multimedia for commercial purposes. That’s why most computers have built-in tools that can be used to quickly capture content from the screen without the need to change settings or navigate through complex menu systems. There are also dozens of reliable third-party screenshot software with the capacity to snap screenshots, along with the option to annotate, crop, or otherwise edit the image.
This is also true for the screenshot on Toshiba, Intel, or Asus laptops, which mostly run on Windows or Chrome and support full range of applications for those platforms. Every owner of an Asus laptop has several methods available to create screenshots and save them locally on the computer or share them online. All of those methods are quite user-friendly and require only a bare minimum of technical knowledge, so it’s fair to say that virtually anyone can start making stunning screenshots after just a few attempts.

How to Screenshot on Asus Laptop
We will present some of the most convenient ways how to screenshot on Asus computer and provide detailed explanations what you can and can’t accomplish with each of the described approaches.
Table of Contents: hide
How to Screenshot on Asus Laptop using Gemoo Snap
How to Screenshot on Asus Laptop using Hotkey
Option 1. Pressing PrtSc alone
Option 2. Pressing Windows + PrtSc
Option 3. Pressing Alt + PrtSc
How to Screenshot on Asus Laptop using Snipping Tool
How to Screenshot on Asus Laptop using Gemoo Snap
Gemoo Snap, as a powerful screenshot tool, has everything you need to take screenshots on Asus laptop. Whether you need to take screenshots at work or in your daily life. Whether you’re a teacher, a designer, a developer, or a marketer, it is a free and lightweight app for you to use. Just press the screenshot button, and then make a mark. So you can easily feedback questions or comment. It is convenient for you to communicate with each other quickly.
- Rich screenshot function – Quick screenshot, screenshot and feedback, screenshot immediately beautify the image, and screenshot upload to the cloud, etc.
- Screenshot a Portion of the Screen – Capture the visible part, a selected area, or any element you want on a webpage.
- Capture Full Page – Easily and instantly capture an entire webpage in just one click.
- Scrolling Capture – Take full-screen or specific area on the Website by scrolling screenshots, and stop at any point as you need.
Now, please follow the detailed steps to take screenshots with Gemoo Snap:
Step 1. Free download and install Gemoo Snap on your computer first.

Gemoo Snap Interface
Step 2. Now, please click and drag your mouse to customize the desirable region, then release it. Then, you can see the toolbar with brush components and add the annotation in this screenshot.
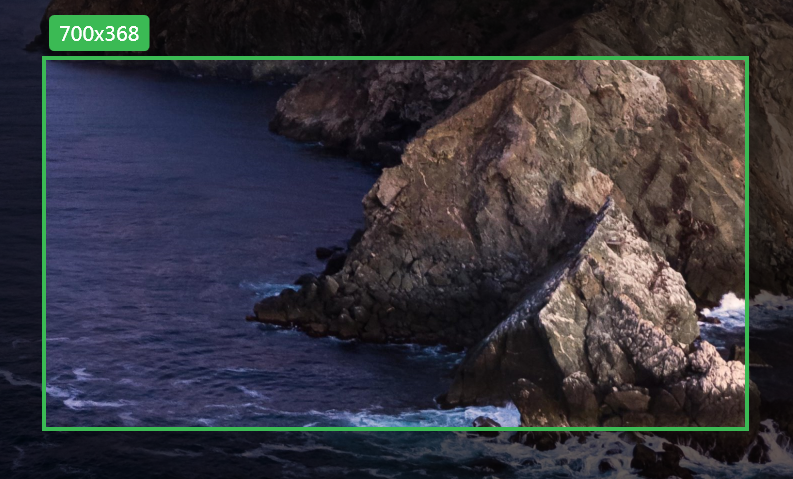
Choose an area to screenshot
How to Screenshot on Asus Laptop using Hotkey
Practically every laptop that Asus currently has on the market has a dedicated key that serves to take instant screenshots. This key is labeled PrtSc and can usually be found right above the backspace button on the keyboard. Using this button is the simplest way to quickly capture the content of the screen without having to open any application. While this button provides a basic functionality with a negligible effort, there are still multiple possibilities and it’s worth learning what can be done if you press this key in combination with another one.
Option 1. Pressing PrtSc alone
If you simply press the PrtSc button, your computer will create a full-screen screenshot with the current content of your monitor. The screenshot is immediately copied to clipboard, and user has the ability to paste it anywhere he wants – into a Word file, an image editor, or directly to a social media account. However, the image is not automatically saved and could be lost forever if Asus laptop is restarted before the screenshot has been copied to another location.
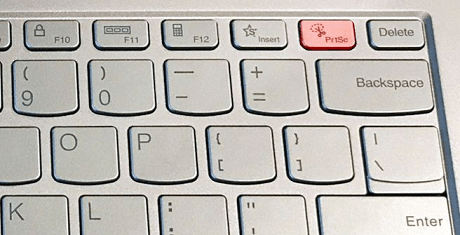
Pressing PrtSc alone
Option 2. Pressing Windows + PrtSc
If you would like to save the screenshot to your hard disc, you should use an alternative hotkey combination. Holding the Windows key while you press the Print Screen button allows you to do just that. You can select the folder where the image will be saved on your computer, or simply put the screenshot on desktop where you can easily find it.
Option 3. Pressing Alt + PrtSc
This option should be used when you want to capture only the content of the active window. The screenshot will be made at the same instance you press those keys, and much like with PrtSc alone it will immediately be added to clipboard. If you want the screenshot to be edited or saved, you will need to use another application into which you will paste the captured image.
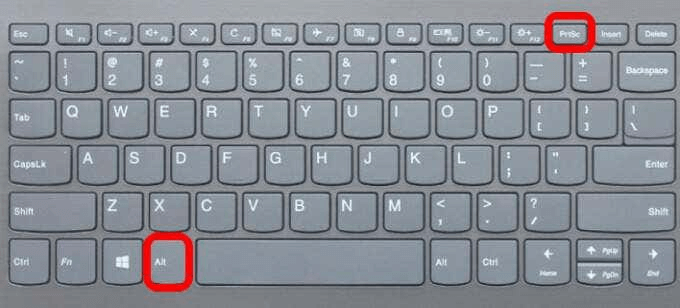
Pressing Alt and PrtSc button
How to Screenshot on Asus Laptop using Snipping Tool
There is another option for screenshot taking on a Windows computer that doesn’t require any downloads or software installation. The Snipping Tool has been added to the collection of tools included with the OS, so it can be found on almost every Asus laptop that operates on a recent version of Windows. While this is a fairly basic content snipping application, it allows you to have much more control over the final form of your screenshot than you could hope for with hotkeys alone.
With Snipping Tool, you can choose the area from which to capture content, with four different options at your disposal. You can select full screen, a window, a rectangular area, or even draw custom shape by to take a free-form snip. Basic annotation tools are provided as well, and it’s very easy to crop or rotate the snip in this app. Thanks to those handy features, Snipping Tool can deliver performance comparable to basic screenshot tools that are available for free from the internet.
Most importantly, Snipping Tool is so user-friendly that literally anyone can just start snapping images with no practice needed at all. Here is what to do when you want to capture a screenshot with this built-in Windows feature:
Step 1. Press Windows + Shift + S to run the Snipping Tool app on your Asus laptop.
Step 2. Select the type of screenshot you want to make (full-screen, window, rectangular, or freeform).
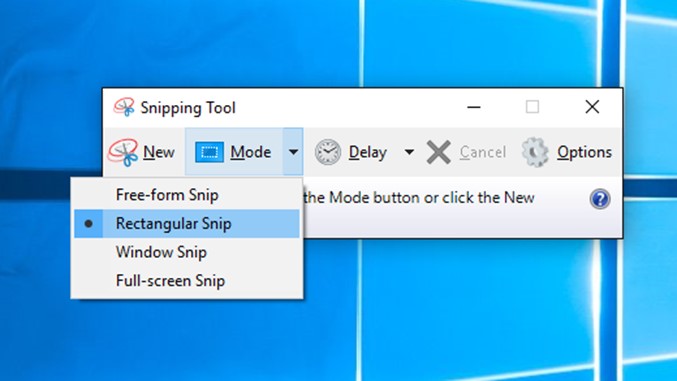
Choose Mode in Snipping Tool
Step 3. Mark the selected area with a mouse and release the mouse button to take a screenshot.
Step 4. Click on the Save snip button to save the screenshot locally on your computer.
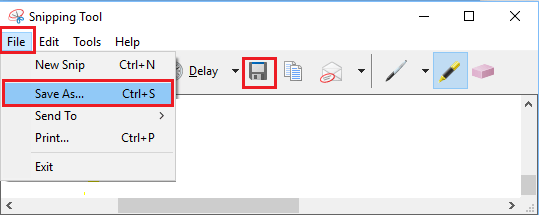
Click on the Save snip button
How to Screenshot on Asus Laptop Using Screenshot Extension
If built-in tools can’t provide the functionality you need, you should turn your attention to third-party screenshot tools available on the internet. There is certainly no shortage of good screen recording apps to choose from, including those that can be installed as a web browser screenshot extension. With an extension-based tool, you don’t need to run the app’s interface and you can simply activate the screenshot function with a single click while you are browsing the internet.
One of the best apps of this kind is Loom, which can be used as an extension to Chrome, Opera, or Microsoft Edge browsers. This is a powerful screen recording app that can easily capture images, video, or audio from your Asus laptop. In addition to excellent recording and editing features, it also facilitates multimedia-based communication and is often used to enhance the productivity of large teams. You can try out this amazing app for free, but if you decide to subscribe for the full version you will have to pay $8 per month for a license.
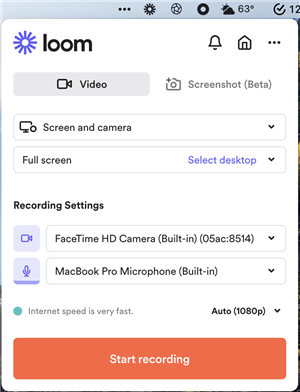
Screenshot Software – Loom
If you only want to take a quick screenshot with Loom, you’ll be able to accomplish that in just a few clicks. Here is what you have to do:
Step 1. Install Loom as an extension to you browser of choice.
Step 2. Press CTRL + Shift + 1 if you want to quickly capture the image of the entire screen.
Step 3. Press CTRL + Shift + 2 in order to customize the size of the screenshot area.
Step 4. Your screenshot will open in another browser tab, with a shareable URL link.
Step 5. Press Shift + S or click Download screenshot to save the image to your computer.
Click Download Screenshot to Save
Frequently Asked Questions of Screenshot on an Asus
How do you take a screenshot on an Asus Chrome laptop?
If you would like to know how to screenshot on Asus Chromebook, you should first check whether there is a dedicated button on the keyboard that lets you take a quick snip. The alternative is to press CTRL + Show Windows for a full screen image, or CTRL + Shift + Show Windows followed by dragging the borders with a mouse if you want to take a partial screenshot.
Can built-in function on Asus laptop take partial screenshots?
Yes, both Windows-based laptops and Chromebooks have built-in tools capable of capturing a selected portion of the screen. You can precisely define the area that you want to be included in the screenshot with a mouse, and automatically snap the image. The whole operation won’t take longer than a few seconds and is very intuitive.
Is it necessary to download screenshot app to Asus laptop?
Users who only want to make simple screenshots from time to time could be well-served with the PrtSc button or the Snipping Tool, so they don’t have to download any third-party apps. On the other hand, content creators who want to heavily edit their screenshots and frequently share them online would probably be wise to install one of the more advanced snipping apps for Windows.
How to save a screenshot on Asus laptop?
Screenshots made with the PrtSc button are initially saved to the clipboard, so you need a different Windows app such as Paint or Word to save them permanently. This is not too practical if you screenshot a lot and may sometimes lead to losing an important shot. For this reason, many users prefer using screenshot apps that allow images to be saved directly to the hard disc.
Can you make a video recording of your screen on Asus laptop?
This is not possible to do with Snipping Tool, and you will need to install some screen recording software in order to capture the activity on your desktop as video. Apps of this kind are numerous and typically free to try, so it won’t be hard to find one that lets you record your computer screen. OBS Studio, Share X, and Screencast-O-Matic are well-regarded screen recorders that might be worth testing.
Final Words
Your Asus laptop has many useful tools already on it, so it’s smart to learn as much about them as you can. For simple tasks such as taking a screenshot, built-in tools work very well and a majority of users are fully satisfied with them. Using keyboard shortcuts is the fastest way to capture the screen if you don’t intend to make large edits, but it’s also possible to snip only a portion of the screen with this method. Windows Snipping tool is another viable option, even if it also has numerous limitations. Third-party apps and browser extensions are equipped with more features, so ambitious content creators might want to use them instead of the native tools. Regardless of which app you ultimately decide to go with, taking screenshots on Asus laptop won’t be very difficult to do.