How to Translate YouTube Videos into Any Language

YouTube has become a global phenomenon, with billions of users watching videos in countless languages. As a content creator, translating your YouTube videos into multiple languages can significantly expand your reach and attract a wider audience. In this comprehensive guide, we’ll walk you through the process of translating your YouTube videos, enabling you to tap into new markets and increase your channel’s visibility.
Table of Contents: hide
Translating YouTube Video Content
Translating Video Titles and Descriptions
Benefits of Translating YouTube Videos
Bonus Tip – Add Subtitle to YouTube Short Video Automatically
Translating YouTube Video Content
YouTube offers built-in tools that make it easy to add translations to your videos. By leveraging these features, you can effortlessly make your content accessible to viewers who speak different languages. Follow these step-by-step instructions to add translations to your videos:
Step 1: Go to YouTube Studio and select the “Content” option on the dashboard on the left side of the screen. Hover over the video you want to translate and click on the “Details” option.

Selecting the Content Option
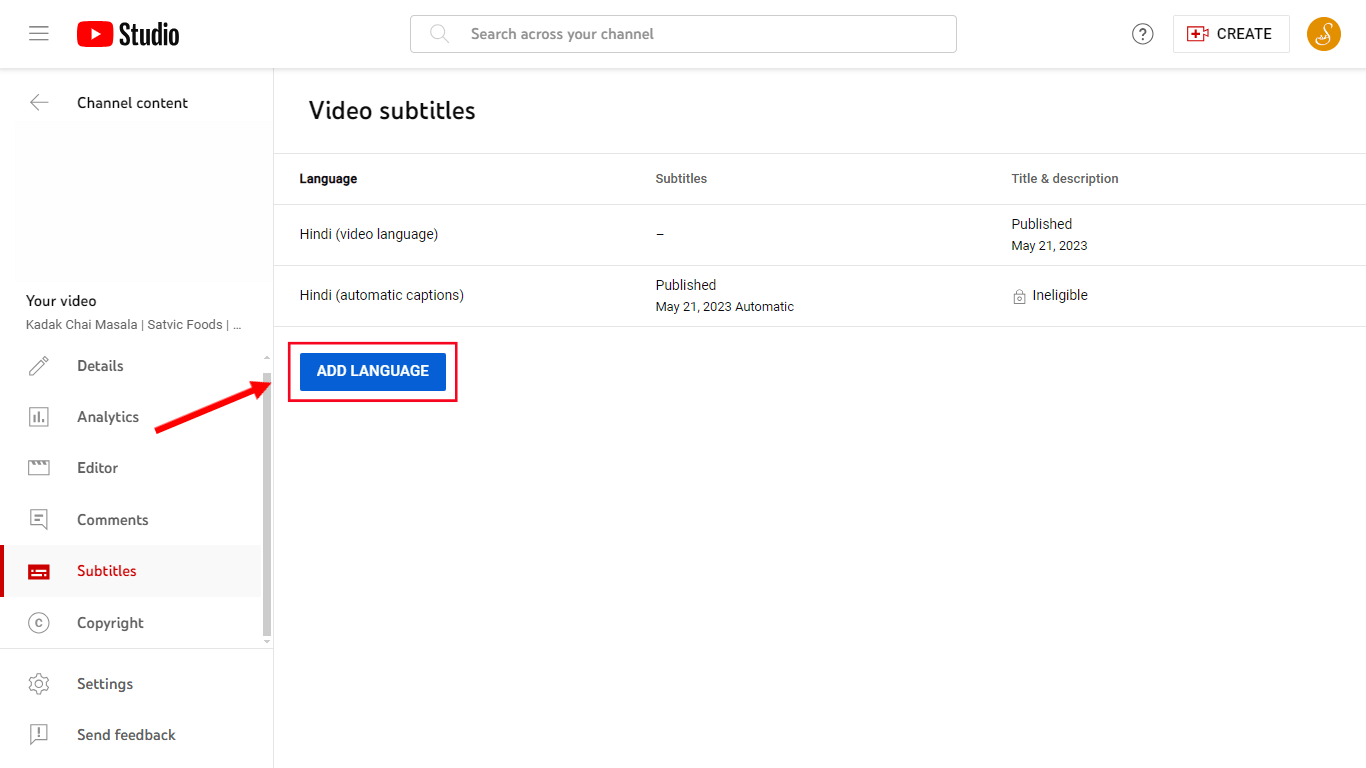
Step 2: Click on the “Subtitles” tab and choose “Add Language.”
Choose Subtitle
Step 3: There are three ways to include subtitles in your video: uploading a translated subtitle file in your desired language, manually typing them, or utilizing YouTube’s auto-translate feature.
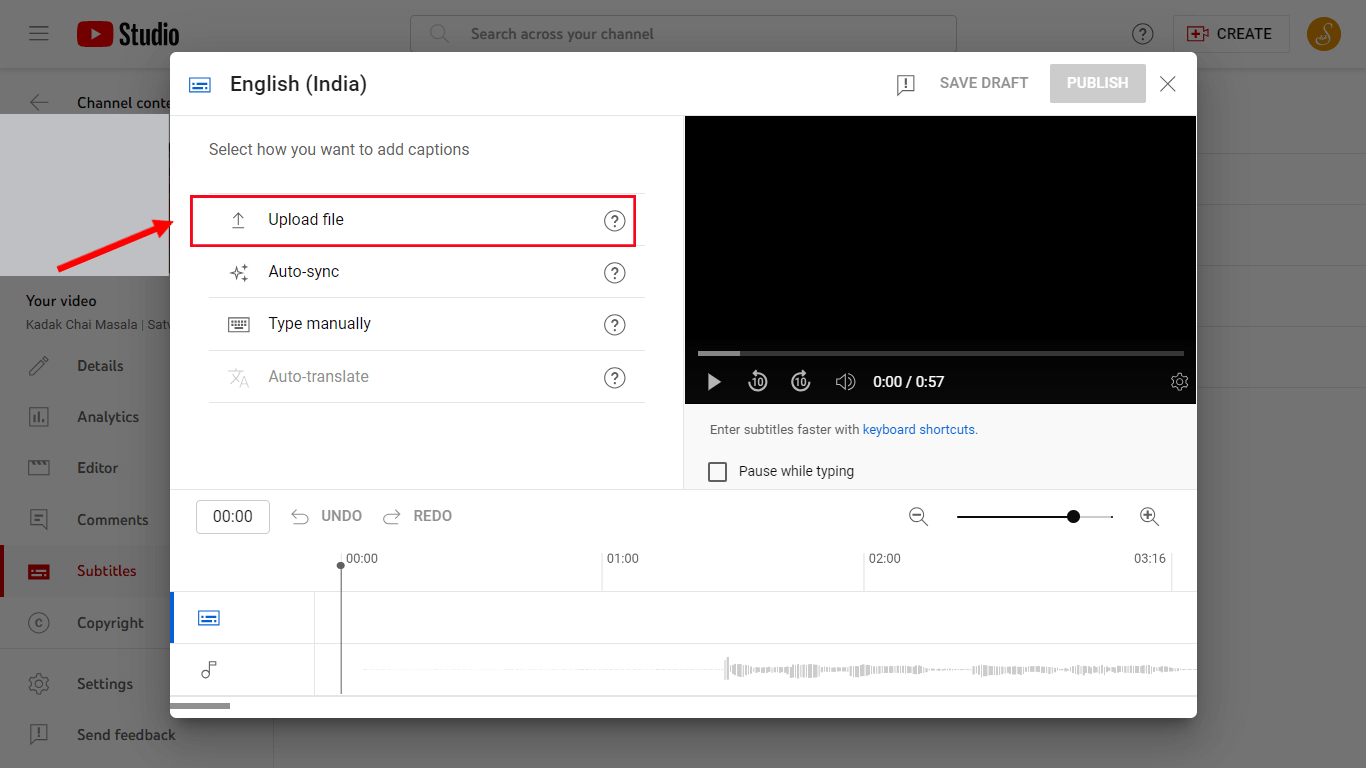
Upload a Subtitle File
Step 4: If you opt to upload a file, ensure that you specify the exact timing for the YouTube subtitles. To do so, select the ‘With timing’ option and proceed by clicking ‘Continue.’
Step 5: Once you’ve completed the translation, click “Publish” to make it available to your viewers.
By translating your video content, you enhance accessibility and engagement, allowing viewers from various linguistic backgrounds to enjoy and understand your content.
Translating Video Titles and Descriptions
In addition to translating the video content itself, it’s crucial to translate your video titles and descriptions. These elements play a significant role in attracting viewers and improving your video’s visibility in search results. Follow these simple steps to translate your video titles and descriptions:
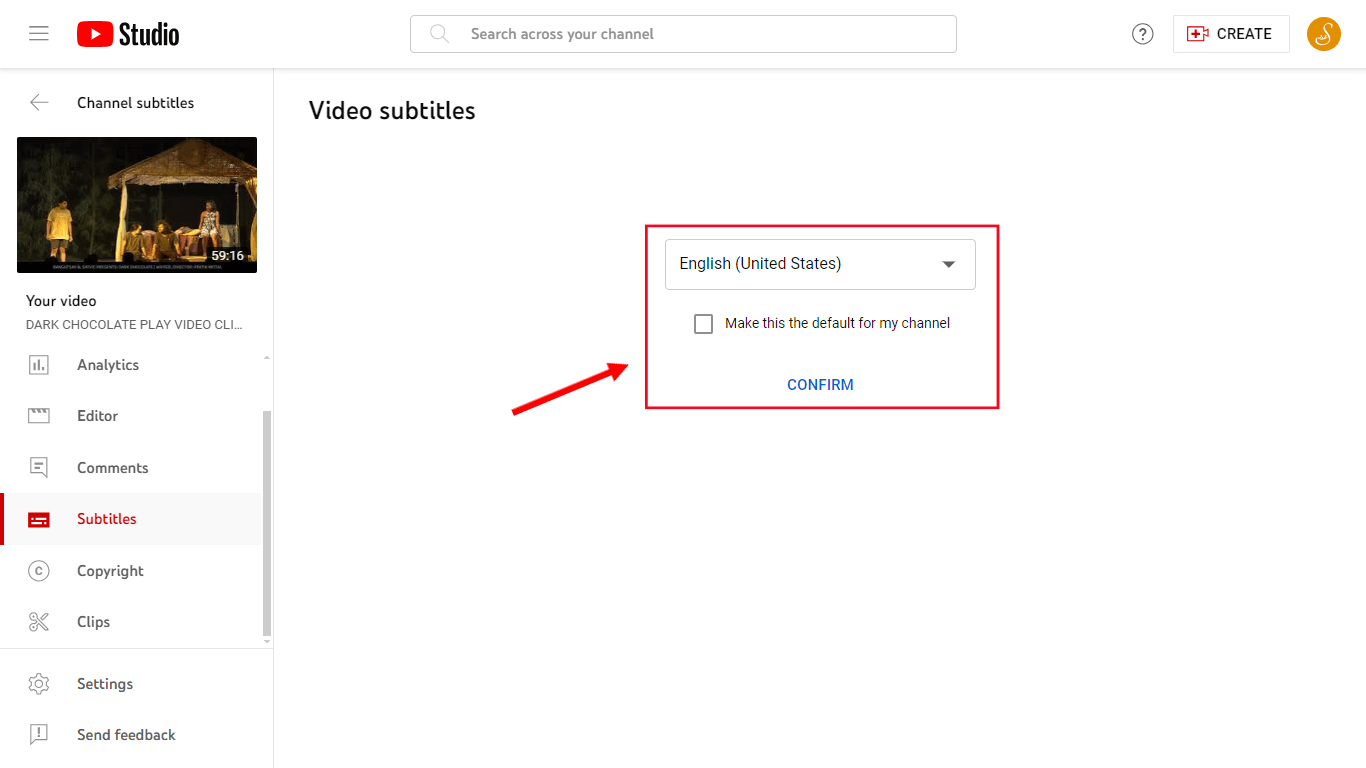
Step 1: In the YouTube Studio, select the ‘Subtitles’ option. Then, select the video you want to translate.
Step 2: Choose a YouTube video and if you haven’t selected the subtitle language yet, YouTube will prompt you to make a selection. Once you’re done, click ‘Confirm.’
Translate Video Titles and Descriptions
Step 3: Now, select ‘Add language’ and choose the desired translation language.
Step 4: In the ‘Title & description’ section, locate the ‘Add’ option and click on it. Finally, enter the translated title and description, and click ‘Publish’ to complete the process.
Checking Translated Videos
To ensure the accuracy and quality of your translated content, it’s essential to review and verify the translations. YouTube allows you to check recent changes made to your video translations. Here’s how:
Step 1: Open the YouTube Studio and navigate to the “Subtitles” tab.
Step 2: Select the video and language you want to review.
Step 3: Click on “History” to view the recent changes made to the translations.
Step 4: Review the changes and make any necessary adjustments.
Step 5: Click “Publish” to update the translations.
By regularly checking and verifying your translated videos, you can guarantee a seamless viewing experience for your international audience.
Benefits of Translating YouTube Videos
Translating your YouTube videos into multiple languages offers numerous benefits for your channel and audience. Some of the key advantages include:
- Expanding Your Reach: By making your content accessible in different languages, you can tap into a global audience and reach viewers who may not have discovered your channel otherwise.
- Improving SEO: Translating your video titles, descriptions, and content can boost your search engine optimization efforts. It allows your videos to rank for keywords in various languages, increasing organic traffic to your channel.
- Enhancing Accessibility and Inclusivity: Providing translations ensures that your content is accessible to a diverse range of viewers, fostering inclusivity and building a stronger connection with your audience.
- Increasing Engagement: When viewers can understand your content in their native language, they are more likely to engage with your videos through likes, comments, and shares.
By translating your YouTube videos, you unlock the potential to reach a wider audience, improve your SEO, and create a more inclusive and engaging viewing experience.
Bonus Tip – Add Subtitle to YouTube Short Video Automatically
CapUp revolutionizes the way creators add captions to their YouTube Shorts videos. With its advanced AI technology, CapUp automatically generates accurate and engaging captions for your short-form content, saving you time and effort. By seamlessly integrating subtitles with emojis, sound effects, and animations into your YouTube Shorts, CapUp enhances the viewing experience for your audience, making your videos more accessible and captivating.
Key Features of CapUp
- AI-powered Subtitle Generation: Create accurate, engaging subtitles automatically with advanced AI.
- Extensive Sound Effects Library: Enhance videos with a vast collection of high-quality sound effects.
- Customizable Text Styles: Personalize subtitles with various styles to match your brand.
- Multilingual Support: Generate captions and add sound effects to YouTube shorts in multiple languages for global reach.
- Intuitive User Interface: Navigate easily and utilize features effectively with a user-friendly interface.
Steps to Add Captions to YouTube Shorts Using CapUp:
Step 1: Log in to CapUp:
Log in to your CapUp account. If you don’t have an account yet, create a new one.
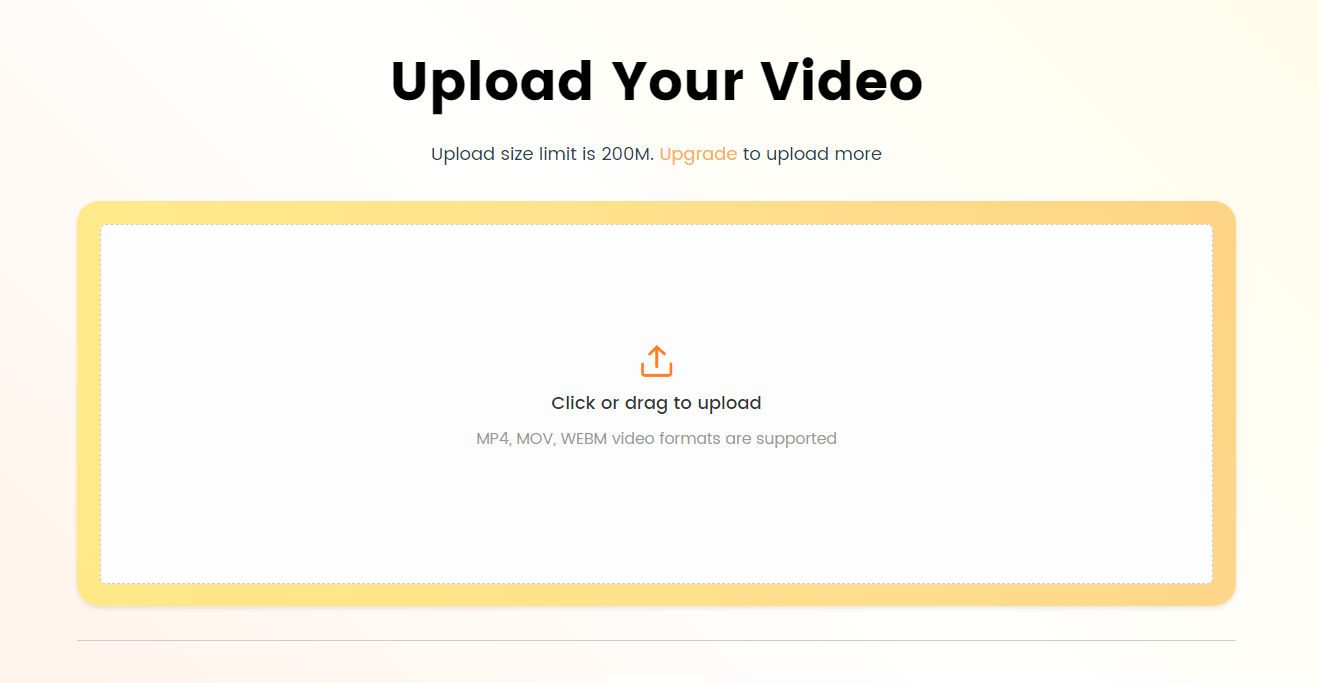
Step 2: Upload Your YouTube Short Video:
Click on the “Upload” button, then select the YouTube short video you want to add captions to. Alternatively, you can drag and drop the video file into the designated upload area.
Log in and Upload the Video
Step 3: Select Video Language:
Choose the language used in your YouTube short video from the drop-down menu. CapUp supports multiple languages to meet your specific needs.
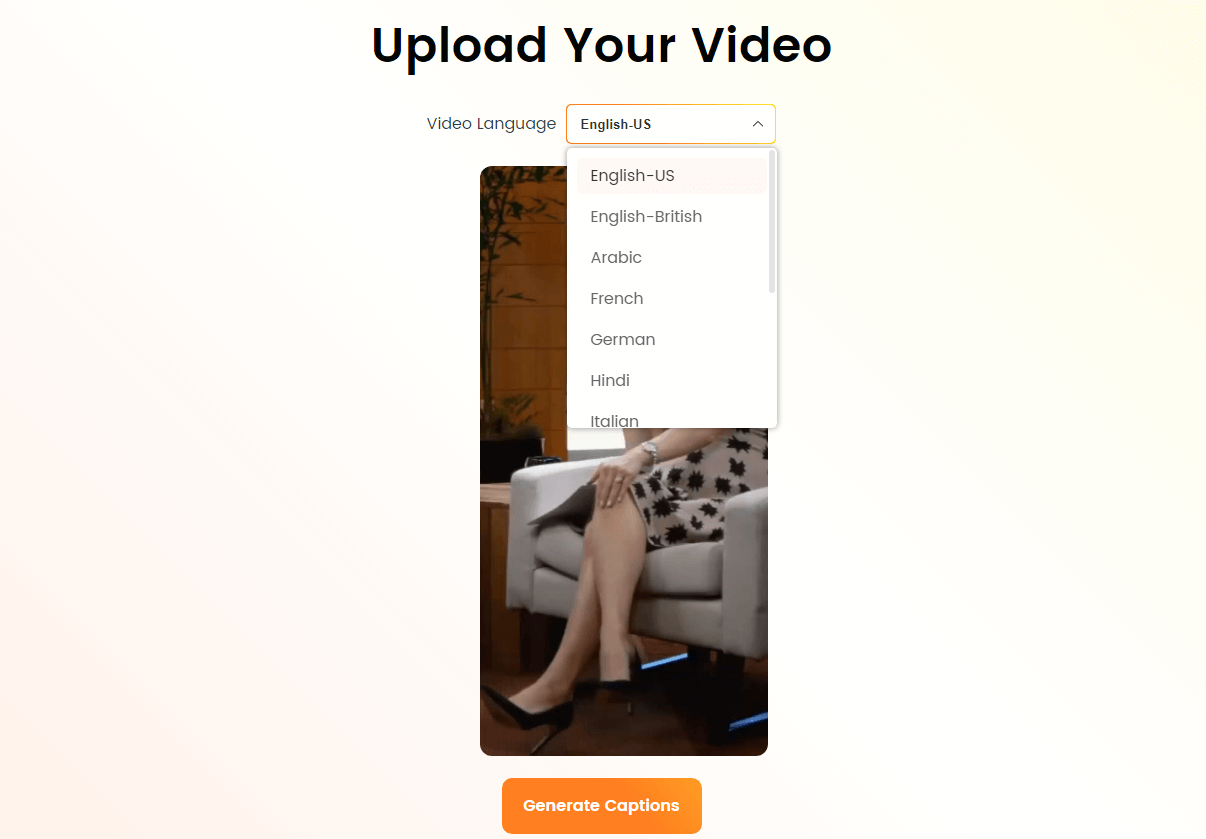
Select the Language that Matches Your Video
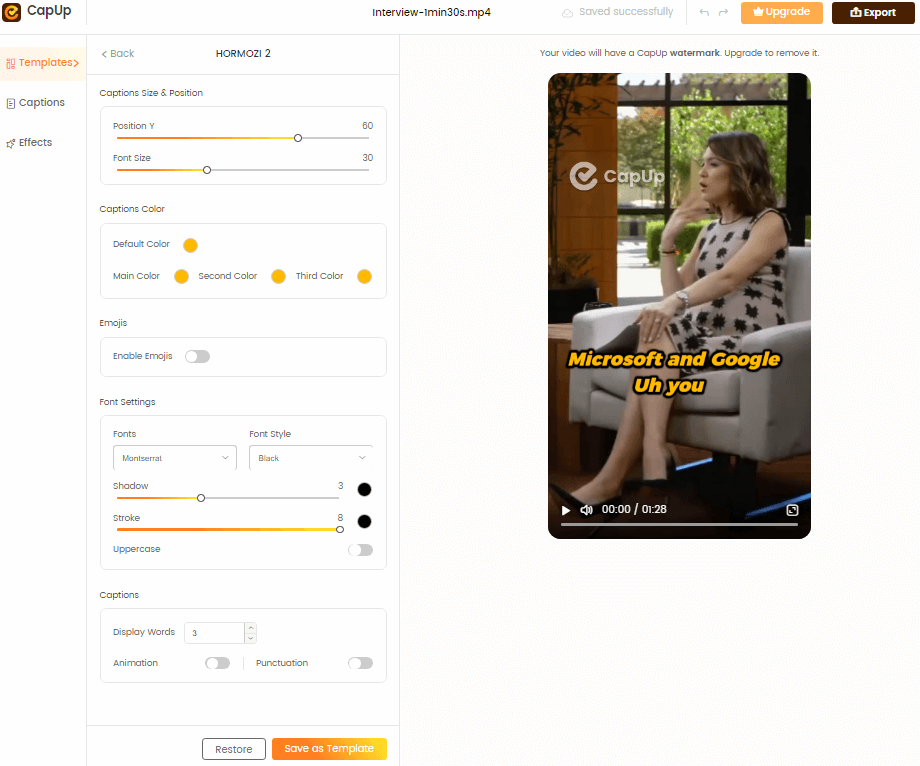
Step 4: Automatically Generate Captions:
Select your desired template and click on the “Save as Template” button to initiate the AI-driven caption generation process. CapUp will analyze your video’s audio and automatically create accurate and engaging captions.
Add Captions to Video Automatically with AI
Step 5: Review and Customize Captions:
After the captions are generated, review them for accuracy and make any necessary edits. Use CapUp’s customization options to personalize the appearance of your captions. Choose from various font styles, sizes, colors, and backgrounds to match your brand’s aesthetic.
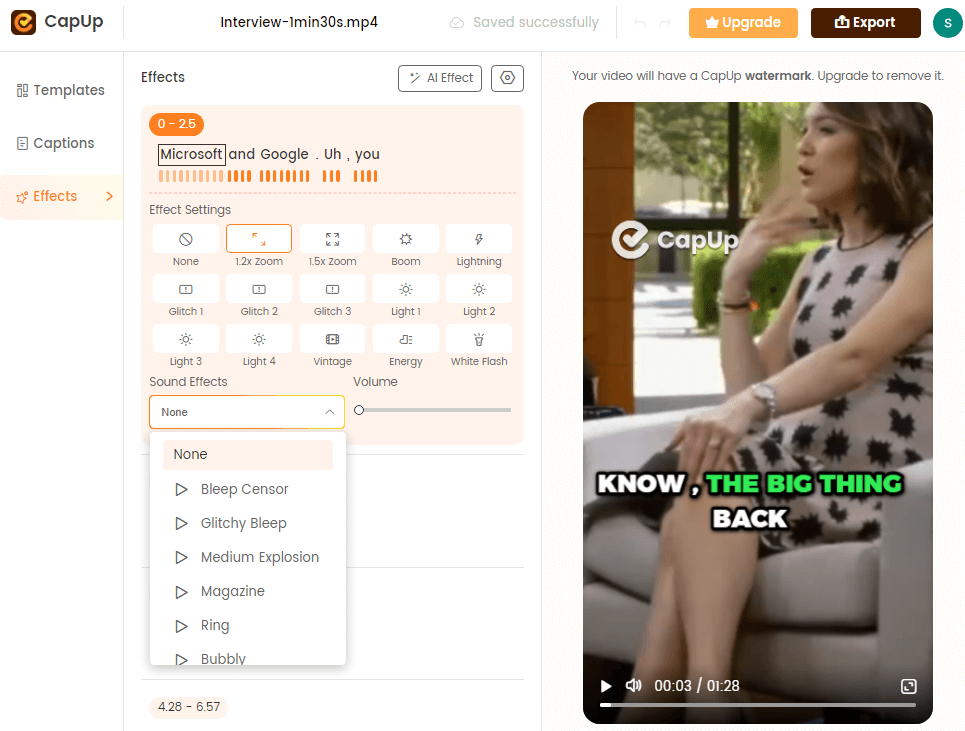
CapUp Outstanding Sound Effects
Step 6: Export and Download:
Once you are satisfied with the captions and sound effects, click on the “Export” button.
Frequently Asked Questions
1. Can I translate my entire YouTube playlist?
Yes, you can translate your YouTube playlist by following the same steps outlined in Section 1 for each video in the playlist.
2. How do I change the default language of my YouTube channel?
To change the default language of your YouTube channel, go to your channel settings, click on “Advanced Settings,” and select your preferred default language.
3. What if I encounter issues while translating my videos?
If you face any challenges during the translation process, refer to YouTube’s Help Center or reach out to their support team for assistance.
Conclusion
Translating your YouTube videos into multiple languages is a powerful strategy to expand your reach, attract a global audience, and improve your channel’s visibility. By following the steps, you can easily add translations to your video content, titles, and descriptions. Don’t miss out on the benefits of translating your YouTube videos. Start reaching a wider audience, boosting your SEO, and creating a more inclusive viewing experience today.