Microsoft Teams provides a convenient feature for recording Teams meetings, which is essential for capturing important discussions, presentations, or collaborative sessions. However, knowing where these recordings are stored can sometimes be confusing. When a Teams meeting is recorded, the file isn’t saved on your local computer by default. Instead, Microsoft Teams utilizes cloud storage to keep these recordings, ensuring they are accessible and secure.

Where is Teams Recording Stored
Typically, the recording is automatically saved to Microsoft Stream if your organization uses this service, or it may be stored on OneDrive for Business, depending on the settings configured by your IT administrator. This cloud-based storage allows meeting participants to easily access, view, and share the recording post-meeting. In this guide, we will explore the details of where Teams recordings are stored and how you can locate, access, and manage these files.
Table of Contents: hide
Where Are My Teams Recordings Saved?
Where Are Teams Recordings Transcripts Stored?
How Long Are Teams Recordings Stored?
Where Are My Teams Recordings Saved?
In Microsoft Teams, the location where your meeting recordings are saved depends on the configuration of your organization and the updates Microsoft has rolled out. Here’s how the recording storage works in Microsoft Teams:

Where Are My Teams Recordings Saved
For Standard Channels
OneDrive for Business and SharePoint: Microsoft has transitioned from storing Teams meeting recordings on Microsoft Stream to storing them on OneDrive for Business and SharePoint (for organizations). When you record a meeting in a standard (non-channel) Teams meeting, the recording is saved to the OneDrive account of the person who started the recording, in a folder labeled “Recordings.”
For Channel Meetings
SharePoint: If the meeting is held in a Teams channel, the recording is stored in the SharePoint document library in a folder associated with that channel. Specifically, it goes into a folder called “Recordings” within the “Documents” section of the SharePoint site tied to the Teams channel.
Accessing Recordings
Teams Meeting Chat: After a meeting is recorded, the recording link is posted to the chat or channel conversation (depending on where the meeting took place). You can click on this link to view the recording.
OneDrive or SharePoint Directly: You can also go directly to your OneDrive or SharePoint site (for channel meetings) to find and manage your recordings.
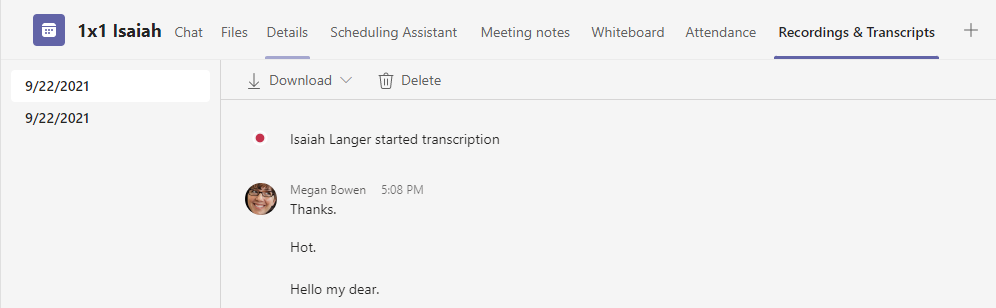
Where Are Teams Recordings Transcripts Stored?
When a Microsoft Teams meeting is recorded and the transcription feature is enabled, the transcript is automatically generated and stored along with the meeting recording.
Where Are Teams Recordings Transcripts Stored
Along with the transition of meeting recordings from Microsoft Stream to OneDrive for Business and SharePoint, transcripts are also stored in these locations. The transcript is saved in the same folder as the recording.
- For non-channel meetings, the recording and transcript are saved in the “Recordings” folder within the OneDrive for Business account of the user who started the recording.
- For channel meetings, the recording and transcript are saved in the “Recordings” folder within the “Documents” section of the SharePoint site associated with the Teams channel.
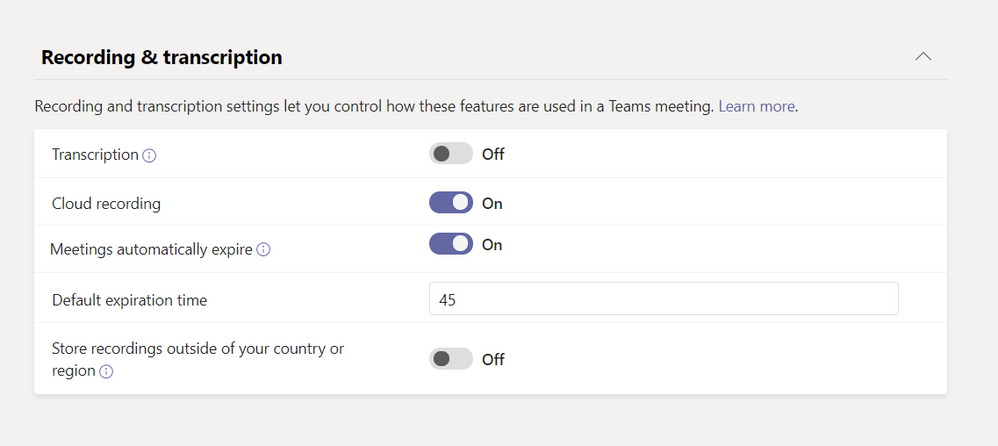
How Long Are Teams Recordings Stored?
Meeting recordings are set to automatically expire after 120 days by default. Adjustments to this expiration setting will only apply to recordings made after the changes are implemented; they do not retroactively affect recordings that already exist. Furthermore, administrators are unable to modify the expiration time for recordings that have already been created.
How Long Are Teams Recordings Stored
Why is My Teams Recording not Showing Up?
If your Microsoft Teams recording is not showing up, there could be several reasons behind this issue. Here are some common factors to consider and steps you can take to troubleshoot and resolve the problem:
- Recording Process Was Not Initiated Properly: Ensure that the recording was started during the meeting. Sometimes users might think they pressed the record button, but it did not activate. Check with other participants to confirm if they saw the recording indicator during the meeting.
- Processing Delay: After a recording is stopped, it needs some time to process before becoming available. The length of this processing time can vary depending on the duration of the meeting and the current server load. It’s generally a good idea to wait for a little while (sometimes up to a few hours for long meetings) before the recording appears.
- Permissions Issues: Make sure you have the necessary permissions to view the recording. For recordings stored in OneDrive, the person who started the recording might need to share it with you. For channel meetings, check if you have access to the SharePoint site where the recording is stored.
- Storage Issues: Ensure there is enough storage space in the OneDrive or SharePoint site where the recordings are saved. If the storage limit is reached, new recordings might not be saved.
- Check the Correct Location: Verify that you are looking in the correct location for your recording. For non-channel meetings, check the “Recordings” folder in the OneDrive of the person who started the recording. For channel meetings, look in the “Recordings” folder within the “Documents” section of the corresponding SharePoint site.
Bonus Tip. How to Screen Record Microsoft Teams Meeting?
FocuSee is a versatile screen recording software that offers a suite of tools for capturing and editing Team meetings. It works on multiple operating systems, including Windows and macOS, making it accessible to a wide range of users. You can record the entire screen or select a specific area, which is particularly useful for focusing on a particular application or window. As it can capture both system audio and external microphone input, FocuSee is ideal for recording Team meetings, video presentations, tutorials, or gameplay with commentary. After recording, FocuSee provides editing features that let you trim, crop, incorporate zoom-in effects, add mouse cursor effects, or include captions to refine your video.
Step 1. Free install FocuSee on your computer. Begin the Microsoft Teams meeting that you want to record. Decide if you want to record the entire screen or just the Teams application window. And then click the REC button to start recording.
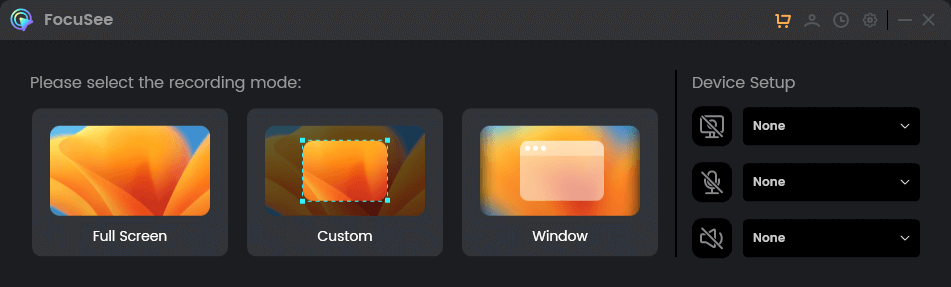
Choose a Recording Mode
Step 3. Join the Teams meeting as you normally would. Everything displayed within the selected recording area will be captured by FocuSee.

Frame an Area to Record
Step 3. When you’re ready to end the recording, tap the red stop button to complete the process. After stopping the recording, FocuSee will usually prompt you to edit the recording.
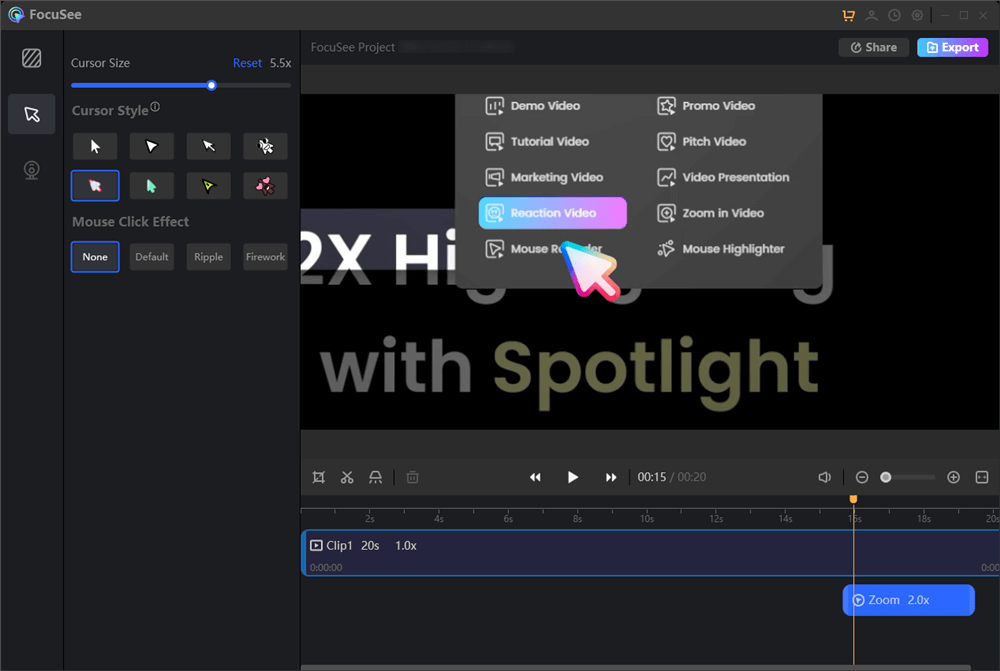
Edit Your Recording
Final Thought
By understanding where Teams recordings are stored, you can confidently utilize this feature to enhance your team’s productivity and collaboration, knowing that your recorded content is safely archived and readily available when needed.