The iPhone 11 makes it incredibly easy to record whatever’s happening on your screen, whether you’re demonstrating an app, capturing a FaceTime call, or creating a tutorial. This built-in screen recording feature captures both video and audio, making it a versatile tool for sharing, learning, and more.
This step-by-step guide will walk you through the entire process, from setting up screen recording to troubleshooting common issues. Let’s get started!
How to Screen Record on iPhone 11
Follow these simple steps to start recording your iPhone 11’s screen:
Step 1: Setting Up Screen Recording on Your iPhone 11
On your iPhone 11, swipe down from the top-right corner of the screen to open Control Center. If you don’t see the screen recording icon, you’ll need to add it. Go to Settings > Control Center > Customize Controls.
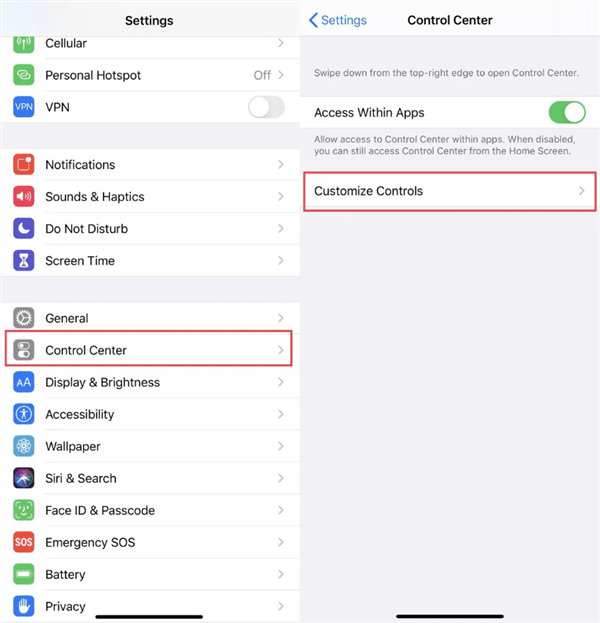
Click on Customize Controls
Scroll down to find “Screen Recording” and tap the green “+”button to add it to your Control Center. You can customize certain settings before you start recording. In the Control Center, long-press the Screen Recording icon(the solid circle).
Here, you can choose to record audio from your microphone, your device’s audio(system sounds, app audio), or both.
Step 2: Recording Your iPhone 11 Screen
Open Control Center and tap the Screen Recording icon(the solid circle). The recording will start after a three-second countdown.
Optional: For a delayed start, tap and hold the Screen Recording icon. You can set a 3-second or 10-second timer.
Hold the Screen Recording Icon
A red bar will appear at the top of your screen, indicating that the recording is in progress. To pause the recording, tap the red bar at the top and then tap “Pause.”
Once you’re done, tap the red bar at the top of the screen and select “Stop” to end the recording. Your screen recording will be saved to your Photos app.
How to Use QuickTime Player to Capture an iPhone 11 Screen
While QuickTime Player can record your Mac’s screen or a connected iPhone/iPad running iOS 8 or later for activities like mirroring, it cannot directly record your iPhone 11’s screen wirelessly.
QuickTime Player relies on a direct USB connection to mirror and record an iOS device’s screen. Since the iPhone 11 uses a Lightning connector and most Macs utilize USB-C, you’d need an adapter.
Step 1. Connect your iPhone 11 to your Mac using a Lightning to USB cable.
Step 2. Open QuickTime Player on your Mac.
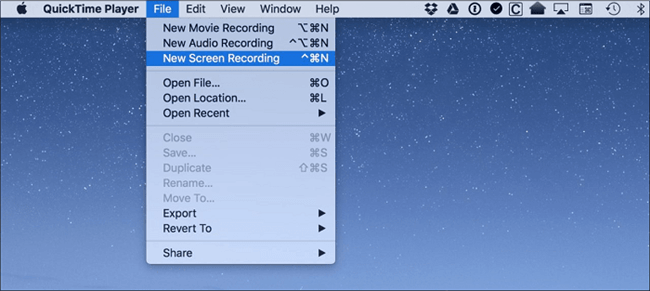
Open QuickTime Player on Mac
Step 3. Navigate to the menu bar and go to File > New Movie Recording.
Step 4. In the QuickTime window, locate the down arrow next to the record button and click on it.
Step 5. From the dropdown menu, select your iPhone 11 as the camera and microphone input source.
Step 6. Press the record button in QuickTime to begin recording from your iPhone 11.
Step 7. When you are ready to finish recording, click the stop button in QuickTime.
Step 8. The recording will automatically be saved as a movie file on your Mac.
Tips. How to Capture the Screen of Your PC or Mac
For high-quality screen recordings on your computer, consider using FocuSee. Here’s a quick overview:
FocuSee is a top-recommended software that’s designed to cater to your specific requirements. It offers flexibility in recording options, allowing you to capture your entire screen, a personalized area, or a single window. The software’s intelligent auto-zoom and mouse highlight features streamline the recording process, enhancing both efficiency and clarity.
For creating tutorial videos, showcasing products, or producing promotional content, FocuSee delivers a smooth and hassle-free experience. Additionally, it makes it easy to record self-portraits and voiceovers, providing a comprehensive solution tailored to your unique needs.
Following the steps below to record the screen on your PC and Mac:
Step 1. Download the FocuSee application onto your PC or Mac. Install it by following the installation instructions provided. Enter your account and password to log in to FocuSee.
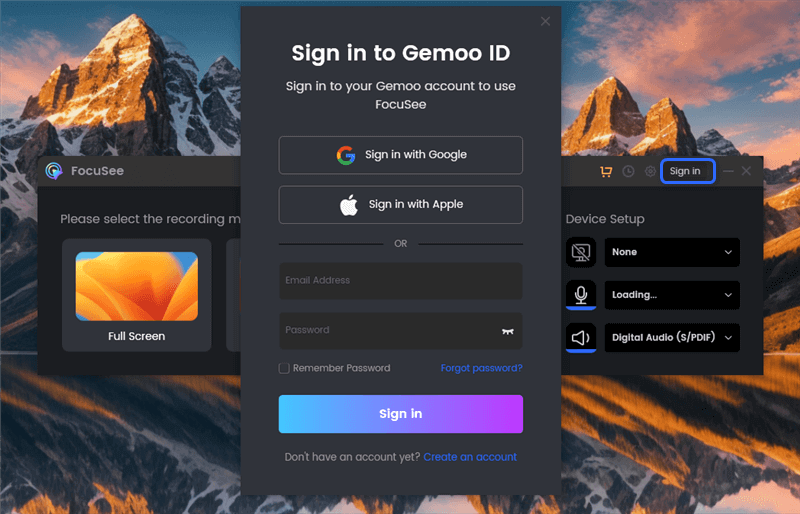
Create an Account and Activate FocuSee
Step 2. FocuSee supports 3 recording modes: record the full screen, custom the recording area, or record the window. You can choose the one you want to record.
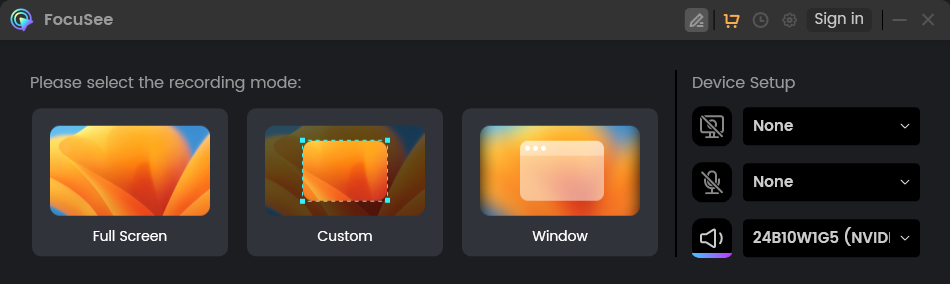
Three Recording Modes for FocuSee
Step 3. After choosing the recording mode, please just focus on your screen recordings. Let FocuSee handle the post-production automatically. You can get a visually appealing video as soon as you finish recording. After recording, you can edit your recordings using the built-in editing tools that FocuSee provides to polish your content. You can change the background, adjust the cursor style, add captions and more.
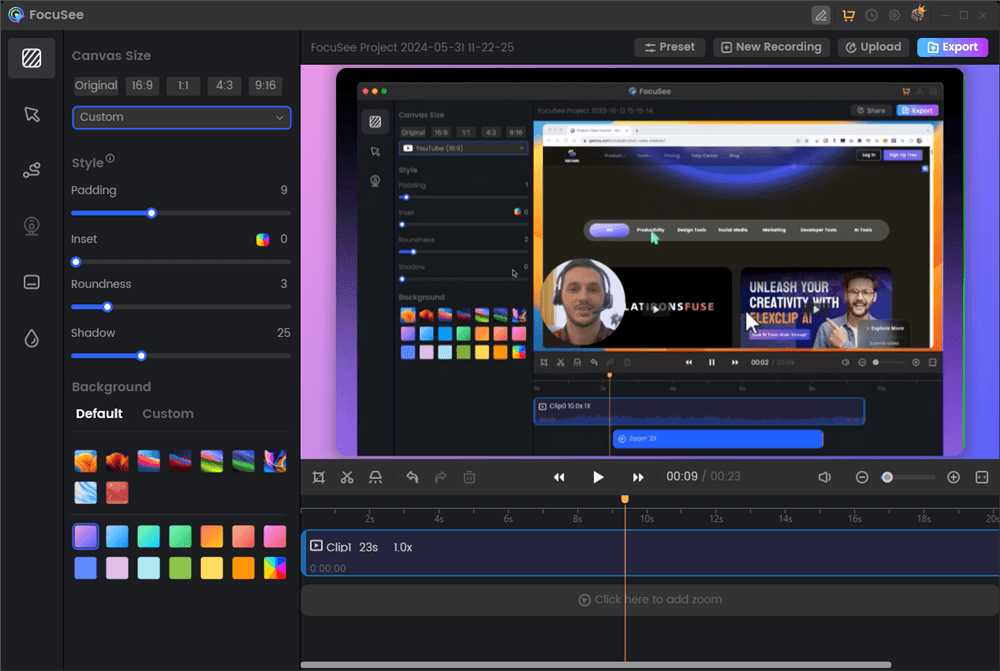
Screen Recording Editing Interface
Step 4. Then, export your recordings as an MP4 or GIF file or share it with a link easily.
How to Export the Video
Troubleshooting Common Screen Recording Issues
- “Screen Recording Failed” Error: This error usually occurs due to insufficient storage space or if an app restricts screen recording. Try freeing up storage space or checking the app’s settings.
- No Audio in Recordings: Ensure that you have enabled the microphone or system audio recording during setup. Also, check the app’s permissions to access the microphone.
- Laggy or Choppy Recordings: Close any unnecessary background apps to free up system resources. If the problem persists, try restarting your iPhone 11.
FAQs: Your Screen Recording Questions Answered
Q: Where are my screen recordings saved?
A: Screen recordings are automatically saved to your Photos app.
Q: Can I record a screen recording with my front-facing camera?
A: No, the iPhone’s built-in screen recording feature only captures the screen content, not the front-facing camera.
Q: How do I trim a screen recording?
A: Open the recording in the Photos app, tap “Edit,” and then use the slider at the bottom to select the portion you want to keep.
Q: Can I share my screen recordings directly to social media?
A: Yes, from the Photos app, you can share your screen recordings to various social media platforms, messaging apps, or cloud storage services.
Conclusion
Screen recording on your iPhone 11 is a straightforward process that can be incredibly useful for a variety of purposes. Whether you’re creating tutorials, sharing gameplay, or capturing important moments, the built-in screen recording feature has you covered.
Experiment with different settings, explore third-party apps, and master the art of screen recording on your iPhone 11 to enhance your mobile experience!
Do you have any other screen recording tips or questions? Share them in the comments below!