FaceTime has revolutionized the way we connect with others using our mobile devices. Sometimes, you wish to record these calls for various reasons, whether a casual conversation with friends or an important business meeting. FaceTime calls can be recorded with audio using various techniques as of 2024, allowing users to save and listen to their calls later.

How to Record FaceTime with Audio
The ability to screen record FaceTime with audio is helpful, especially when recording important business calls for later use. This guide will show you how to record FaceTime with audio, so you can easily capture and treasure those priceless interactions for years. So, continue reading the article to learn how to record facetime with audio on all devices!
Table of Contents: hide
How to Record FaceTime with Audio on iPad or iPhone
Why Record FaceTime Calls?
The utilization of FaceTime has transformed its original purpose of personal communication. FaceTime is now used for purposes other than personal communication. It has grown to include corporate applications and content generation for web platforms. Due to this, more and more people are seeing the benefits of recording FaceTime sessions for various uses, including documentation, analysis, and sharing insightful conversations with a larger audience. It enables the preservation of priceless moments spent with loved ones, facilitates in-depth analysis of business meetings, improves content creation by engaging guests and conducting interviews, and supports academic and journalistic research through recorded interviews. Additionally, it encourages professional growth through insightful conversations and successful teamwork by recording group discussions. These recorded chats become useful tools that may be reviewed for direction and inspiration, whether for obtaining valuable counsel, discussing upcoming trends, or looking for mentorship.
How to Record FaceTime with Audio on iPad or iPhone
FaceTime is a popular video calling feature on Apple devices, including iPads and iPhones. You may easily connect with friends, family, or coworkers and use excellent audio and video communication. Setting up a FaceTime video call with audio on your iPad or iPhone is simple. You can join virtual meetings or interact face-to-face with loved ones by taking a few easy steps. Let’s look at how FaceTime with audio on iPad or iPhone!
Step 1: Start the FaceTime app with a green icon and a white video camera.
FaceTime icon
Step 2: Begin by clicking on the “+” option at the app’s top to initiate a new call.
Step 3: Enter the person’s email, name, or contact number into the search bar.

Search Recipient
Step 4: Now, you can choose between making an audio or video call.
Step 5: When the call is initiated, the recipient’s phone will ring, and they can decide whether to accept or reject the call.
How to Use FaceTime Audio on an Android
Apple’s functionality now allows Android users to join in FaceTime calls. Despite the ongoing limitation for Android users to start conversations on FaceTime, they can now join a FaceTime call if they receive an invitation from an individual using an iPhone, iPad, or Mac. While it may not fully meet the desired “FaceTime for Android” experience, this development represents a significant advancement towards enhancing user convenience and accessibility across various devices. It marks a positive stride toward fostering a more inclusive calling experience.
Step 1: For using FaceTime on Android, you’ll need someone you know with an Apple device. If they have iOS 15 or higher, they can open the FaceTime app and select “Create Link.”

Creating Link
Step 2: Afterward, they can send you the FaceTime link through any messaging platform.
Step 3: Open the link using Google Chrome on your Android phone or tablet. Input your name in the designated box and tap on “Continue.”
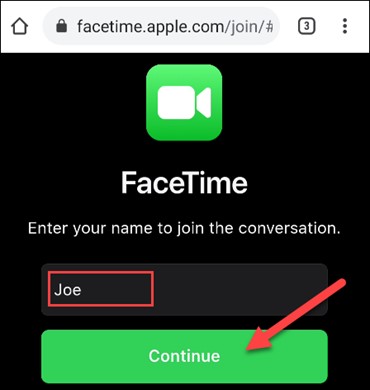
Tap Continue
Step 4: Then Tap on the “Join” option on the top floating toolbar.
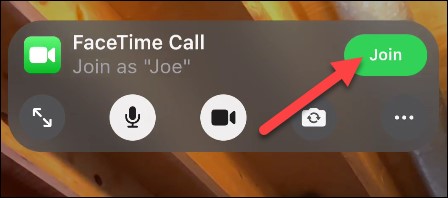
Select Join
Step 5: Your request to join must be approved by an iPhone, iPad, or Mac user who provided you with the link.
How To Record FaceTime on Mac
Here, we’ll introduce 2 methods of recording FaceTime on your Mac computer.
Record FaceTime on Mac via FocuSee
FocuSee is a powerful screen recorder with video editing features. After recording, you can preview your FaceTime recordings and trim unwanted parts according to your needs. Besides, FocuSee can also automatically generate captions for your recordings, which can be edited for accuracy.
Follow these steps to record FaceTime calls through FocuSee on Mac:
Step 1. Free install FocuSee and open it on your computer. Make sure you have enabled the system audio and microphone recording. Launch FaceTime on your Mac computer.

Choose the Custom Recording Mode
Step 2. Choose the Custom button and frame the area on your FaceTime software. Click the REC button to initiate the recording process.

Frame the Area to Record FaceTime
Step 3. When you finish recording, go to the video editing interface, where you can add video background, incorporate subtitles, and generate captions on your own.
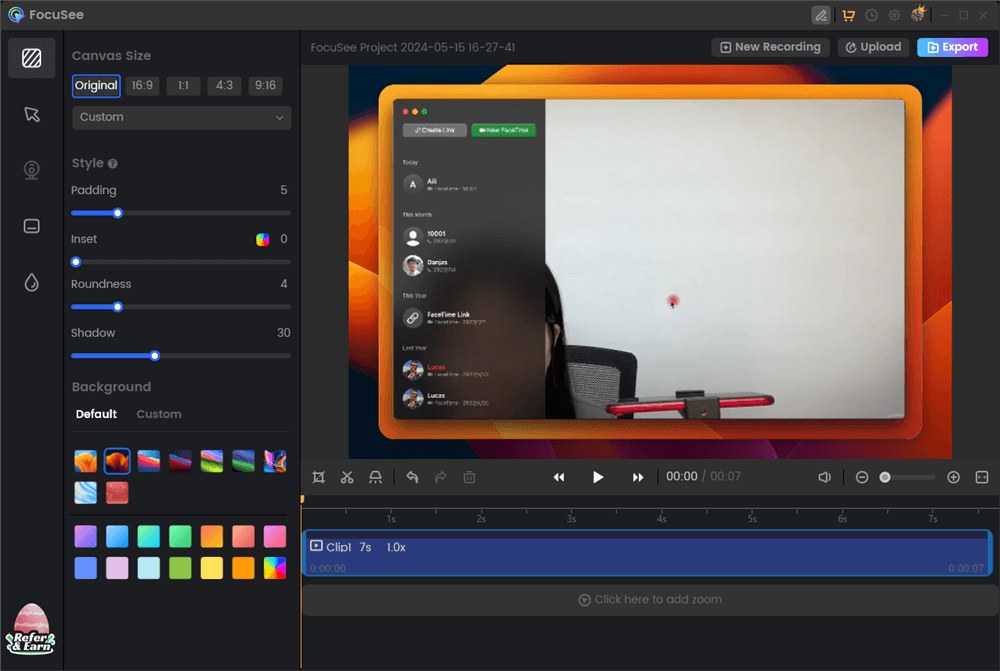
Edit the FaceTime Recording
Also Read: Fix FaceTime Screen Recording Having no Sound >
Record FaceTime on Mac via Gemoo Recorder
Another FaceTime recording app for Mac is Gemoo Recorder, which has many features to improve your recording experience. Gemoo makes capturing your screen, webcam, and microphone simple so you can successfully convey yourself and your ideas. You may communicate complex messages by utilizing the handy storage and organization features provided by the Gemoo platform for the recorded videos. Additionally, you may add shapes, texts, memes, and other notes to your recordings in real-time to help you better convey your views.
Some prominent features of Gemoo Recorder are:
- Capture audio, video, and the screen
- Use Gemoo to save and arrange videos and share them with a single click
- Capture all on-screen activities and Insert shapes, texts, memes, and annotations during the recording
Follow these steps to record FaceTime calls through Gemoo Recorder on Mac:
Step 1: Sign in to Gemoo Recorder on Mac by entering your account and password after downloading and launching the software.
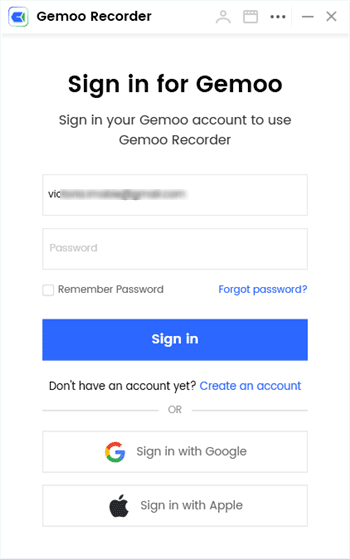
Sign in to Gemoo
Step 2: Choose the “Screen & Camera” recording mode to capture FaceTime calls.
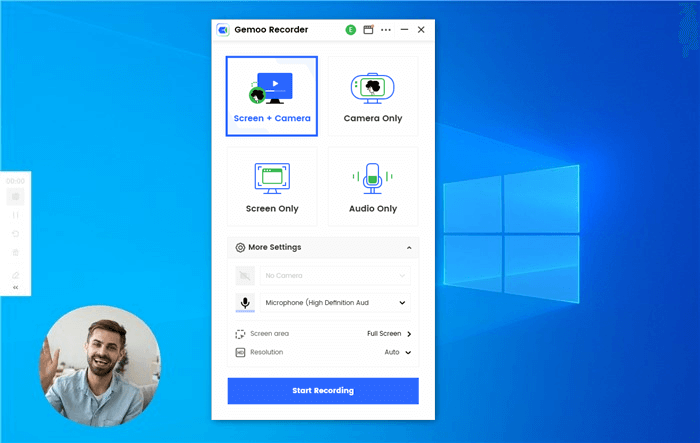
Select Screen & Camera Recording Mode
Step 3: You can start the procedure by clicking the “Start Recording” option after choosing the preferred recording mode.
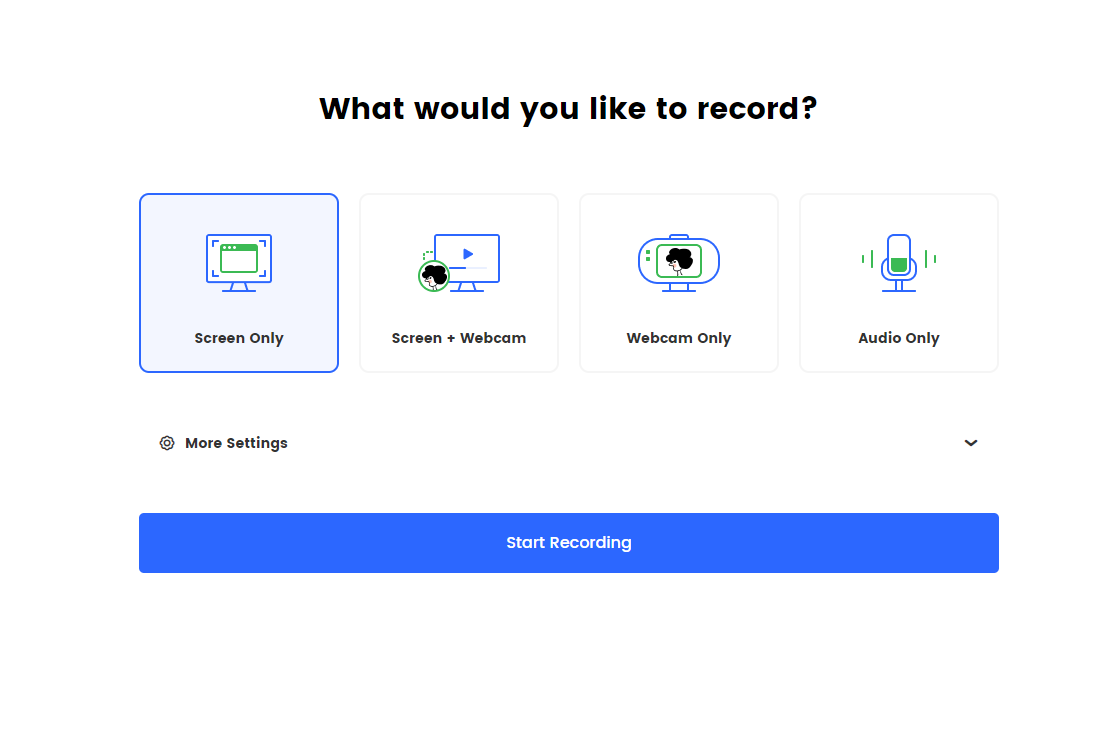
Choose the Recording Mode and Click the Start Recording Button
Step 4: A 3 seconds countdown will appear to allow you to prepare.

Countdown Appears
Step 5: Click the red “Stop” or “Finish Recording” button to conclude the recording.
FaceTime Audio Recording FAQ
- Why is it not possible to record FaceTime with audio?
If you can’t record audio during FaceTime calls, it can be because the feature is restricted. Press and hold the “screen recording” option in the control center of your device to enable audio recording. Turn on the microphone option once it appears. After following these steps, you should be able to record FaceTime videos with accompanying audio.
- Will the other person be notified if I record FaceTime audio?
FaceTime does not explicitly notify or alert the other party if you are capturing the audio of the call. To maintain transparency and have their permission, it is usually regarded as appropriate to let the other person know that you are recording the conversation. This is especially important if it includes sensitive or confidential discussions.
- Can I record FaceTime calls with audio on my Windows PC?
Since FaceTime is an Apple-only software, a Windows PC cannot directly record FaceTime calls with audio. However, you can use screen recording software on your PC to capture the voice and video of the FaceTime chat.
Final Thought
Learning how to record Facetime with audio is a useful technique for remembering important conversations and treasured memories. To record audio and video during FaceTime calls, explore the settings on your device. It may involve enabling the microphone during screen recording or utilizing third-party software. Do share your insights and queries with us in the comments section below!


