Modern laptop computers are fast and powerful and can be used for many different things. If you own an Asus laptop and use it for private or professional purposes, you probably happened to need to record your gameplay screen or video or something else on a Windows or Mac computer. This simple action can solve a number of technical needs, from trying to explain how to perform certain actions to putting together visual material you intend to upload to a streaming site (i.e. YouTube or Twitch).

How to Screen Record on Asus Laptop
Like most laptop brands, Asus made sure that its users are covered in this situation. There are some screen recording tools already present on the computer that could make a quick recording of your screen, but those apps are pretty basic and may not satisfy everyone. That’s why it’s reasonable to look into the available alternatives and decide whether it’s worth upgrading to a more advanced recording method. The exact rationale and list of priorities may be different for every user, so it’s mandatory to carefully analyze the benefits and costs of each approach.
In this article, you can find out everything you need to know about how to screen record on an Asus laptop with Windows 10. Our review of the available recording methods is impartial and includes plenty of practical details that users might find valuable, so it represents a good starting point for anyone who wants to learn more about this topic.
Also read:
How to Screen Record on Surface Pro >
How to Screen Record on Thinkpad >
Table of Contents: hide
Does Asus Laptop have Screen Recording Function?
How to Screen Record on Asus Laptop with Windows 10 (6 ways)
Does Asus Laptop have Screen Recording Function?

How to Screen Record on Asus Laptop Windows 10
Before delving into commercial screen recording software, ensure your Asus laptop is running Windows 10, as it enables the Xbox Game Bar feature for the app or game recording.
Here are the detailed steps to record your Asus laptop screen via the Xbox game bar:
Step 1. Press and hold the Windows key together with the G key, and you will open the dialog box that allows you to control the video and audio settings in greater detail.
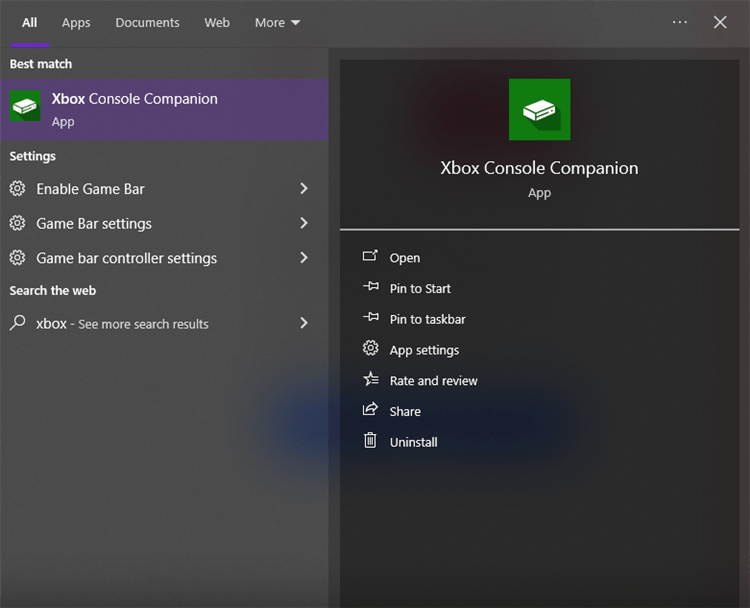
Open the Xbox Game Bar
Step 2. In the Game Bar, access the Widget Menu and choose the Capture option.
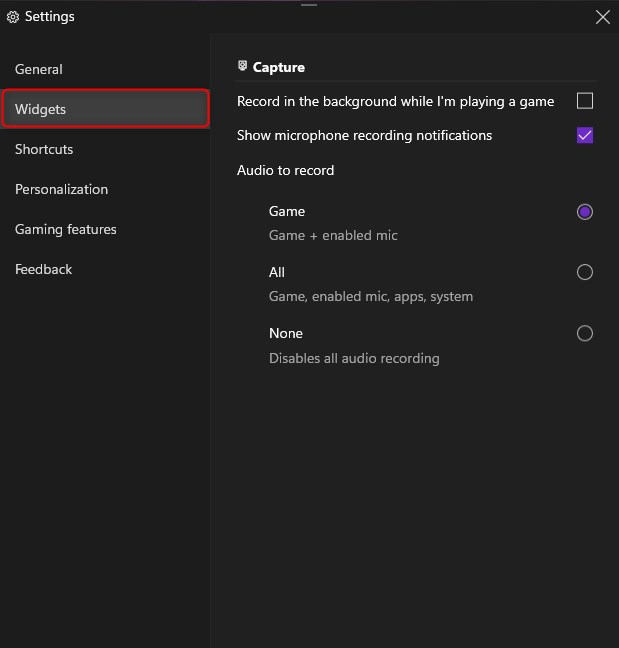
Configure Video and Audio Settings
Step 3. Choose the Start Recording button to begin recording the upcoming game content. Alternatively, you can press Windows + R and start recording the action from the screen immediately.
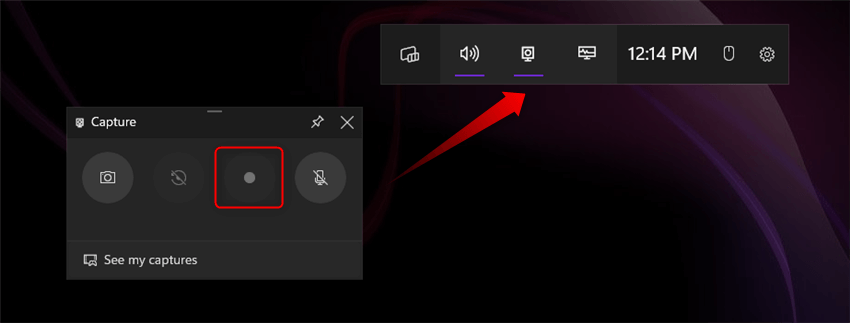
Start the Screen Recording
Step 4. When you want to quit recording and finalize the clip, you can press the same combination of keys, or use the stop icon on the bar.
Despite its obvious advantages, Game Bar is an imperfect tool for grabbing screen content that won’t perform well with more demanding tasks. In fact, content from some apps can’t be captured with this software at all, necessitating the use of screen record software for Windows with more extensive recording, editing, and sharing features.
How to Screen Record on Asus Laptop with Windows 10 & 11
Numerous apps and software compatible with Windows 10 & 11 can capture screen content, but only a select few with a balance of features, usability, and pricing are worth considering. While preferences and use cases vary, we’ve compared the top screen recorders for Asus laptops and recommend options suitable for most users.
Screen Record on Asus Laptop via FocuSee
Whether studying or working, more and more people are using ASUS laptops. If you want to create video tutorials or online courses, market your business to online customers, or record new moves in your favorite game, then use FocuSee, which lets you record the screen on an Asus laptop easily.
- 4K Recording – FocuSee effortlessly captures your screen in stunning 4K UHD or smooth 1080P at 60fps. It is particularly useful when recording content that typically imposes playback limitations, ensuring that your recordings are seamless and of the highest quality.
- Intuitive zoom feature– you have the flexibility to zero in on crucial details simply by clicking your mouse. This allows you to create focused, detailed segments within your recordings, making it easier for viewers to follow along with key points.
- Multiple record modes – You can choose to record “Full Screen”, “Window Only”, and “Custom Area”.
- Camera filters and visual background – When recording with your webcam, you choose some of your favorite images as your avatar, use the camera with different filters, and add various virtual backgrounds to hide your real location.
Please free download FocuSee to start the wonderful experience of recording screen and microphone.
Step 1. Launch FocuSee on the computer and enter your account and password to log in to FocuSee.
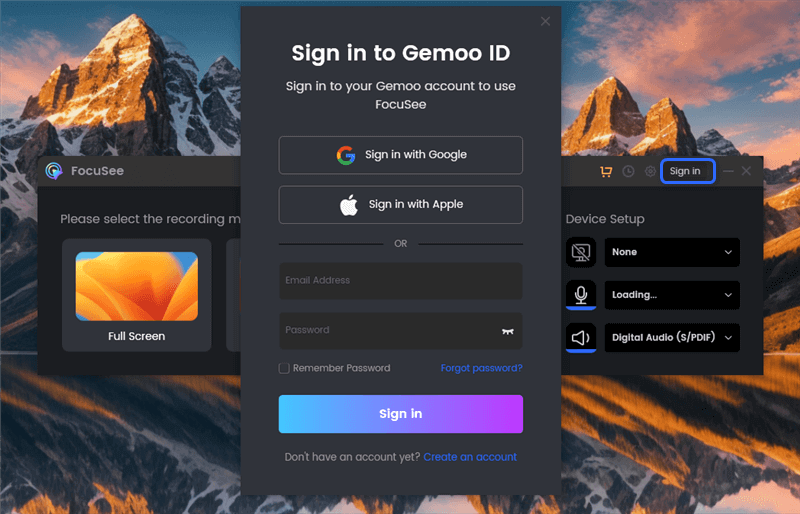
Create an Account and Activate FocuSee
Step 2. FocuSee offers three recording modes: Full Screen / Custom / Windows. You can choose the one you want to record.
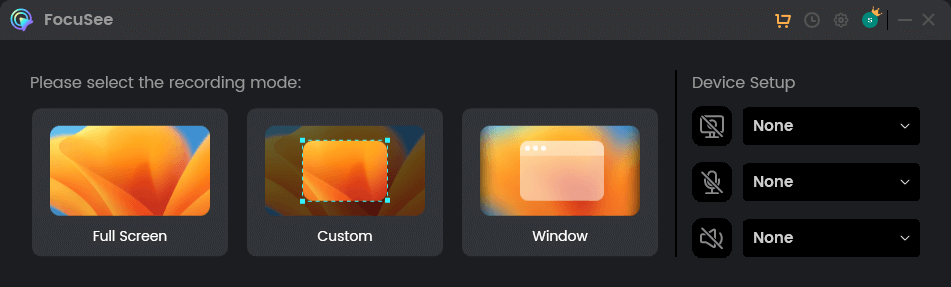
How to Record a Video with FocuSee
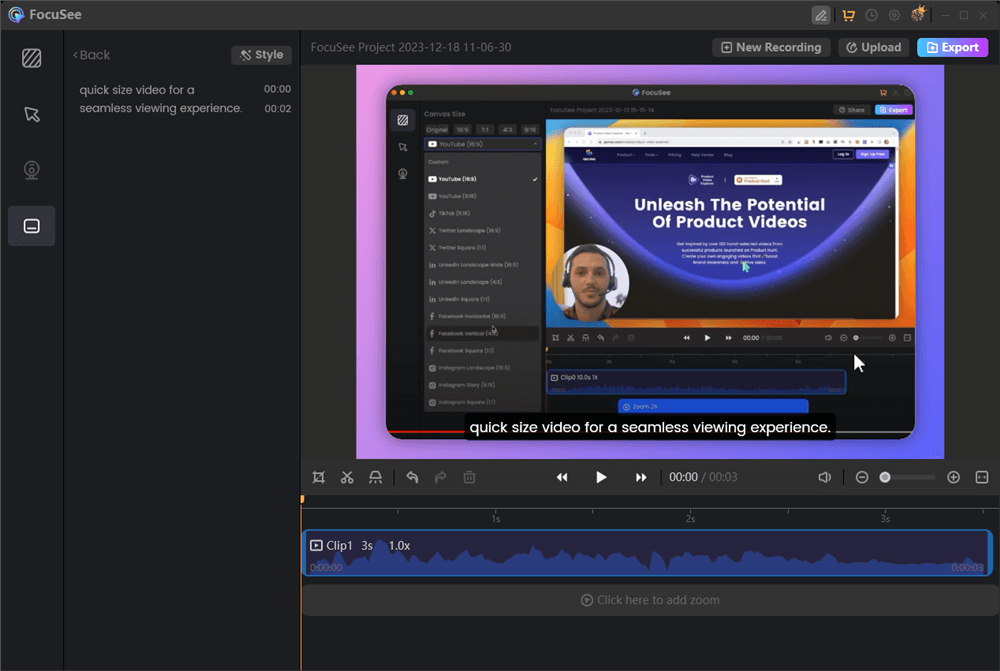
Step 3. Please just focus on your screen recordings. Let FocuSee handle the post-production automatically. You can get a visually appealing video as soon as you finish recording. After recording, you can change the background, adjust the cursor style, add captions and more.
Riverside Alternatives – FocuSee
Step 4. Then, export your recordings as an MP4 or GIF file or share it with a link easily.
Copy the Link to Share
Screen Record on Asus Laptop via OBS Studio
OBS is a well-known open-source software product that excels in several roles, and it can help you capture your screen activity along with native audio. It comes equipped with lots of smart features that make video creation and editing a walk in the park. It’s also possible to stream your broadcasts on the internet directly from OBS, shortening the path from an idea to a video that’s being watched.
If you only intend to record your screen with this software, the procedure is quite straightforward and accessible to any user. Here is what you need to do.
Step 1. Run OBS on your Asus laptop and start a new Scene.
Step 2. Find the Sources box on the screen and click on the + shaped icon.
Step 3. Choose the Capture Display option, and confirm your choice by clicking OK.
Step 4. Open the Settings menu and select Output from the sidebar.

Open the Settings Menu
Step 5. Define the Destination path by picking a folder where the recording will be saved.
Step 6. When you are finished tinkering with settings, click on the Start recording button.
Screen Record on Asus Laptop via Ezvid
Ezvid is another great software product you can use to capture the content of the screen on your Asus laptop. With this app, it’s possible to record video or audio and then enhance the recording by adding various elements or changing the video speed. Above all, it’s extremely simple and intuitive, with a number of keyboard shortcuts defined for frequently used commands. Since Ezvid is freeware and has low system requirements, you can download it to your laptop even if you need it only occasionally.
This screen recorder has an interface that allows for instant completion of key tasks such as recording the laptop display. Here is how to execute this important function.
Step 1. Install Ezvid on your laptop and start the application.
Step 2. Click on the Screen Record button to start recording anything from your screen.
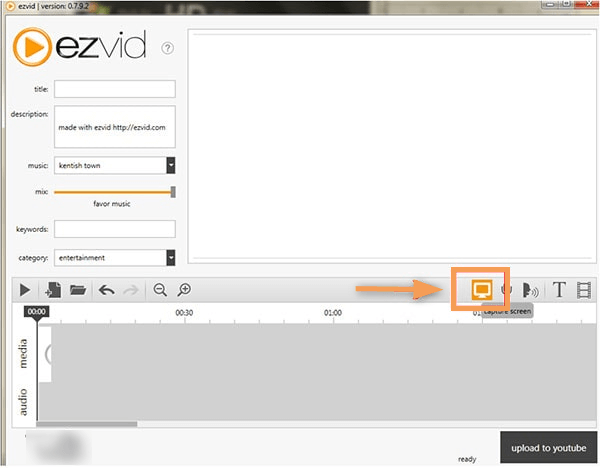
Click the Start Button on Ezvid
Step 3. After you are done recording and editing, choose whether to save the file locally or upload it directly to the internet.
Screen Record on Asus Laptop via Filmora Scrn
If you are looking for a reliable and user-friendly screen recorder you can install for free, Filmora Scrn should be on your shortlist. This software supports 6 different capturing modes and allows you to pan and zoom across your screen and show all the details you want. It also has impressive editing features and can capture sound from the app or the external microphone. Those characteristics make Filmora a great choice for anyone who wants to create tutorials, talking-head videos, or stream games online.
However, most users are interested in the quickest way to record your laptop screen with this app. To accomplish this, just follow those simple steps.
Step 1. Start Filmora Scrn on your computer and simultaneously start the app from which you intend to record content.
How to Record Screen on Asus Laptop with Filmora
Step 2. Click on the Rec button to initiate the recording session.
Step 3. During the 3-second countdown, go back to the window you are recording from.
Step 4. Press the F9 key on the keyboard to stop the recording when you are done.
Step 5. The recording will instantly be opened in the editor so that you can apply any changes you want.
Screen Record on Asus Laptop via CamStudio
CamStudio has many similar functions to other apps on this list, but it presents them in a format that suits users of all experience levels. It can capture still frames or continuous video from any window, and lets the user add text and annotations without too much effort. In case you want to protect your artwork, it’s even possible to add a watermark on top of the visuals.
Perhaps the most relevant advantage of CamStudio is its extreme simplicity of use. To capture what you are currently doing on your Asus laptop, you should make a short series of simple actions.
Step 1. Install CamStudio on the Asus laptop and start it.
Step 2. Select the region of the screen that you would like to record.
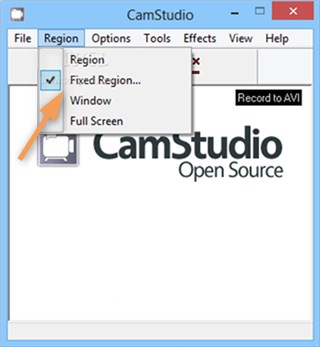
Select the Region of the Screen
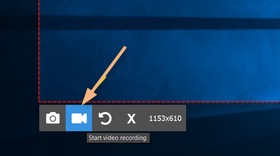
Step 3. Adjust other technical settings such as video quality or compression rate.
Step 4. Hit the red button in the toolbar to start recording.
Screen Record on Asus Laptop via ScreenRec
With this free app installed on your computer, it becomes extremely easy to record the screen whenever you wish to do so. This tool works on every major OS and has very practical and smartly designed features that empower beginners to create very professional-looking materials. It requires almost no training and has pretty simple commands, so you can basically just run with your project right after you download it.
For the basic function of recording your laptop screen, the sequence of commands is very short and involves only a few steps. This is how to activate this function:
Step 1. Run the ScreenRec app on your laptop.
Step 2. Simultaneously press the Alt and S keys to choose the region of the screen to be recorded.
Step 3. Click on the microphone icon in the toolbar to choose the audio source.
Step 4. Click on the camera icon in the same toolbar to start recording.
Click on the Camera icon
Step 5. Create a private URL referring to the video that can be shared with selected contacts.
Frequently Asked Questions of Record Screen on Asus Laptop
How do I record my Asus laptop screen on Windows 11?
If you own a computer with Windows 11 OS installed on it, you can use the built-in screen recording software:
Step 1. Press the Windows Key + ALT + R on your keyboard to activate the screen recorder.
Step 2. Once the recording feature is active, you’ll see a red circle button; click it to commence capturing your screen.
How difficult is it to include sound in my recordings?
Most apps recommended above support recording system audio as well as microphone sound, and it’s really easy to combine audio with video with just a few clicks.
Which screen recording software should I download to my Asus laptop?
If you are searching for a way how to screen record on Asus Chromebook laptop, you should carefully consider the features and limitations of each app before downloading your screen recorder of choice.
Final words
Anyone looking to learn how to record screen on an Asus Vivobook laptop or a similar device should rest assured that numerous suitable tools are available. You can either use the built-in screen recorder in Windows 10 or Windows 11, or pick up a software app from the internet that has all the features you require. Depending on your demands and the level of video-making skills you have, you should choose a tool that allows you to express your ideas without any restrictions. With the right software app in your hands, recording any content from your computer will become a routine task.