ASUS laptops are known for their high performance and sleek design. However, like every other technology, they can experience issues. One common problem users may encounter with the built-in camera. And whether you are trying to use your camera for video conferencing or creating content, your camera must work properly.

Fix Asus Camera Not Working
However, like many people, if you are also facing the ASUS Camera Not Working issue, you’re at the right place. In this article, you’ll learn several proven ways to fix ‘my camera is not working on my ASUS laptop’, along with how to activate your camera on an ASUS laptop. Let’s get going!
Also read: Also read: Janitor AI Not Working >
Table of Contents: hide
How to Activate My Camera on My ASUS Laptop?
How to Activate My Camera on My ASUS Laptop?
Depending on your familiarity with the laptop’s settings, turning on the camera on an ASUS laptop might be easy or complex. The first thing to try is checking the connection between your camera and your computer. Make sure nothing is covering or blocking the camera’s view if you’re using one that came preinstalled. Moreover, if you’re using an external camera, ensure it is properly connected and recognized by your laptop.
To activate your camera on an ASUS laptop, follow the steps below:
Activate My Camera on My ASUS Laptop
Step 1: Press Fn + f10 to activate the camera from the keys. You will see a camera logo on the screen, which indicates that your camera is enabled.
Step 2: Now, search for Camera Privacy Settings in the Search menu and open it.
Step 3: To activate your ASUS camera, toggle the Camera Access switch and Let apps access your camera switch to ON.
Why Is My ASUS Laptop Camera Not Working?
When this happens, it’s often because the camera has been disabled in the settings of your ASUS laptop. This may be due to the camera being turned off in Device Manager or blocked by your computer’s privacy settings. Also, the camera driver may either be outdated or not installed. Because of this, the laptop may identify the camera, but it would still be useless.
ASUS Camera Not Working
Also, there are other reasons why your ASUS laptop camera is showing a black screen. Another cause might be that the camera is physically obstructed, obscured, or destroyed. This may occur if a protective sticker covers the camera lens or if an item is obscuring the lens. In this situation, remove any obstructions and check whether the camera is operating again. Furthermore, if the camera is damaged, it may need to be fixed or replaced.
Further Reading: Why Is My Screen Recording Black >
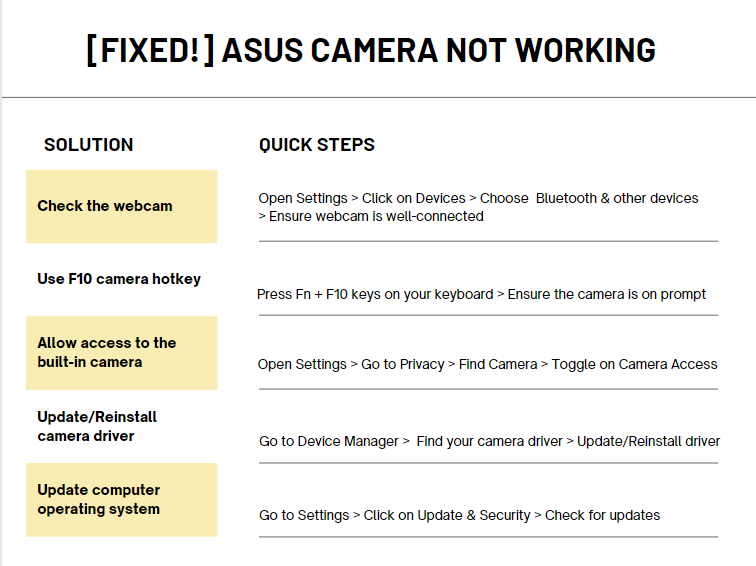
How to Fix ASUS Camera Not Working?
Want to fix the ASUS Vivobook camera not working issue when you seek to screen record on ASUS laptop? Find answers in this section! Although ASUS laptops are of top quality, their camera often runs into an issue, which you can fix by following these methods.
Fix ASUS Camera Not Working
Ensure Webcam is Well-connected
Making sure your webcam is properly connected is critical in troubleshooting camera issues on your ASUS laptop. The camera will not operate properly if it is not properly connected. If you’re using an external camera, ensure it’s connected and that your laptop recognizes it. However, if you’re utilizing a built-in camera, it’s essential to ensure that it’s not obscured or hindered by anything else. Also, ensure that the camera lens is free of any physical damage.
To ensure that your webcam is well connected on your ASUS laptop, follow the steps below:
Ensure Your Webcam Is Well-Connected
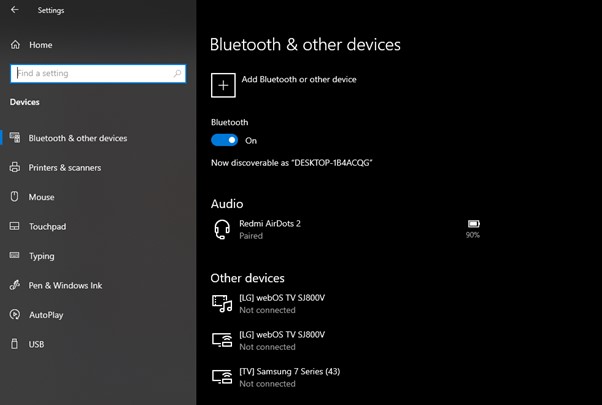
Step 1: Open Settings on your ASUS device.
Step 2: Click on Devices and select Bluetooth & other devices from the sidebar
Step 3: In Bluetooth & other devices window, find your camera by its name and make sure it is properly connected.
Use the F10 Camera Hotkey
Using the F10 camera hotkey is one way to activate your camera on your ASUS laptop quickly. The F10 key is typically used as a shortcut to turn on and off the built-in camera. Many people are unaware of it, which can lead to them disabling the camera accidentally. So, it can fix your ASUS camera not working issue.
To understand how to use the F10 Camera hotkey to turn on the camera, follow these steps:
Step 1: First and foremost, look at the f10 key on your ASUS keyboard. If there’s a camera sign on the key, it is for enabling and disabling the camera.
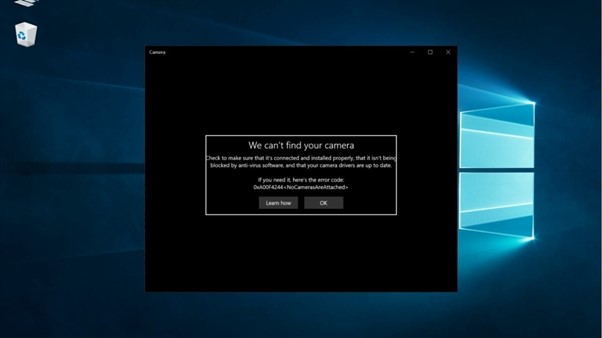
Step 2: Now, you need to press Fn + f10 keys on your keyboard (the hotkeys may vary depending on your settings). If you see a Camera On prompt on the screen, your ASUS camera is enabled.
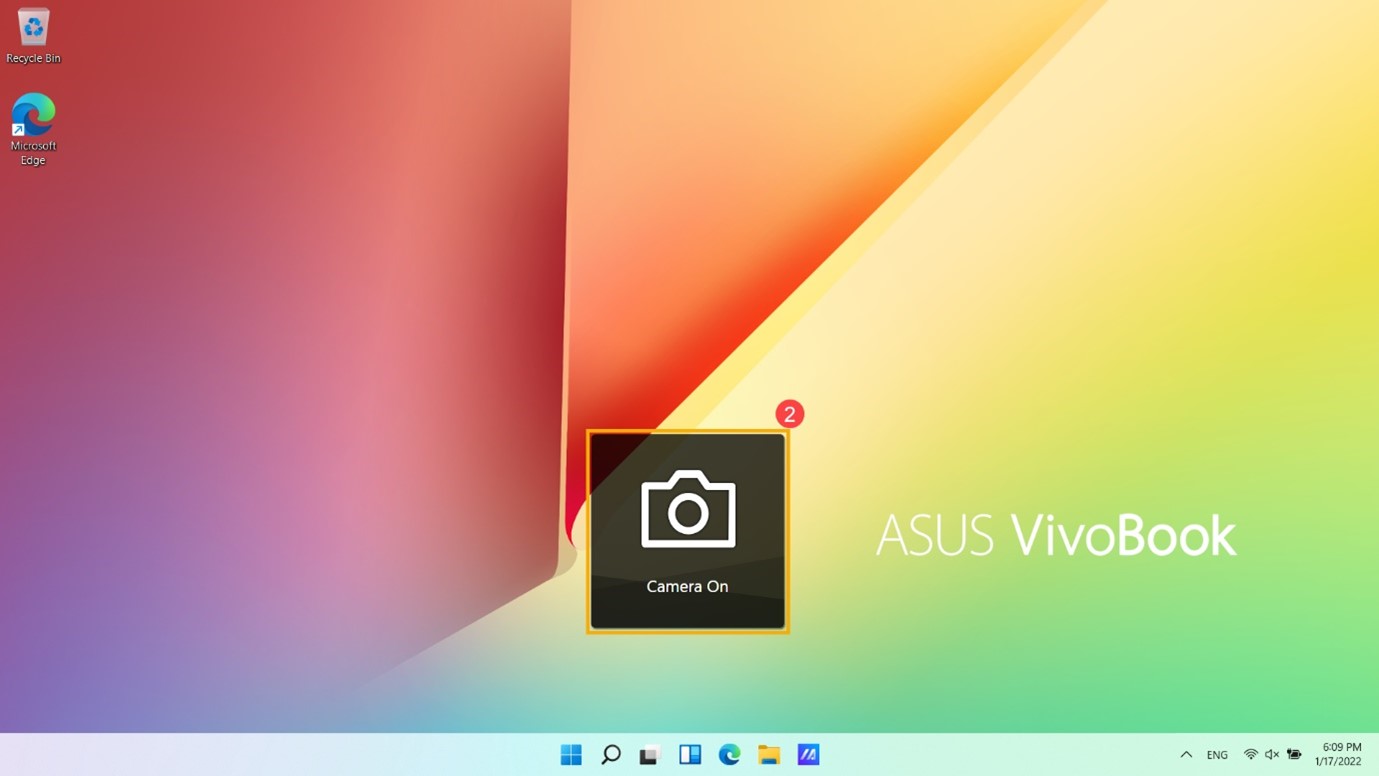
Camera On Prompt
Allow Access to the Camera
It is possible that you’ve not been given access to the camera from your ASUS laptop settings. Ensuring that the built-in camera has been granted access in the settings is essential in fixing camera issues on your ASUS laptop. This can be done by checking the privacy settings on your computer, where you need to ensure that the camera has been enabled for the apps you want to use it with. If the camera is still not working, you should try other methods.
To fix your ASUS camera not working issue by allowing access to the camera, follow the steps below:
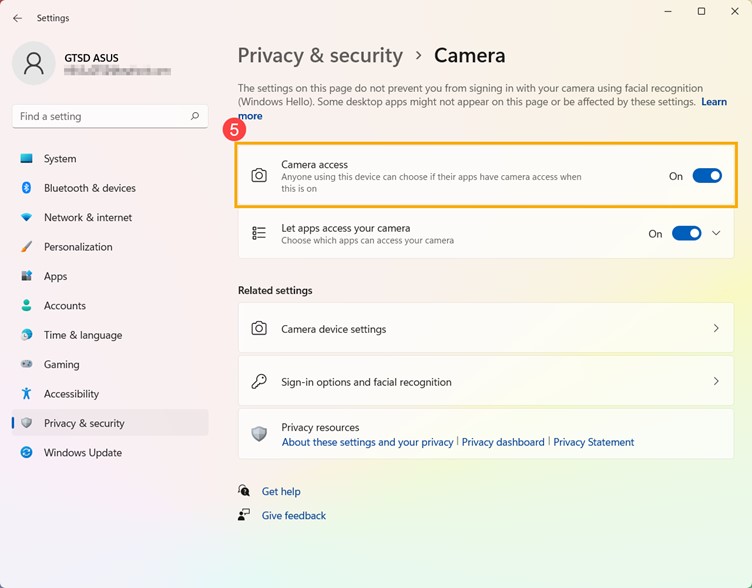
Step 1: Open Settings on your ASUS PC and click on Privacy.
Step 2: Look for Camera in the side menu and click on it.
Step 3: Toggle the switch next to Camera access to ON in the Camera window. Also, you can toggle the switch next to Let apps access your camera to ON.
Update the Built-in Camera Driver
If your ASUS laptop’s built-in camera is malfunctioning, you should try updating the camera driver. If the camera driver on your laptop is old or corrupt, the computer may identify the camera, but it will not work. When you update the driver for your camera, you can fix compatibility problems and boost its performance. If the camera still doesn’t function after you’ve tried everything else, try upgrading the driver.
To understand how to update the built-in camera driver, follow the steps below:
Update the Built-in Camera Driver
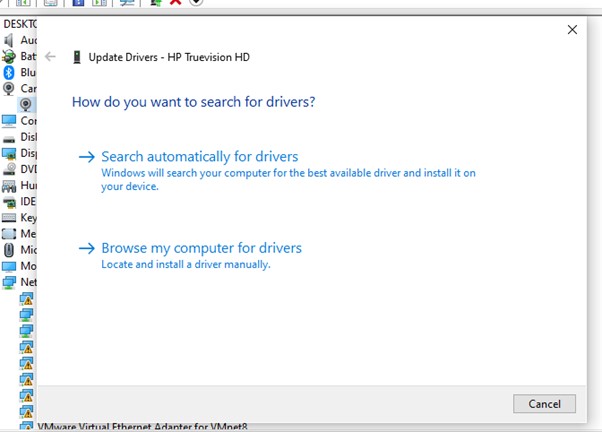
Step 1: Access Device Manager on your ASUS PC by searching for it in the Search menu.
Step 2: Expand Cameras by finding and clicking on them. Now, select your camera driver and right-click on it.
Step 3: In the dropdown menu, click on Update Driver. In the Update Driver screen, click on Search automatically for drivers. If there’s an update available, you will get it.
Reinstall the Built-in Camera Driver
If there’s no update available for your built-in camera driver, it’s time to reinstall it. Reinstalling the camera driver can prove to be an essential method for troubleshooting your ASUS laptop camera not working issue. Sometimes the downloaded version of the driver runs into an issue, which can only be solved by uninstalling and installing the driver again.
To understand how to reinstall the built-in camera driver, follow the steps below:
Step 1: Open Device Manager on your ASUS laptop and expand the Cameras option.
Step 2: Right-click on the camera driver and select Uninstall Device from the dropdown menu.
Step 3: An Uninstall Device prompt will appear; click on Uninstall to uninstall the camera driver.
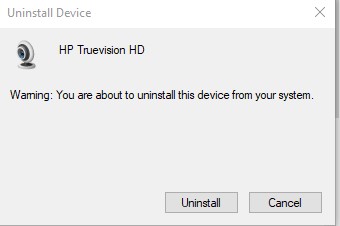
Click on Uninstall
Step 4: Now, click on Actions from the top menu and select Scan for hardware changes. This will automatically reinstall the camera when the scan is complete.
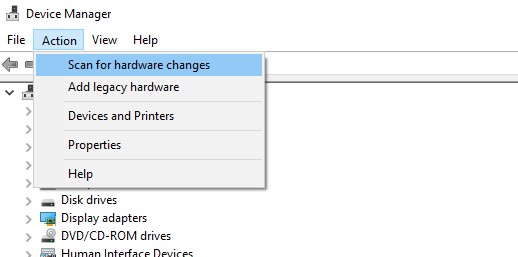
Click on Scan for Hardware Changes
Update Computer Operating System
An outdated operating system can cause compatibility issues with the camera driver, affecting recording screen and webcam. Updating the operating system can fix these issues and improve the camera’s overall performance. It’s important to note that updating the operating system should be considered a last resort, so make sure you’ve tried all the ways to fix the ASUS camera not working issue discussed above.
To understand how to update the operating system of your ASUS computer, follow the steps below:
Step 1: Go to Settings on the ASUS device and click on Update & Security.
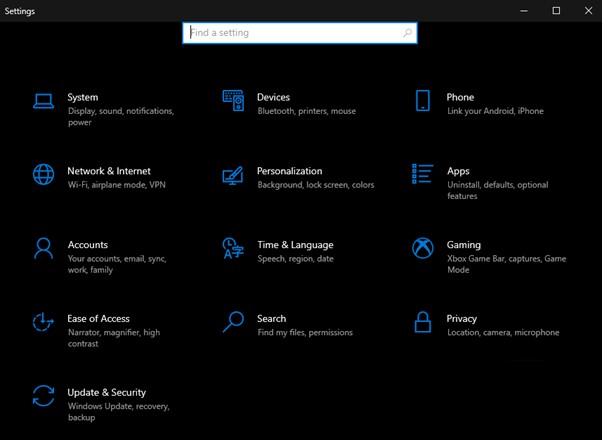
Click on Update & Security
Step 2: Look for an update available on the Windows Update screen. If an update is available, download the update.
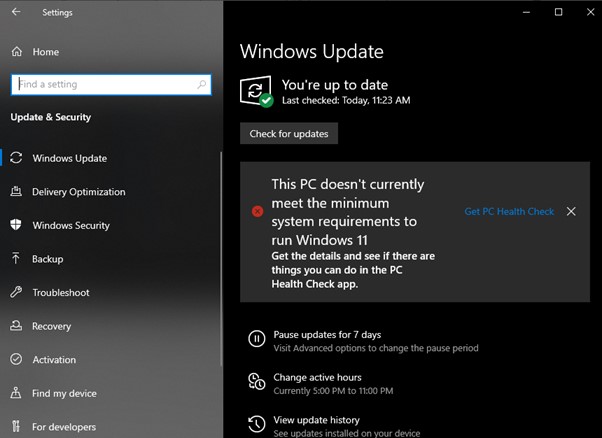
Click on Check for Updates
Step 3: Wait for the check to be over; if you get an update, you need to install it.
Further Reading: How to Fix OBS Virtual Camera Not Showing Up >
Bonus Tip. Record Screen and Camera on ASUS
When you chat with your friends or work on a remote online meeting, you may need to record your screen and camera to save the important moments. When it comes to recording your screen and camera, the built-in tools may not always be sufficient. Fortunately, You can use Gemoo Recorder to record your screen and face at the same time on Asus laptops.
To use Gemoo Recorder, you need to download and install it on your Asus laptop. Afterwards, you can customize the settings according to your preferences. To start recording, simply hit the “Start Recording” button. Gemoo Recorder also allows you to save your recordings either in the local storage or to the Cloud.
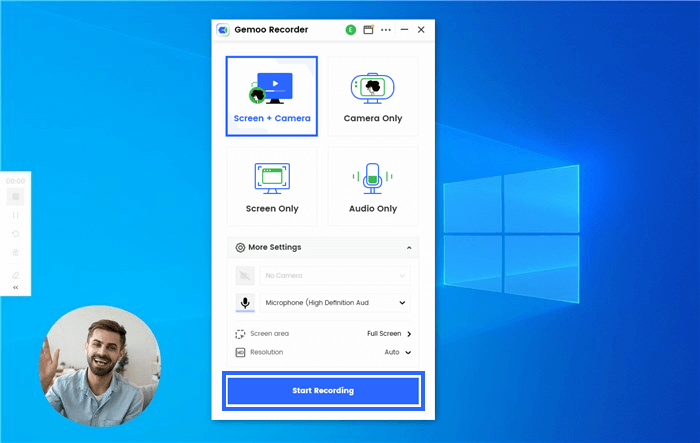
Hit the “Start Recording” Button
Final Thought
ASUS laptops are of top quality, but sometimes they run into some issues, and the most common one is ASUS Camera Not Working. But whether the problem is with the camera settings, the driver, the connection, or the operating system, there are several ways to troubleshoot and fix the problem. And by following the steps outlined in this article, you should be able to get your camera up and running again. If you have any other suggestions or tips for fixing camera issues on ASUS laptops, please feel free to share them in the comments section. And if this article helped you, please consider sharing it with others who may be experiencing similar issues.
