Microphones have always been important tools in our lives, used either personally or professionally. Improve sound quality can add a lot of emotion to a speech, so if we don’t use it correctly, the audience might get annoyed. Even though technology has advanced a lot, we still find ourselves looking for ways to find out how to make the mic sounds better.
How to Make Mic Sound Better
When we are trying to be heard, headsets and microphones are the cause of frustration. Getting a good-quality sound can be quite tricky. In general, getting a good microphone is the best thing, but fortunately, if there are some other problems, they can be fixed.
Table of Contents: hide
Using Noise Cancelling Software
Learn How to Use a Microphone
Using a microphone can sometimes be problematic, especially if you want to avoid any kind of distortion that will affect the performance. Sound systems in microphones differ, so similar microphones might not at the same time produce similar results. Testing microphones before use is very important, but that is not all.
Many microphones make quiet signals and cannot be recorded easily. We need to boost it up to make it loud so it will be on the same level as the other equipment we use. This is where microphone preamplifiers come in handy, also known as gain staging. Another thing to consider is changing microphone input levels, which can be done using the Control Panel (‘Sound’> ‘Recording’>‘Properties’>’ Levels’>’ OK’). Also, many like to use microphone stands and boom arms, especially if they are doing podcasting, as they help you adjust the height and the direction of the microphone easily.
Set the Gain in the Right Way
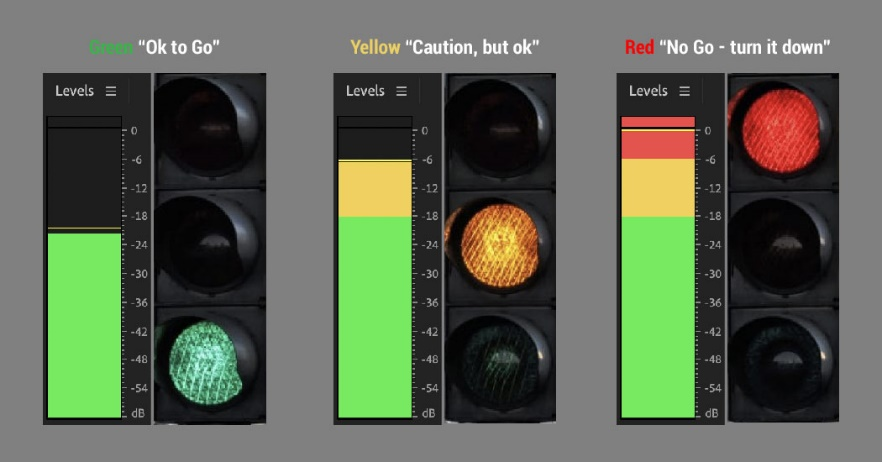
This is what increases a microphone signal amplitude and if a gain is too high, your voice in the recording will be too loud, and the sound will be distorted. A gain set to 100 % will result in a clipped recording with not a great sound. An amplifier in the mixer (a pre-amp) adds power to a signal and the signal can thus work well in the sound system. You should learn how to match the vocal power sent into the microphone with the mixer. Now we have colored lights coming in. When red lights are showing when you talk or sing, there will be a distortion in the system. Your gain knob should be set well when you see amber, not red.
The main thing that should be remembered is that your gain should be high enough so that you can be heard well even if you speak quietly, but low enough so that your loudest sounds can be recorded well. If you have a low gain, then you should include background noise. If it is too high, you will not be able to use effects or filters because they affect the quality of the audio signal. Don’t confuse gain with volume, which controls the loudness of the output of the channel.
Set the Gain in the Right Way
Using Noise Cancelling Software
Online meetings have become inevitable aspects of our lives and we wouldn’t be able to do this without good microphones. Even though we use good software for this, we cannot disregard the audio quality and how background noise can affect the overall meeting. By background noise, we mean the traffic that can be heard outside, the AC noise, or the noise from our keyboard. Luckily, this can be solved with some noise-canceling software.
Noice-canceling software can remove undesirable background noise thus improving the audio quality and it can work well with any communication tools. One of these tools is CleanVoice, which can remove stuttering and mouth sounds. All you need to do is upload your files on the website, and everything else will be taken care of for you! Another popular software is Krisp, which filters the noise from your microphone. It can be integrated into Zoom, Skype, and some other programs. You can get it for free, and if you want more features, there is also a paid version. Other equally good software would be Descrpt, SoliCall Pro, RTX Voice, and so on.
Making the Most of Microphone Directionality
Understanding how a microphone picks up sound is very important and directionality is an answer to this. It shows the direction of a microphone’s sensitivity to sound in space. Since microphones don’t pick up sounds in the same way, we need the directionality of a microphone that will show the area within which the sound sources will be picked up and located. To understand this, we must first explain different polar patterns represented by a polar diagram.
Omnidirectional microphones can pick up sounds from all directions. This is why they are great for recording choirs. They are very strong, but since they can record sounds coming from all directions, they can also pick up unwanted sounds, such as the sounds of cars, so they need very quiet environments. Bi-directional pick-up sounds in two directions, in front and behind. Cardioid or Uni-Directional pick up sound from the front, but poorly from the rear. Depending on what space you are recording in, all these types can be useful.
Using Equalizer
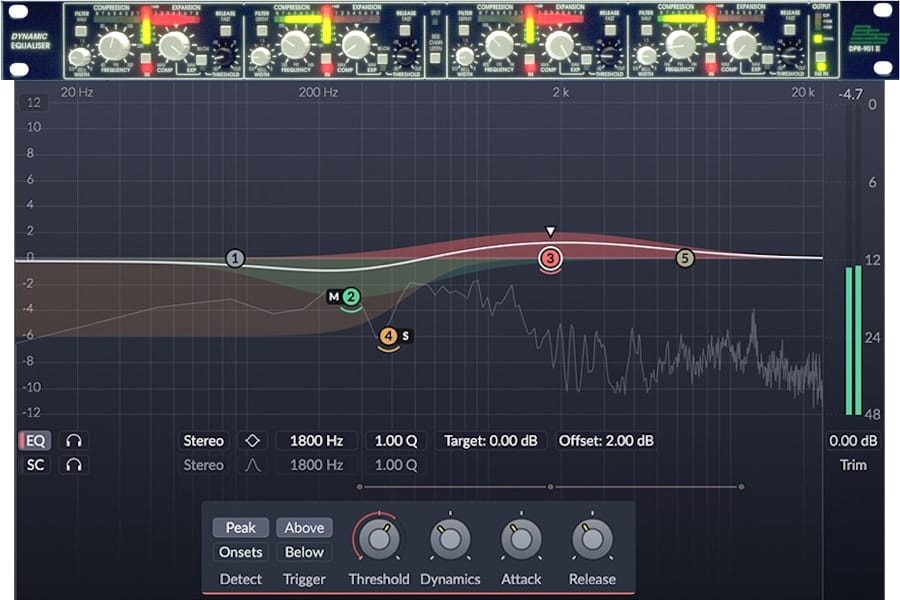
Equalization is the adjustment of the different frequency components within one audio signal. Equalizers can alter the tone of the sound, so learning how to use it is very important. They can remove some frequencies and shape your recordings so different sources can be together in a mix. Sometimes it is difficult to get the right sound without hardware and equalizers can help with this. The first thing you should do is choose the right microphone, there are many based on your needs. Once this is done, it’s time to find the right environment (quiet). Equalizers limit unwanted sounds and your microphone can be equalized without any hardware. A microphone has equalizer settings and you can adjust EQ levels. If you want to soften the sound, reduce the frequencies from 800Hz to 1kHz, and if you want to enhance the highs, increase the frequencies from 2kHz to 5kHz. When you adjust equalizer settings, listen to the recording to check if further tweaking has to be done.
Using Equalizer
Final Thoughts
In this article, we talked about how microphones can sound better and mentioned some proper ways of using a microphone. I hope that after reading it you understand better some of the terms we mentioned, such as equalization, directionality, noise canceling, and so on.
Following these steps will get you the best possible sound and I hope that you got the most out of this article. If you have any questions feel free to leave them in the comments below!