Easy Guide to Cropping Images on Your Mac Computer

Making a perfect photo is hard – even professionals don’t always get the frame they want on the first try. That’s why it’s pretty common to slightly change the dimensions of the photo (or another image) in post-production and exclude some parts that spoil the impression or reveal too personal details. Even if the original image author may be happy with the scope, other users might still find it useful to crop out some of the elements located near the edges.
If you are using a Mac computer, you have a choice of image editing tools that support the cropping function. Of course, the procedure is slightly different depending on the chosen tool, but in general, this is something you can learn how to do in the afternoon. This article could be a good starting point for beginners looking to become more skilled with image editing and help users with cropping images on a Mac regardless of the source from which they originally arrived.
Crop Images on Mac
What is Image Cropping and Why Is It Important?
To put it simply, cropping consists of cutting parts of the image out of the frame. This simple operation removes portions of the image located on the periphery, and can consequently change the dimensions and proportions of the image. Thus, even a relatively minor crop can completely alter the visual look and feel of the image, inspire a different interpretation, or make the image suitable for a different type of use (i.e. publishing on social media).
Since cropping doesn’t require practically any graphic design knowledge, it is one of the first editing operations that users learn how to do on a Mac. This can be a great way to cut random objects out of your photos, remove open tabs from your desktop screenshots, or isolate segments from images downloaded from the internet. Mastering this simple edit gives you the power to manipulate images in many different ways, which is why you should invest some time and practice until you get it right.
Why You Need to Crop an Image?
There are countless situations when cropping can make your life easier and your work better. No matter what your line of business might be, it’s highly likely that you are creating, opening, and sending images numerous times during a typical day. Here are some of the most common reasons for cropping an image you have on a computer:
- The image is poorly framed and needs to be reframed for better proportions
- There are objects in the background unrelated to the main subject
- The image contains a watermark or signature that you want to remove
- Format of the image doesn’t fit the requirements of its intended purpose
- Sensitive or personal information can be seen in the background and must be removed
- There are multiple objects in the image and separating them improves the visibility
- Lighting is uneven in the image and cutting the darkest part is necessary
How to Crop Images on a Mac with Photos App?
Most users rely on built-in apps on their Mac for basic tasks such as image editing and management, which is understandable because most native MacOS apps are pretty good. In particular, the Photos app is a very popular tool that allows users to control all of their photographs and other visual files from a centralized location. This app supports cropping and doesn’t require too much creative skill to use optimally. Here is the sequence of necessary actions that will get the job done:
Step 1. Run the Photos app, and browse the folders until you find the images that need cropping
Step 2. Double-click on the chosen image, then click on the Edit icon
Step 3. After the editor mode opens, look near the top of the page for the Crop function
Step 4. Choose between automatic dimension adjustment with a set aspect ratio, or manual cropping
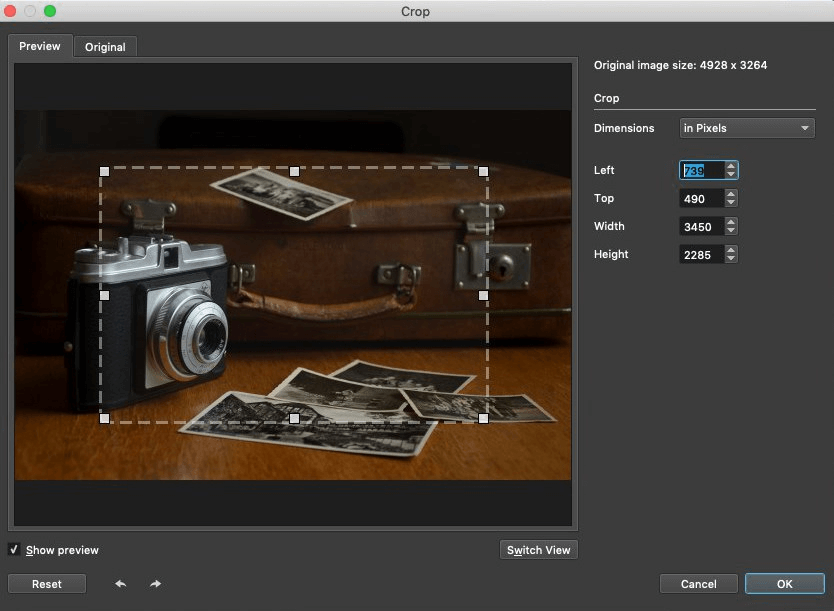
Choose between Automatic Dimension
Step 5. Click and drag with your mouse to crop the image manually, and click OK when you finish
How to Crop Images on a Mac via Gemoo Snap?
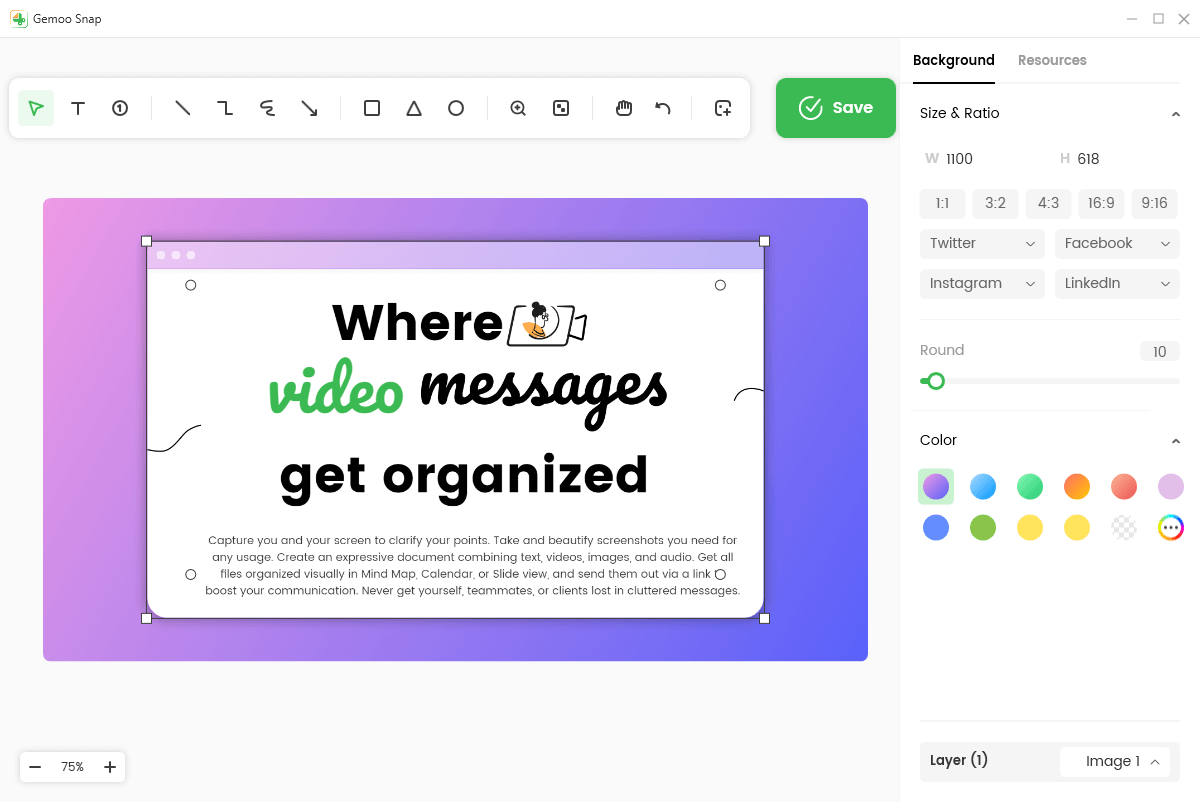
Third-party apps compatible with the Mac are another viable approach you should consider. There is no shortage of great applications for image editing, including Gemoo Snap that you can download for free. Noted for its simple interface, precise control over the output, and cloud storage space to store your cropped images, Gemoo could be the long-term solution for all of your needs. You can use the same app to snap screenshots and crop them down to size with absolute ease, and that’s just the beginning. If you decide to you this software to crop any image saved on your Mac, here is what you need to do.
Step 1. Down and install Gemoo Snap on your computer and create an account on the official site.

Sign in Account
Step 2. Choose the Screenshot & Beautify mode. Capture the screen and delete it. Then, you can upload the image that you want to crop.
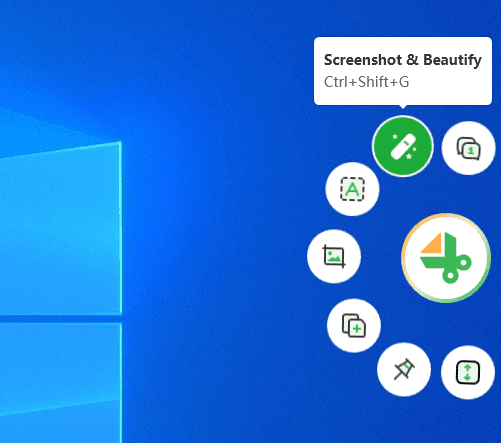
Select the Screenshot & Beautify Option
Step 3. Find the cropping feature in the toolbox and use your mouse to cut it to the right dimensions.
Cropping Image via Rich Tools
Step 4. Browse the online library to find the cropped image and download it to your computer.
Frequently Asked Questions about Cropping Images on a Mac
Is manual cropping difficult to do with precision?
Since cropping is performed along straight lines and all cropping tools show you exactly where the line is, you don’t need to have great eye-hand coordination to do it with precision. That said, it’s still a good idea to zoom in before cropping and make sure that all the important details will remain in the picture.
Are there keyboard shortcuts I can use for image cropping on a Mac?
It’s possible to use the combination of keys CMD + K after you open an image with the Finder app to crop some parts of it. However, even with this method you still need to use your mouse to mark the area that should be cut from the picture, so the shortcut doesn’t save a whole lot of time.
Should I delete the old version of the image after I saved a cropped version?
In case you are just trimming the background and the new version is unquestionably better than the raw original, there is no need to keep the old version on the Mac. On the other hand, if you cropped out some relevant details (i.e. phone numbers or e-mail addresses) for specific reasons, you probably shouldn’t delete the original image.
Final Thoughts
It’s best to think about cropping as a minor adjustment rather than serious editing of an image. This operation is extremely simple and can be completed in seconds if you know the correct procedure. It’s essential for Mac users to feel comfortable with the cropping tools they commonly use, so they can conduct this procedure immediately after acquiring the image. Tell us how you usually crop images on your Mac and which method would you recommend to beginners – we expect to hear your opinion in the comments.