Many users have admired the visual AI program, Midjourney, which has gained significant popularity for its ability to generate art by AI and user imagination. However, users are growing curious about alternative ways to utilize Midjourney outside the Discord platform.
How to Use Midjourney without Discord
Midjourney operates exclusively within Discord, a widely used messaging program facilitating communication within communities and groups. This limitation has caused some users to seek methods of accessing and utilizing Midjourney independently from Discord. This article addresses whether it is possible to utilize Midjourney without relying on Discord. We will explore Midjourney alternatives and provide insights on why you should consider giving this AI tool a chance if you are intrigued by its capabilities but prefer to avoid familiarizing yourself with Discord. So, let’s get started with the details of how to use Midjourney without Discord!
Also Read: How to Fix Midjourney not Working? >
Table of Contents: hide
Can Use Midjourney without Discord?
Why Do You Need Discord for Midjourney?
Can Use Midjourney without Discord?
Regrettably, using Midjourney without Discord is not currently an option. Midjourney is exclusively integrated into Discord, a popular social chat platform for community communication. Unlike other AI art generators like DALL-E and Stable Diffusion, Midjourney’s functionality relies entirely on Discord. This requirement of having a Discord account has made some individuals hesitant to explore this AI art maker.
Discord can be challenging for certain users due to its cluttered interface, which needs clear guidance for accessing various options. Even if one manages to explore the platform, incorporating Midjourney into Discord involves a significant learning curve. Users must gain access to Midjourney’s servers, grasp the appropriate Midjourney prompts and their placement, and understand the process of creating AI art privately. These complexities can prove overwhelming for many individuals, including those who are technologically adept.
Further Reading: How to Fix Midjourney Envelope Not Working >
Why Do You Need Discord for Midjourney?
The reason behind Midjourney’s utilization of Discord, rather than a web or mobile application, often sparks curiosity among many individuals. Interestingly, this design choice emerged through the team’s remote work environment. During the development phase, the Midjourney team encountered the need to troubleshoot the system internally. As a result, they turned to Discord as a means of debugging.
To their surprise, the remote team discovered that employing a Midjourney bot within Discord significantly enhanced their collaborative efforts. While unintentional, the decision to adopt Discord as the primary tool for Midjourney’s operations was a fortunate accident. It aided in effective debugging and transformed into a robust collaboration platform, enabling the team to work harmoniously despite physical distance.
Further Reading: What to Do When Midjourney Couldn’t Validate This Link >
Can You Add Midjourney to Your Own Discord Server?
Adding Midjourney to your Discord server is possible but requires individuals with “Manage server” permissions to act. Double-check that you possess the necessary permission to ensure your server appears in the list when adding the Midjourney Bot. By granting this access, you can seamlessly integrate Midjourney into your Discord server and use its functionalities for enhanced collaboration and productivity.
How to Use Midjourney to Create AI-generated Images?
The setup process for Midjourney may seem complex and require a few other things to get started smoothly. Here are the detailed steps on how to use Midjourney to create AI-generated images:
Step 1. Visit the Midjourney website, locate the “Join the beta” link at the bottom, and click on it. You will be redirected to Discord. Follow the prompts to register and proceed.
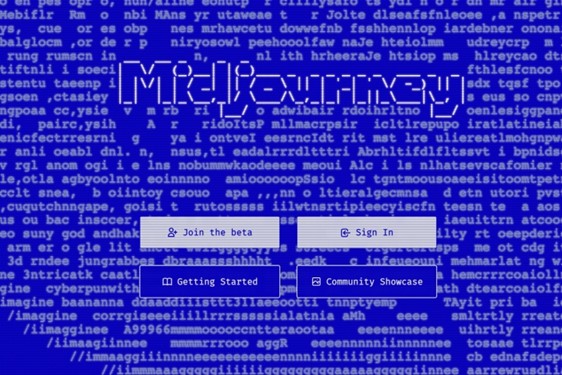
Sign Up Midjourney
Step 2. After logging in to your account, close any initial windows or messages that appear. Instead, navigate to the left sidebar and locate the button labeled “Explore public servers.” To find the “Midjourney” community, you can search for it in the list of featured communities or type “Midjourney” in the search field. Once you locate it, click on it to enter and become a community member. Finally, click the “Join Midjourney” button at the top to become a member.
Step 3. Once you have successfully joined the Midjourney community, you will notice the left sidebar displaying “Newcomer rooms, ” consisting of newbie groups. Click on one of the rooms to enter it. To view the images generated by the Midjourney AI bot for other users, scroll up and down the page. Explore the creative visuals and artworks that have been generated within the community.
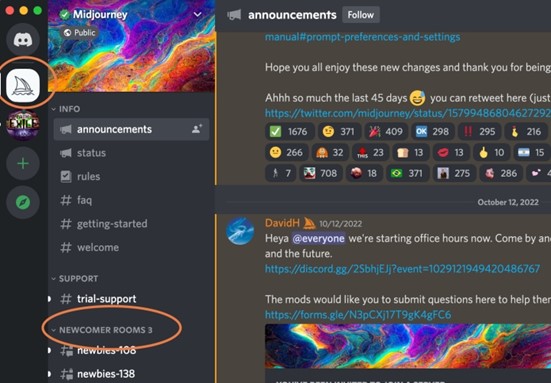
Join a Newbie Group
Step 4. As the free trial is no longer accessible, it is necessary to subscribe to a paid plan to utilize the Midjourney service. To initiate the subscription process, locate the Message field at the bottom of the screen. Type “/subscribe” into the field and press Enter. After that, click “Open subscription page”.
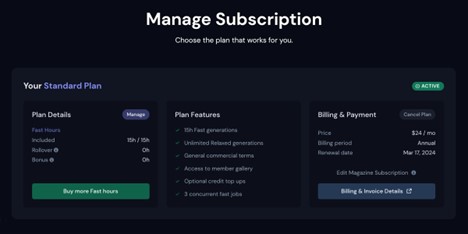
Choose the Subscription Plan
When you reach the subscription page, you can decide whether to pay yearly or monthly. Fill out the payment form by giving the necessary information. After your payment is processed successfully, go back to the Discord page and find the newbie group you were in before.
Step 5. You can type “/imagine” or “/” and select “imagine” from the menu. Then, enter your description in the prompt field. After pressing enter, please wait a few seconds for the images to be generated. Midjourney typically creates four thumbnail images for each request.
Step 6. The interface displays images with buttons labelled U1, U2, U3, and U4 below each image. These buttons allow users to upscale the corresponding image. The numbering system indicates the position of each image on the screen. Users can view the upscaled version of the selected image by clicking the appropriate U button. Scrolling down the screen reveals the upscaled images.
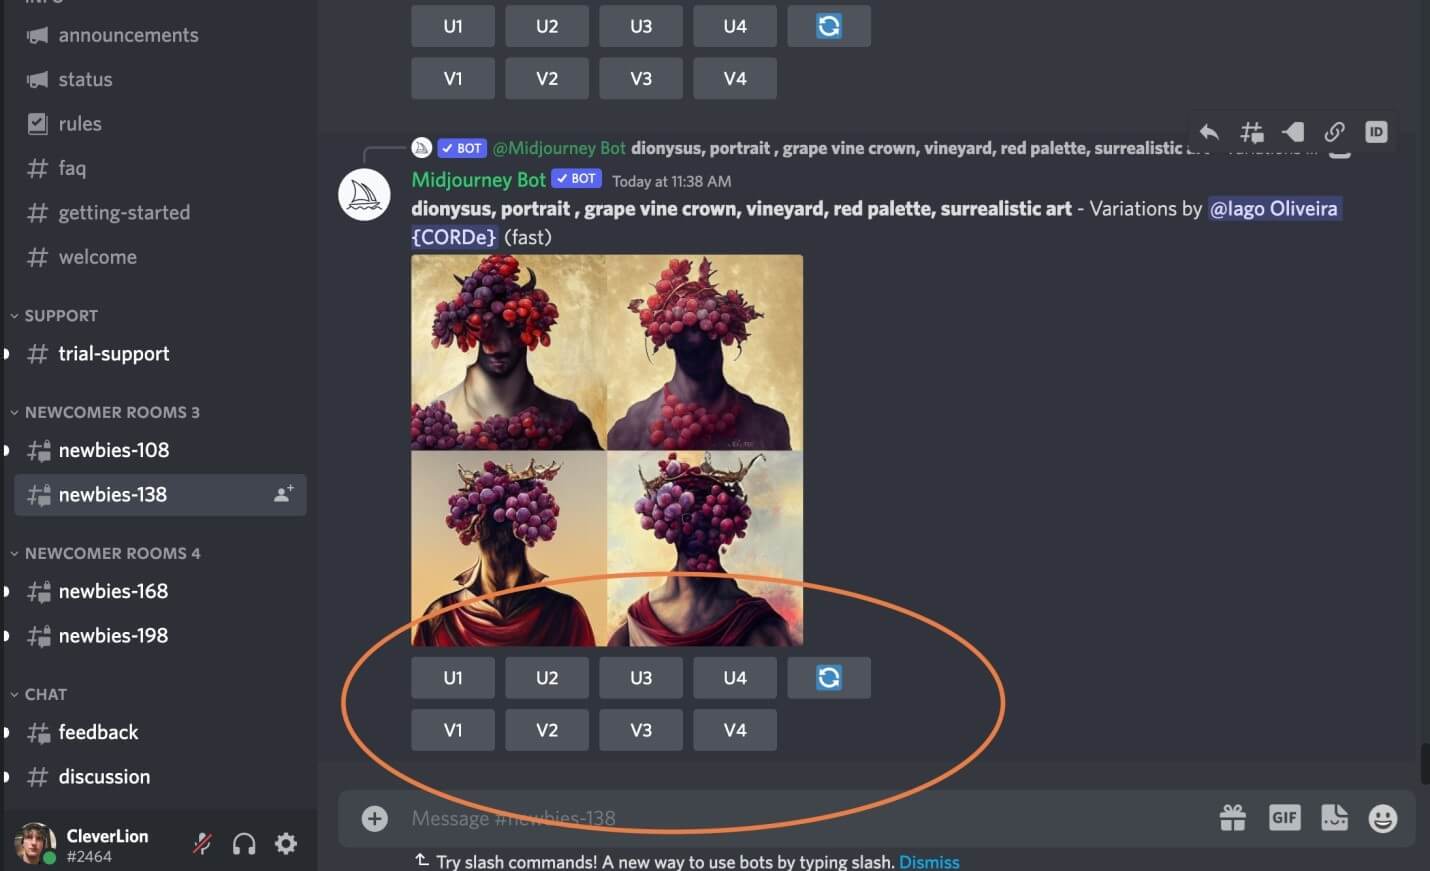
Upscale Images
Step 7. The V buttons provide the option to modify a chosen image. You can click the corresponding V button if you prefer a specific image among the four but want to explore enhancements or improvements. After scrolling down, a new set of four images will be displayed, each showcasing a slightly different version of the selected image. It allows you to compare and examine the variations.
Make Changes to the Image
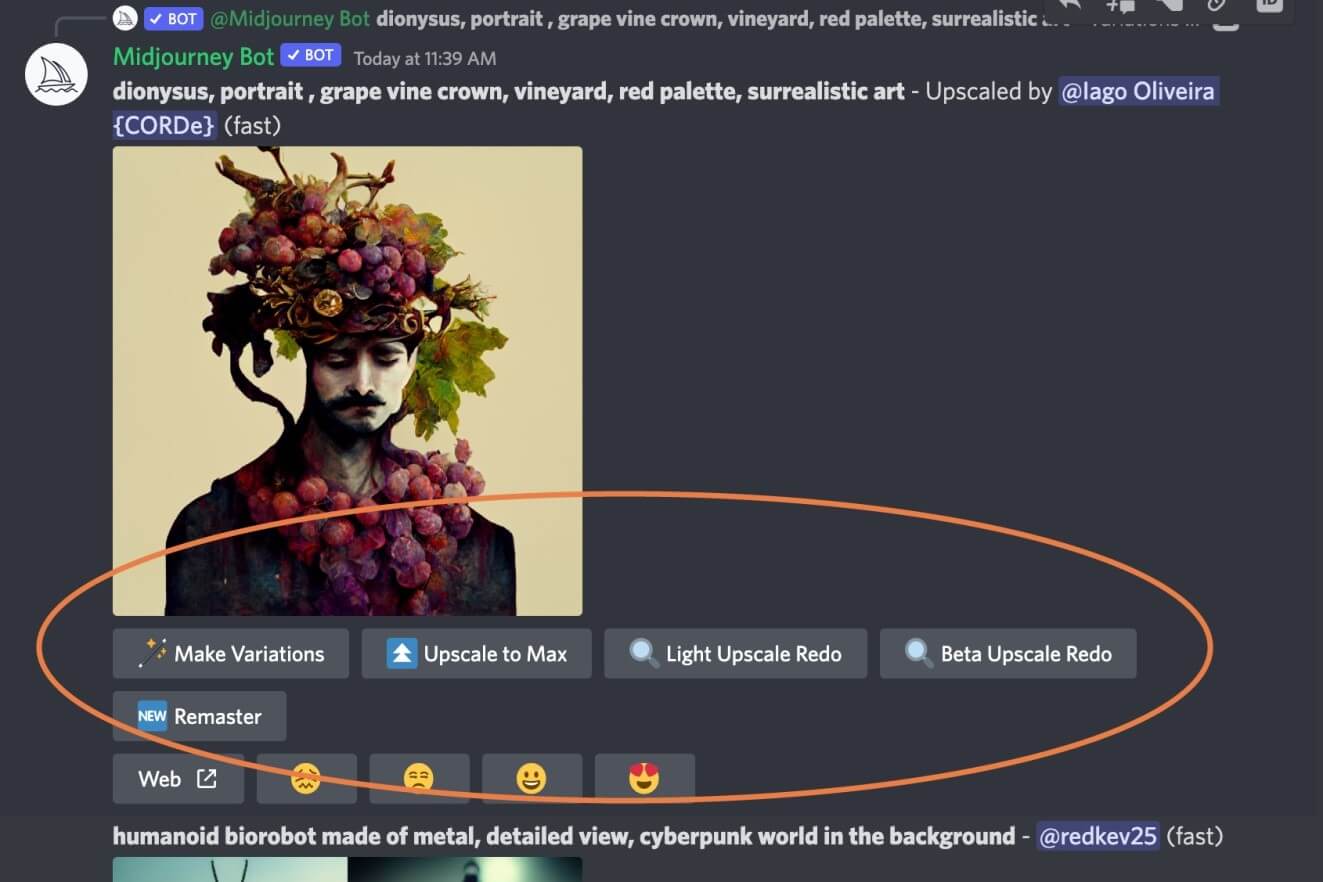
You also have a chance to try out an enlarged image. Below the image is a button called “Make variations” that you can click. This button will create different versions or variations of the image. It’s a cool feature that lets you explore and find different versions of the enlarged image.
Step 8. To choose an image, click on it. Zoom in with the magnifying glass cursor for a closer look, and right-click for browser options, including saving, copying, or emailing the image.
Step 9. To navigate back to the Discord page and access the newbie group, you can return to the corresponding section. At the bottom field, click and type “/” to initiate commands. Scroll through the list of available commands to explore and manage your interactions effectively. By doing so, you can access a range of options to enhance your Discord experience within the newbie group.
Final Thought
In conclusion, you can’t use Midjourney without Discord. Once you start using Discord, you will appreciate how it enhances the coherence and completeness of your Midjourney experience beyond expectations. Whether you aim to design distinctive and captivating visuals for your business or want to explore the imaginative possibilities of AI-generated imagery, Midjourney is the ultimate tool for the task at hand. Experience its transformative capabilities today and witness how it can enhance your image-creation process! Must share your concerns regarding this in the comments section below!
