Having the ability to switch between different cameras on Windows 10 can greatly improve the way you use your computer for various tasks, such as recording videos and capturing images. Whether you’re participating in a video call, live streaming, or just taking photos, being able to select the right camera for the job can make a big difference in the quality of your output. By switching it, you can easily choose between a built-in laptop camera, an external webcam, or even a smartphone camera connected to your computer.
However, Windows 10 may automatically select the wrong camera as the default camera. In this article, we will show you how to switch the default camera on Windows 10, so you can always use the camera that you need. With this ability, you can optimize your camera experience to capture high-quality images or record HD videos and ensure that you always use the right camera for your needs. So, if you want to change your default camera, then stick with us!

How To Switch Default Camera On Windows 10
Also read:
How to Make a Facebook Post Shareable? >
How to Turn Off Instagram Reels?>
Table of Contents: hide
Part 1. Can You Set an External Webcam as Default on Windows 10?
Part 1. Can You Set an External Webcam as Default on Windows 10?
If you are wondering how to set an external webcam as your default camera on windows 10 in case your integrated camera is dysfunctional or for any other reason, then this part will answer your question! Using an external webcam on Windows 10 can offer many benefits over a built-in laptop camera. They have higher resolution, better image quality, and more advanced features such as autofocus and low-light correction.
Windows 10 has settings for the camera that allow you to change your default camera and replace it. From there, you will be able to see a list of all the cameras connected to your computer, and you can select your external webcam as the default camera. However, some external webcams may require additional software or drivers to be installed. Once you have done this, you should be able to adjust your position to avoid your camera so zoomed in when recording.
Part 2. How to Change Default Camera Windows 10?
Looking for ways to change your default camera on windows 10? Then you are on the right way! In this part, we will highlight four ways that you can follow to perform this change. These include disabling any internally integrated camera, setting up the default camera, and removing extra cameras internally as well as externally. These ways comprise short and easy-to-follow steps. So, it is time to look into the solutions below without further delay:
Disable other internal webcams.
It is possible for a device to have more than one internal webcam, but it is very rare. Some laptops may have a front-facing and a rear-facing camera built-in, which would count as two internal webcams. Some devices may also have an additional internal camera that can be attached or detached. So, one way to change the default camera on Windows 10 is to disable all other internal webcams. Let’s look into that:
Step 1: Click on the “Start Menu” in the bottom left.
Step 2: Now, you have to search and click on “Device Manager.”
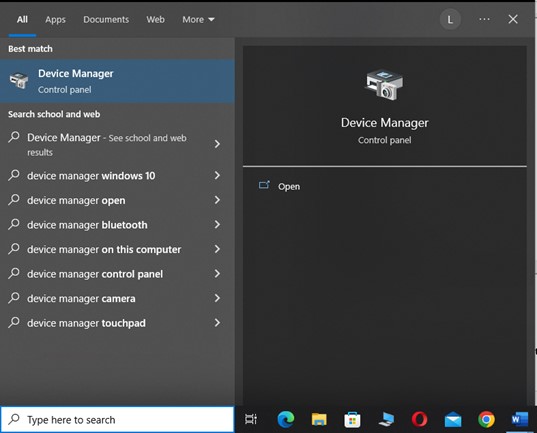
Search Device Manager
Step 3: Inside the device manager, scroll and click on “Cameras.”
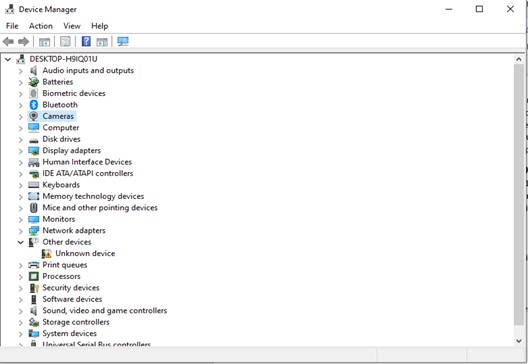
Click On The Camera
Step 4: Lastly, right-click on “Integrated Camera,” then click on “Disable device” and press “OK” on the prompt.
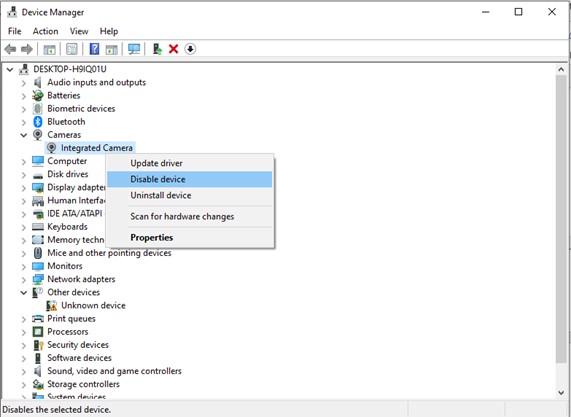
lick On The Disable Device
Set Camera Device as default in Devices and Printers.
Another way to change the default camera on Windows 10 is to set the camera device as default in the Devices and Printers section of the Control Panel. If you have many external and internal cameras attached to your device, it becomes quite hectic to disable each one of them or detach them from the computer. This can be a helpful solution if you want to avoid physically removing or detaching the cameras and can save up the hard work.
Additionally, setting your preferred camera as default prevents your other cameras from getting disabled. Let’s look into the steps:
Step 1: Search and click on “Control Panel” in the “Start Menu.”
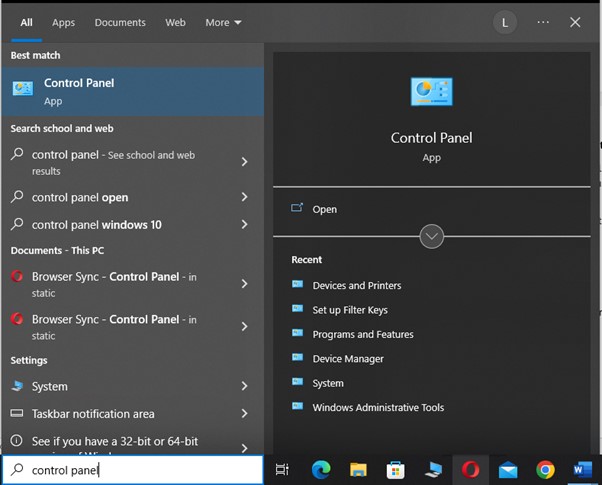
Click On The Control Panel
Step 2: Inside the control panel, click on “Device and Printers.”
Click On The Devices And Printers
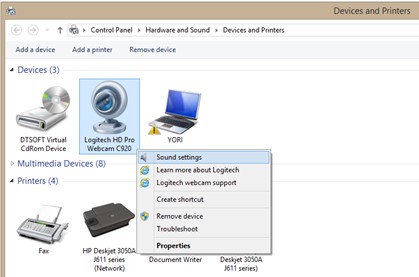
Step 3: Select your preferred camera and right-click on it from the list of all the attached devices.
Right Click On The Preferred Camera
Step 4: Lastly, just click on “Select this device as default.”
Remove Other Cameras from Devices and Printers.
Another way to set your preferred camera as default is if you leave no option for the computer other than one camera, i.e., remove all the other potential cameras from your windows 10. It is an easy process, and following a few steps, your selected camera device will be set as your computer’s default device for all camera-related activities. However, you may have to restart your apps or computer for changes to take effect.
To perform this quick and easy process, you have to follow the steps below:
Step 1: Open “Control Panel” from the “Start Menu.”
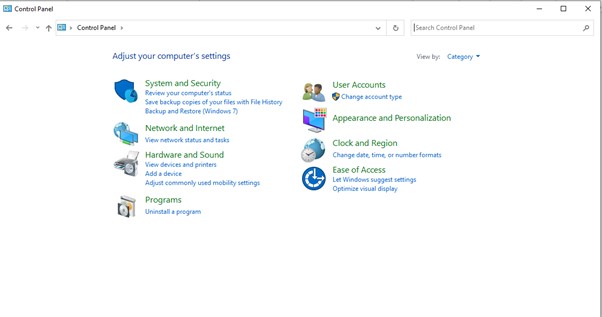
Open The Control Panel
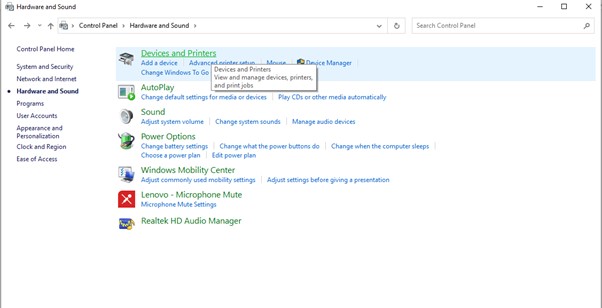
Step 2: Now you have to go to “Hardware and sound.”
Step 3: Inside it, you have to find and click on “Devices and Printers.”
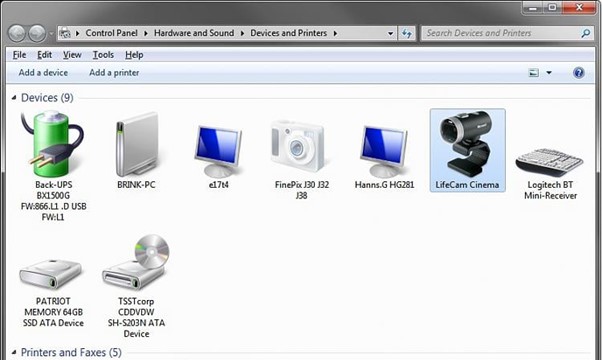
Step 4: You have to look for all the cameras, right-click on them, and then click on “Remove device.”
Right Click On Camera
Unplug Extra Cameras
Last but not least, to change the default camera on Windows 10, you can unplug any extra cameras that are connected to your computer. This will ensure that the camera you want to use as the default is the only one available, and Windows 10 will automatically select it as the default camera. Keep in mind that if you have multiple cameras connected to your computer at the same time, you will need to manually select the desired camera in the settings by following the above ways.
Furthermore, If you do not want to select your desired camera manually, this is a good option. To do that, you have to first unplug the USB cable or other connection for any extra cameras and then use the camera you want as the default. Once you are finished using the camera, you can plug the other cameras back in. It is advised that before unplugging, make sure you have your unsaved recordings or data backed up to avoid any inconvenience.
Remove The Usb Cable
Part 3. Frequently Asked Questions
After you have learned this new information, you might have certain questions pop up in your mind. In this part, we will try to answer some common queries. So, without further ado, let’s get going:
1. How to change the default camera on android?
- You will need to access your device’s settings to change the default camera on an Android device.
- Once you are in the settings, you will need to tap on “Apps” or “Application Manager.” From there, you can scroll through the list of installed apps, find the camera app you want to use, tap on it, and select “Open by default” or “Open supported links.”
- If a default camera app is set, you will need to tap on “Clear defaults” before setting a new one.
2. How to change the default camera on Mac?
To change the default camera on a Mac, you will need to open the application that you want to use the camera with and then select the camera you want to use in the application’s settings or preferences.
For example, if you want to use a different camera in Zoom, you will open the Zoom app, go to the settings or preferences, and select the camera you want to use as the default. Once you’ve chosen it, it will be saved as the default.
3. How to change the default camera in Chrome?
- To change the default camera in Chrome, you can open the Chrome browser and navigate to the website where you want to use a different camera.
- Once there, click on the three dots in the top right corner of the browser window to open the Chrome menu, then click on “Settings.”
- In the settings menu, click on “Privacy and security” and then select “Site settings.” Under “Permissions,” click on “Camera” and select the camera you want to use as the default.
- You will be prompted to allow the website to access your camera and microphone, so make sure to click “Allow” to complete the process.
Final Thought
With the advancements in electronics today, different efficient and smart cameras are available in the market that can be integrated with your computer. Each one has enhanced features, is quality-wise immaculate and can be used for various purposes. To take advantage of them, one has to know how to switch default camera access on windows 10. Moreover, we hope this article helped you answer your question and was informative. If it did, please feel free to share it with your family and friends, and remember to leave a comment with your thoughts or feedback in the comment section.