How to Remove the “Activate Windows” Watermark Permanently

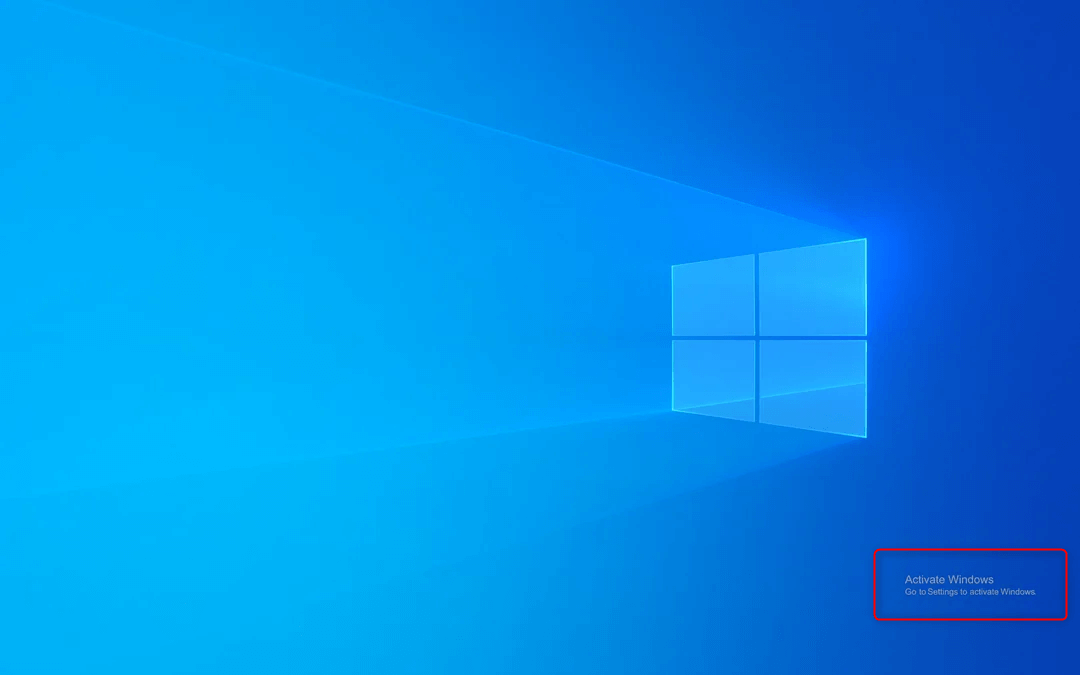
If you’re a Windows user, you may have come across the “Activate Windows” watermark on your desktop background. This watermark appears when your copy of Windows is not activated or is not genuine. While it serves as a reminder to activate your operating system, it can be bothersome for some users. In this article, we’ll explore various methods to remove the “Activate Windows” watermark permanently, allowing you to enjoy a seamless Windows experience.

How to Remove the “Activate Windows” Watermark
Table of Contents: hide
What Is the “Activate Windows” Watermark?
Is It Possible to Hide the Activate Windows Watermark?
How to Remove Activate Windows Watermark?
What Is the “Activate Windows” Watermark?
What Is Activate Windows Watermark
Before learning how to remove activate Windows watermark, let’s figure out what the activate windows watermark Windows 10 is. This watermark is a notification that appears on the desktop background of Windows operating systems when the installed copy of Windows is not activated or is not genuine. It acts as a prompt to users, reminding them to activate their operating system to unlock the full functionality and receive updates from Microsoft.
Is It Possible to Hide the Activate Windows Watermark?
Yes, it is possible to hide the Activate Windows watermark that appears in the bottom right corner of an unactivated Windows system. Here are a few different methods available in 2024:
- Registry edit: You can modify the registry to disable the watermark, by creating a registry entry and requiring some technical expertise.
- Third-party tools: There are free and paid tools available that can disable the watermark through a simple UI without registry edits.
- Use themes/wallpapers: Choosing a dark theme or transparent wallpaper can make the watermark less visible on some systems.
- Resize/reposition the taskbar: Adjusting the taskbar size and position can potentially move the watermark out of view.
- Virtualization: Running Windows in a virtual machine like VirtualBox may avoid displaying the watermark altogether.
- Dual boot: Having Windows installed in dual-boot alongside another OS keeps it somewhat hidden when not actively using Windows.
How to Remove Activate Windows Watermark?
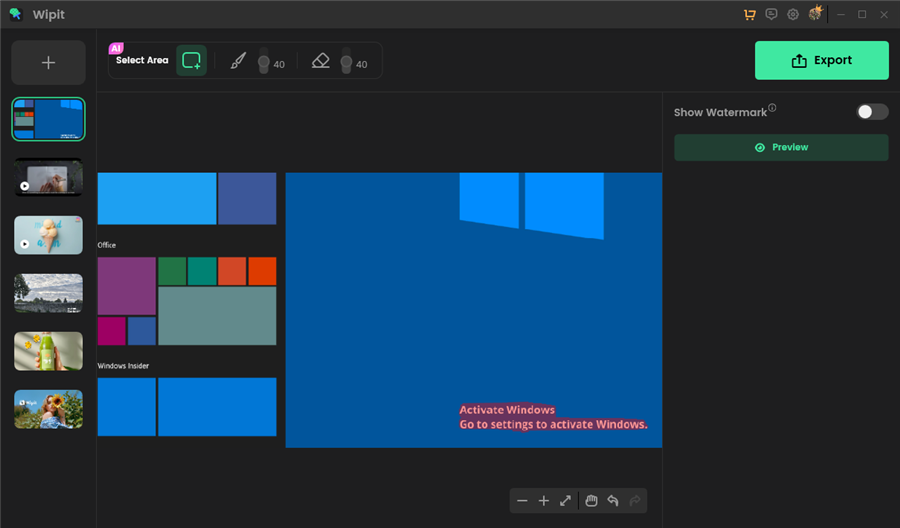
The persistent activate Windows watermark can be an annoyance for many Windows users, especially when screen capture on Windows. Among the popular Windows 10 Watermark Removers in 2024, Wipit utilizes advanced artificial intelligence algorithms to intelligently analyze and process the screenshot content, effectively remove watermark Windows 10 and other unwanted objects from your images and videos without blur. With its user-friendly interface and automated removal process, Wipit offers a seamless solution for erasing the “Activate Windows watermark”, ensuring a clean and professional display.
Steps to remove Activate Windows watermark
Step 1: Free install Wipit on your computer. Once downloaded, launch the application and proceed to upload the photo containing the unwanted watermark that you wish to remove.

Upload Images from Your Computer
Step 2: Within Wipit, select the AI Select Area option and frame the Windows Activate watermark that you want to erase. Simply release the mouse, and the AI algorithm in Wipit will automatically identify the borders of the removal area.
Frame and Remove Activate Windows Watermark
Step 3: If you are pleased with the resulting output after previewing the watermark removal effect, click the Export button in Wipit to save the edited photo directly to your computer.

Preview the Activate Windows Watermark Removal Effect
Wipit only removes watermarks and elements from user-owned or authorized content. Users must avoid infringing on others’ intellectual property rights. Unauthorized use of copyrighted material is illegal, and Wipit and Gemoo strictly condemn such software usage.
How to Remove the Activate Windows Watermark Permanently?
As mentioned, the “Activate Windows” watermark appears when your copy of Windows is not activated or not genuine, reminding you to take action. Are you tired of seeing the “Activate Windows” watermark on your desktop background? Continue reading and learn how to permanently remove Activate Windows watermark.
Do the Notepad Trick
You can activate Windows without a product key. Here, we will explore the Notepad trick, which offers a simple yet temporary solution to remove the “Activate Windows” watermark.
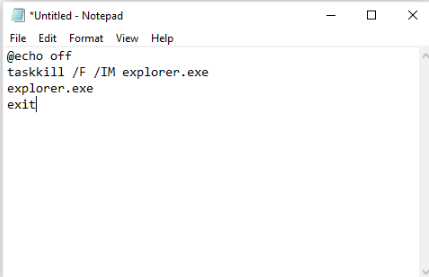
The Notepad trick is a popular method that can remove the “Activate Windows” watermark. Follow these simple steps to try it:
Step 1: Open Notepad on your Windows system.
Step 2: Paste the provided code into the Notepad. (Code provided below)
Paste the Provided Code
@echo off
taskkill /F /IM explorer.exe
explorer.exe
exit
Step 3: Save the file with a “.bat” extension. For example, you can name it “remove_watermark.bat”.

Save the File with a “.bat” Extension
Step 4: Run the saved file as an administrator.

Run the Saved File
It’s important to note that the Notepad trick may only remove the “Activate Windows” watermark temporarily. After restarting your system, the watermark might reappear. Therefore, this method serves as a quick fix rather than a permanent solution.
While the Notepad trick may not permanently remove the watermark, it can provide temporary relief if you need to hide it for a presentation or screenshot. If you’re looking for a more permanent solution, continue reading this article to explore alternative methods.
Modify Your Registry
If you’re bothered by the persistent “Activate Windows” watermark on your desktop background, modifying your Windows Registry might offer a more permanent solution. By making changes to the Registry, you can potentially remove the watermark altogether.
To modify your Windows Registry and remove the “Activate Windows” watermark permanently, follow these steps:
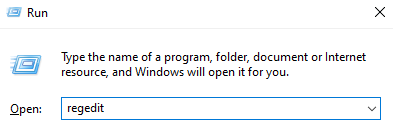
Step 1: Open the Registry Editor by pressing the Windows key + R on your keyboard. This will open the Run dialog box.
Step 2: Type “regedit” in the Run dialog box and press Enter. This will launch the Registry Editor.
Launch the Registry Editor
Step 3: Within the Registry Editor, navigate to the specified path: HKEY_CURRENT_USER\Control Panel\Desktop. You can do this by expanding the folders in the left-hand pane.
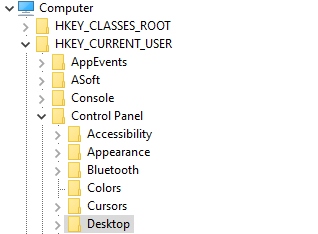
Navigate to The Specified Path
Step 4: Look for the “PaintDesktopVersion” entry on the right-hand side of the Registry Editor window.

Entry on The Right-hand Side of the Registry Editor
Step 5: Double-click on the “PaintDesktopVersion” entry to modify its value.
Step 6: In the Edit String dialog box that appears, change the value from “1” to “0”.
Step 7: Click OK to save the changes.
Step 8: Close the Registry Editor.
Step 9: Restart your computer to apply the changes.
After restarting your computer, check if the “Activate Windows” watermark has disappeared from your desktop background. If the watermark is no longer visible, congratulations! You have successfully removed it using the Registry modification method.
It’s worth noting that modifying the Registry is a sensitive task, and any incorrect changes can cause system instability or other issues. Therefore, it’s crucial to exercise caution and follow the instructions carefully. If you’re uncomfortable with making Registry modifications, it’s recommended to seek assistance from a knowledgeable individual or consider alternative methods to remove the watermark.
Change Ease of Access Settings:
If you’re seeking an alternative method to remove the “Activate Windows” watermark permanently, changing the Ease of Access settings might provide a solution. By adjusting these settings, you can potentially make the watermark vanish from your desktop background.
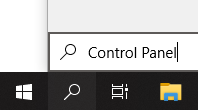
To remove the “Activate Windows” watermark by adjusting the Ease of Access settings, follow these steps:
Step 1: Right-click on your desktop and select “Personalize” from the context menu. This will open the Personalization settings window.
Select Personalize
Step 2: In the Personalization window, locate and click on the “Ease of Access” section.

Click on the Ease of Access
Step 3: Within the Ease of Access settings, find the “Show Windows background” option.

Find the Show Windows background Option
Step 4: Toggle off the “Show Windows background” option by clicking on the switch or checkbox next to it.

Show Windows Background Option
Step 5: Close the Personalization settings window.
Now, check if the “Activate Windows” watermark has disappeared from your desktop background. If the watermark is no longer visible, you have successfully removed it by changing the Ease of Access settings.
Note: It’s important to note that this method might not work for all Windows versions or configurations. If the watermark remains or reappears after a system restarts, consider exploring additional options.
Activate Your OS
If you’re seeing the “Activate Windows” watermark on your Windows operating system, it indicates that your copy of Windows is not activated or is using an invalid license. Activating your Windows OS is the recommended and most reliable way to remove the watermark. There are two primary methods to activate Windows: using a product key or utilizing a digital license. In this article, we will introduce these methods and guide you through the steps to activate your Windows operating system.
Activate Using a Product Key:
One way to activate your Windows OS is by using a valid product key. Follow these steps to activate Windows using a product key:
Step 1: Open the Settings app by clicking on the Start button and selecting the gear icon, or by pressing the Windows key + I on your keyboard.
Step 2: In the Settings window, navigate to “Update & Security.”
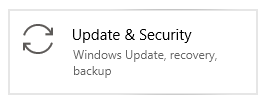
Click on Update & Security
Step 3: On the left-hand side, click on “Activation.”
Step 4: Under Activation, click on the “Change product key” option.
Step 5: Enter the valid product key in the provided field. The product key is a unique alphanumeric code that typically comes with a purchased copy of Windows.
Step 6: Follow the prompts and instructions to complete the activation process. Windows will verify the product key and activate your operating system accordingly.
Activate Using a Digital License:
If you upgraded to Windows 10 from a genuine copy of Windows 7 or Windows 8.1, or if you have a digital license linked to your Microsoft account, you can use the digital license for activation. Here’s how:
Step 1: Open the Settings app.
Step 2: Go to “Update & Security.”
Step 3: Select “Activation” from the left-hand menu.
Step 4: Under Activation, click on the “Troubleshoot” option.
Step 5: Choose the appropriate option based on your situation. For example, if you have a digital license linked to your Microsoft account, select the option to sign in with your Microsoft account.
Step 6: Follow the on-screen instructions to sign in with your Microsoft account and activate your Windows operating system using the digital license.
By following these activation methods, you can remove the “Activate Windows” watermark and ensure that your Windows operating system is properly licensed and activated. Activating your OS provides access to all features and updates, as well as a genuine user experience.
FAQs About Activate Windows Watermark
Here are some potential FAQs about the Activate Windows watermark.
Why does the Activate Windows 11 watermark keep coming back?
This is because the installation has not been fully activated with a genuine Windows product key and the activation state is still pending/non-genuine. The only permanent solution is to purchase a legitimate product key and fully activate the Windows 11 installation.
What are some non-removal methods to hide the watermark?
Using dark wallpapers, resizing the taskbar, or running Windows in a VM can help mask the watermark.
Does the Activate Windows watermark go away?
The Activate Windows watermark will not go away on its own after a period. The Activate Windows watermark will continue appearing until your Windows device is properly activated with a valid digital license.
Does Activate Windows show up in games?
The Activate Windows watermark will typically not be visible when playing full-screen games or applications on an unactivated Windows system. While the desktop watermark may theoretically still exist, the vast majority of full-screen games or video playback effectively cover it up and prevents distraction. The activation reminder is mostly experienced outside of gaming contexts.
Final Thought
The “Activate Windows” watermark indicates that your Windows operating system is not activated or is using an invalid license. To remove the watermark, it is recommended to activate your Windows OS using a product key or a digital license. By following the steps outlined in this article, you can activate your Windows operating system and enjoy the full functionality and features without the watermark. Remember to use a valid product key or utilize a digital license linked to your Microsoft account to ensure a legitimate and genuine activation.