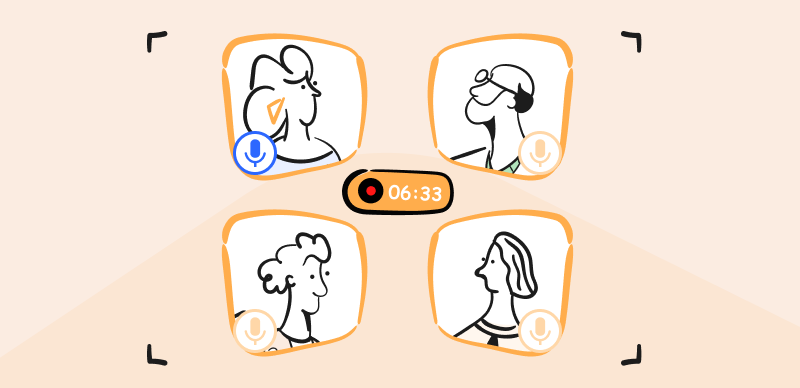
Technology has brought about significant changes in the way people communicate and work. In the past, meetings and seminars were typically held in physical meeting rooms or conference halls, requiring attendees to travel long distances and sometimes even across different countries. However, with the advent of virtual meeting tools, such as Zoom Meetings. People can now hold meetings and seminars virtually from their homes or offices, saving time and reducing costs associated with travel.
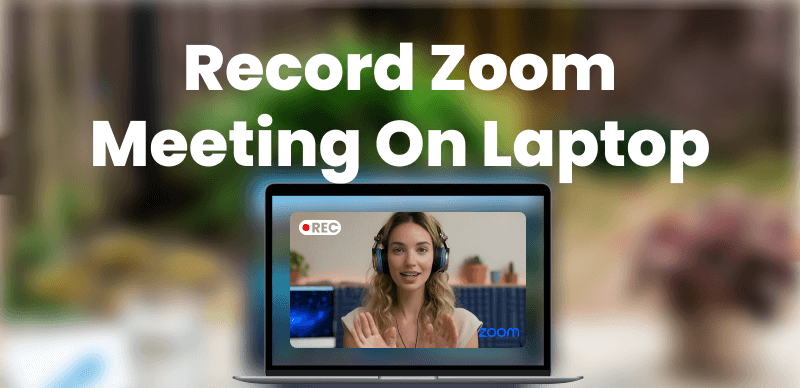
Record Zoom Meeting on Laptop
While online meetings have many benefits, there are times when it becomes necessary to record video meetings for future reference or to share them with others who were unable to attend. For instance, recording meetings can help to ensure that important discussions and decisions are not forgotten or to provide a record of a training session or presentation that can be revisited later. In this article, we will explore four different methods you can use to record Zoom Meetings and understand whether recording the meeting informs the host or not, so stick with us to learn more!
Table of Contents: hide
Can I Screen Record a Zoom Meeting without Host Knowing?
Screen Record a Zoom Meeting via FocuSee
Screen Record a Zoom Meeting via Gemoo Recorder
Screen Record a Zoom Meeting via Zoom Built-in Tool
Screen Record a Zoom Meeting via Xbox Game Bar
Can I Screen Record a Zoom Meeting without Host Knowing?
Are you unsure whether the host is notified when you record a Zoom meeting? Look no further! Zoom is a popular online video communication tool that allows users to hold meetings, webinars, and conferences from anywhere in the world. It offers a range of features such as screen sharing, virtual backgrounds, and breakout rooms that make online communication more engaging and interactive. Besides this, it offers several options for recording meetings, including local, cloud, and automatic recording, each with advantages and limitations.
Despite concerns raised by some individuals, does recording a meeting on Zoom as a participant notify the host? However, it is important to note that recording a meeting without obtaining the consent of all participants can be considered unethical. It is always recommended to ask for permission before recording a meeting to respect the privacy and rights of all attendees and ensure that the recording is stored securely and not shared with unauthorized individuals to maintain the confidentiality of the meeting’s content.
Screen Record a Zoom Meeting via FocuSee
FocuSee is a sophisticated screen recording tool that can serve as a powerful alternative to the built-in recording features of Zoom, especially for users looking to create more engaging and professionally edited videos from their meetings. You can also use FocuSee to record a Zoom meeting on your laptop if you are not the host.
Key Features of FocuSee as a Zoom Meeting Recorder
- FocuSee allows you to record a Zoom meeting on laptop as a participant without notifying other participants.
- FocuSee supports editing your Zoom meeting recordings by automatically applying dynamic zoom effects and generating video captions, which saves time and effort.
- FocuSee records your screen along with a selfie and voiceover to create more personal and engaging content from your Zoom meetings.
- FocuSee helps to add quizzes, forms, and call-to-action buttons within the video to increase viewer interaction.
- FocuSee customizes the appearance of your video with camera frames and filters to match your personal or corporate branding.
Step 1. Free download FocuSee and open it on your computer. Choose a recording mode
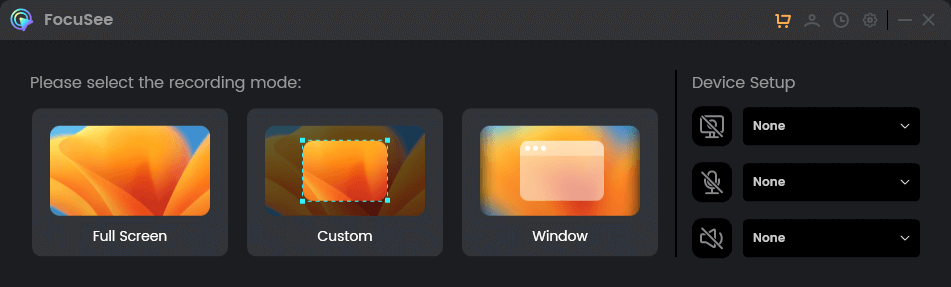
Choose a Recording Mode
Step 2. Open the Zoom meeting you attempt to record and click the REC button. When finish recording, tap the red Stop button. Then you will navigate to the video editing interface.
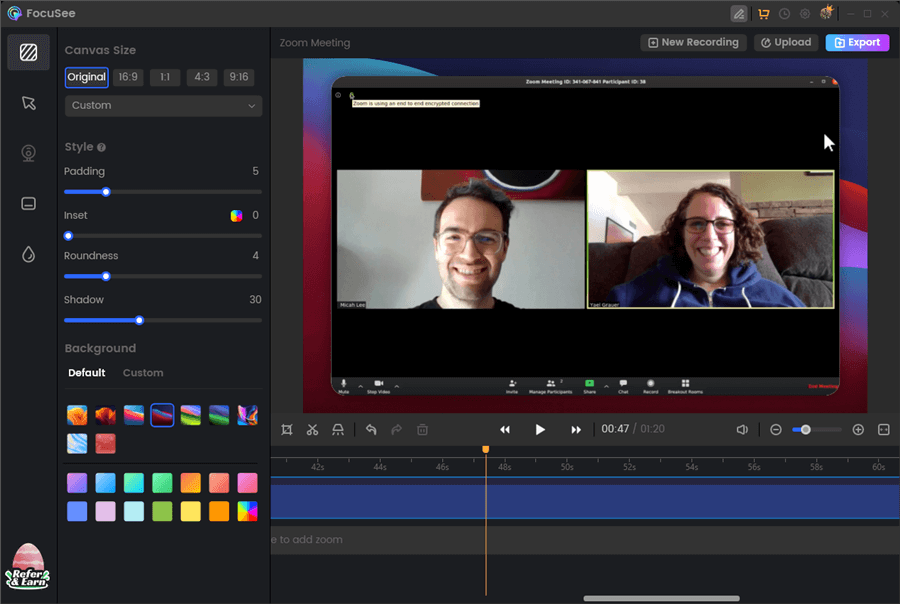
Record a Zoom Meeting
Screen Record a Zoom Meeting via Gemoo Recorder
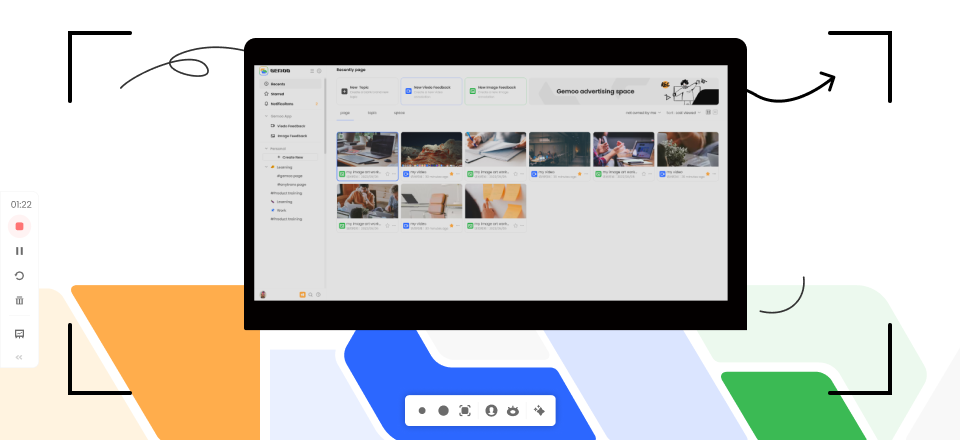
Gemoo Recorder is a professional screen recording tool that can capture audio and video from a computer screen. It is a software application that allows users to record their screen activities, including online meetings, webinars, games, and other types of content. It offers you a range of features when it comes to screen recording on comptuer, such as the ability to choose recording areas, audio sources, and recording quality. A big pro of this tool is that it is compatible with both Windows and Mac laptops. To screen record Zoom meetings via Gemoo recorder, follow these steps:
Step 1. Free install Gemoo Recorder and open and join and locate the Zoom meeting you wish to record.
Step 2. Select “Screen Only” and click the “Start Recording” button in Gemoo Recorder to start the recording process.
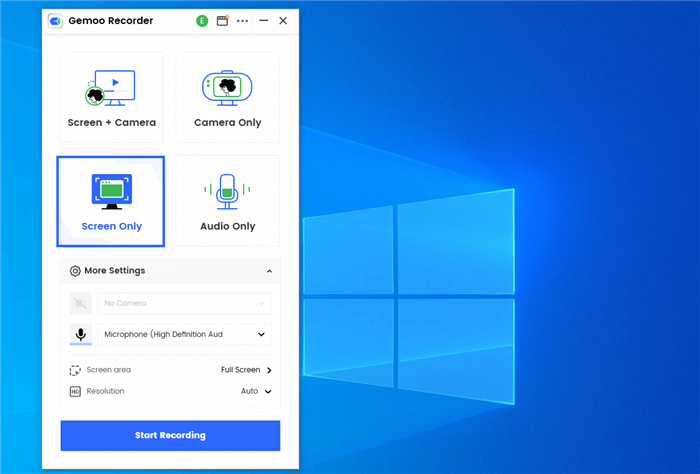
Screen Only Mode
Step 3. A three-second countdown will begin before the recording starts.
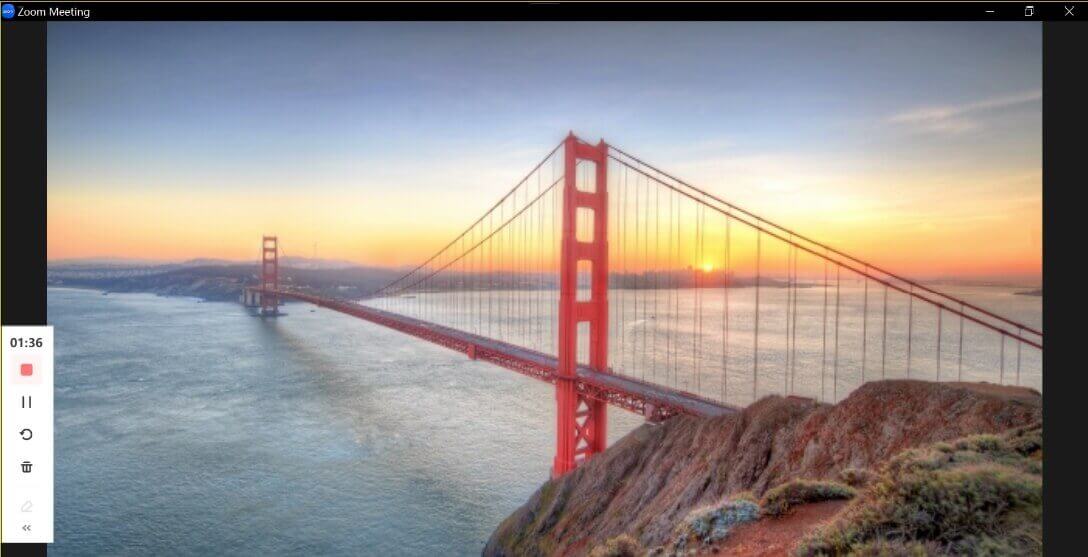
Zoom Meeting Recording via Gemoo Recorder
Step 4. To end the recording process, click either the red “Stop” option on the left menu or the “Complete Recording” button.
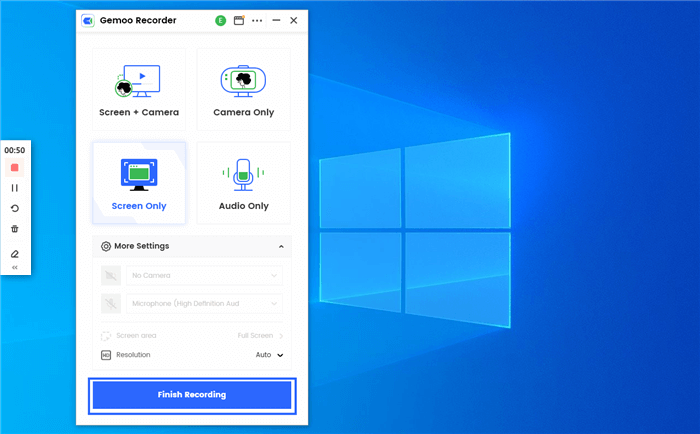
Finish Recording
Screen Record a Zoom Meeting via Zoom Built-in Tool
Zoom Local Recorder is a built-in screen recorder tool within the Zoom software that allows users to record meetings and webinars. It is available on desktop and mobile devices and offers various recording options, including computer audio, video gallery view, and active speaker view. The tool allows users to save their recordings as MP4 or M4A files and pause and resume them. Additionally, the Zoom Local Recorder allows users to pause and resume their recordings, making it a versatile and convenient tool for capturing Zoom meetings. To record meetings using this in-built Zoom recorder, follow these simple and quick steps:
Step 1. Start the Zoom meeting and join as a participant or host.
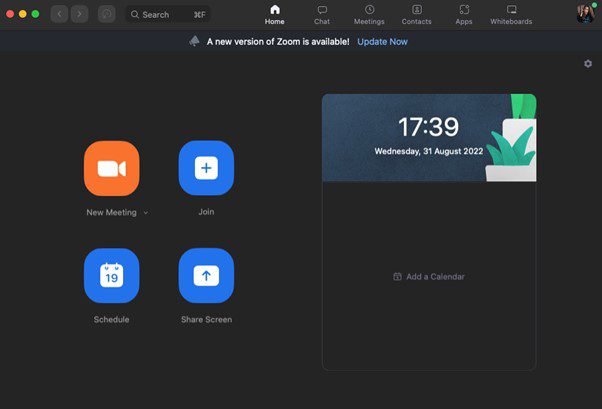
Start or Join a Meeting
Step 2. Once the meeting has started, click on the “Record” button at the bottom of the screen.

Click on the Record Button
Step 3. You can pause the recording by selecting the “Pause” button during the meeting.
Step 4. Once the meeting ends, click “Stop Recording,” and the recording will be stopped.
Depending on your preference, you can store the recording in the Zoom cloud remote servers or on your computer. If you select to store the recording on your computer, it will be saved to the location you specified during the recording process. If you store the recording in the Zoom cloud, it will be processed and available for download from the Zoom web portal.
Screen Record a Zoom Meeting via Xbox Game Bar
The Xbox Game Bar is a built-in feature in Windows 11 that allows gamers to access various tools and features while playing games on their computer. It is a pop-up overlay that appears on top of any game, providing quick access to tools and settings without exiting the game. Another feature of the Xbox Game Bar is that it can record Zoom meetings, allowing users to capture and save online meetings and webinars easily. This can be a useful tool for those who need to review meetings later or share them with others who were unable to attend using the below-mentioned steps:
Screen Record a Zoom Meeting via Xbox Game Bar
Step 1: Open your Windows settings and click on “Gaming” > “Game Mode,” and ensure that Game Mode is enabled.
Step 2: Open Zoom and join the meeting you want to record.
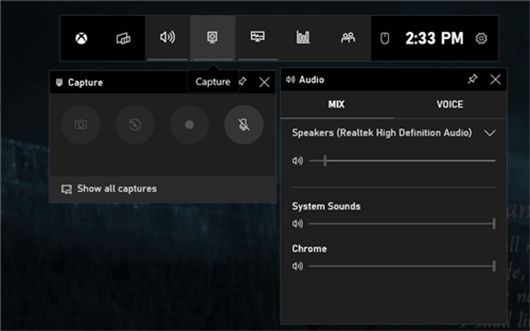
Step 3: Press the “Windows” + “G” keys on your keyboard to open the Xbox Game Bar. From there, click on the “Capture” icon and then on the camera icon to start recording the Zoom meeting.
Step 4: To stop recording, click on the stop button in the recording bar or press “Windows” + “ALT” + “R” on your keyboard.
The recording location will depend on your chosen settings. You can check the location of the recording by going to the “Captures” folder in your default “Videos” folder. Alternatively, you can choose a different location to save your recordings in the Xbox Game Bar settings.
Screen Record a Zoom Meeting via Quick Time Player
QuickTime Player is a media player application that comes pre-installed on all Mac devices. It is primarily used to play video and audio files, but it also has a screen recording feature that allows Mac users to record their screen activity, including Zoom meetings. Mac users can get the most out of QuickTime Player’s features by exploring its different settings and preferences. They can also customize their screen recording settings, such as choosing the audio source and selecting a portion of the screen to record, which can be useful in recording Zoom meetings using the easy and quick below-mentioned steps:
Screen Record a Zoom Meeting via Quick Time Player
Step 1. On your Mac, open QuickTime player.
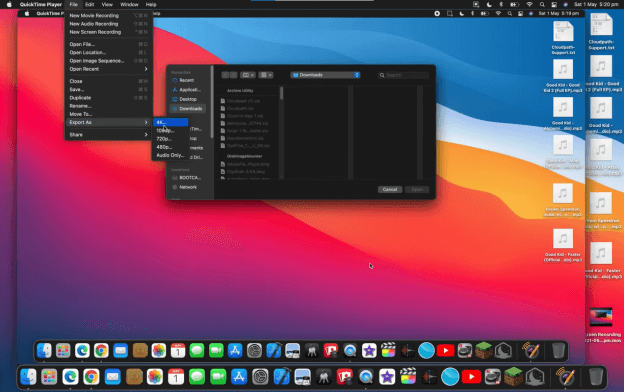
Step 2. Create a new meeting on Zoom or join an existing one and click “File” > “New Screen Recording.”
Step 3. Select audio options and recording area, then hit the “Record” button to start the recording process.
Step 4. To stop recording, press “Command + Ctrl + Esc.” Another way to do it is by clicking the red recording icon.
When using QuickTime Player to record a Zoom meeting on MacBook, the default location for the recording is the desktop. However, if you wish to save the recording in a different specified location, you can select the required destination when setting up the screen recording. This feature provides flexibility for users who prefer to organize their files in a particular way or want to save the recording to a different folder for easy access later on.
Faqs about Recording Zoom Meeting
Are you still ambiguous? Worry no more, as this section will answer some of the commonly asked questions to help you understand and fill any gap left regarding recording Zoom meetings, so let us not wait anymore and jump into the questions:
Can participants record a Zoom meeting?
In Zoom meetings, only the host can initiate a Local Recording. If another member wishes to record the meeting, they must obtain permission from the host during the meeting. The host must be present in the meeting to provide recording permission to a participant or appoint them as an alternate host. Users with meeting scheduling capabilities will instantly join as an alternate hosts and can start the recording.
Can I use Zoom to record a video of myself?
Yes, you can use Zoom to record a video of yourself. To do this, you’ll need to start a Zoom meeting or use the virtual room feature. Once you’re in the meeting, click on the ‘Record’ button located at the bottom of the Zoom window, which will initiate the recording process. You can choose to record the entire meeting, which includes your video, any shared screens, and audio, or select a specific active speaker view. When you finish recording, end the meeting or stop the recording manually, and the recording will be saved to your designated local folder or to the Zoom cloud if you have a subscription that includes cloud recording. It’s important to note that you should have a stable internet connection and sufficient storage space to accommodate the video file, as recording a video can consume considerable resources.
How long can I record a Zoom meeting?
The length of time you can record a Zoom meeting depends on the type of Zoom account you have. If you have a free Zoom account, you can only record meetings less than 40 minutes long. However, you can record meetings over 40 minutes with a paid Zoom account.
For example, if you have a paid Zoom account and need to record a meeting that will last an hour, you can do so without any issues. On the other hand, if you have a free Zoom account and need to record a meeting that will last for an hour, you will need to end the meeting before the 40-minute mark and start a new meeting to continue recording.
How do I download a Zoom recording to my laptop?
To download a Zoom recording to your laptop, you should first ensure that you have the necessary permissions if the meeting was not hosted by you. If you have the authority, follow these steps:
1. After the meeting, go to the Zoom web portal and sign in to your account.
2. Navigate to the ‘Recording’ tab where you’ll find the list of your recordings.
3. Select the meeting you wish to download, and you’ll see options to play, download, or share the recording.
4. Click on the ‘Download’ button, and the recording will be saved to your computer, typically in your Downloads folder or the location you specify.
5. For video recordings, Zoom provides a .zip file that contains the recording file, supplementary files, and a text transcript.
Ensure that your laptop has enough storage space to accommodate the file, as recordings can be quite large, especially for long meetings.
Can I edit a Zoom recording?
Yes, you can edit Zoom recordings within the app. It provides some basic editing features for recorded meetings, including trimming the video playback range and adding a watermark. Users can use Zoom’s built-in video editor to modify the playback range of their recording by choosing the recorded meeting they want to edit and clicking the play button on the video.
All you need to do is choose the scissor icon and drag to select a particular area. Additionally, Zoom’s audio transcription option can automatically caption the video recording, making it more accessible to viewers who are deaf or hard of hearing. Top of Form
How do I share a Zoom recording?
To share a recorded Zoom meeting, open the cloud settings and navigate to your desired meeting recording. Click on the “Share” button located on the page of the recording you want to share. Customize your sharing preferences as needed. Then, select “Copy Sharing Information” and proceed to the email or platform where you want to share the cloud recording and paste the sharing information.
Final Thought
In conclusion, Zoom meeting recordings are essential for future reference and productivity. Recording your Zoom meetings can provide valuable information and insights you can revisit anytime, whether for work, school, or personal use. This article has provided in-depth information on four different methods to help you know how to record Zoom meetings, along with easy-to-follow steps. By following these steps, you can ensure that your Zoom meetings are recorded accurately and efficiently. If you found this article helpful, please share it with your friends and colleagues, and leave us your valuable feedback.