Zoom’s recording feature is a powerful tool that allows users to capture meetings, webinars, and other virtual sessions for later review or sharing. Whether you’re a host looking to access your recordings, recording a Zoom meeting as a participant, or the one hoping to view a recording shared by the host, knowing how to access Zoom recordings is crucial.
How to Access Zoom Recordings
This guide will walk you through the process of locating and managing your Zoom recordings, both for local files stored on your computer and for cloud recordings saved on Zoom’s servers. We’ll cover the steps to access these recordings, how to share them with others, and what to do if you encounter any issues along the way. Let’s dive into the world of Zoom recordings and ensure you never miss out on the content that matters.
Do Zoom Recordings Automatically Save?
Where Can I See My Zoom Recordings?
How to Access a Zoom Meeting Recorded by Someone Else?
Yes, Zoom recordings are designed to be saved automatically, but the process and the location where the recordings are saved depend on the settings and the specific type of Zoom account you have.
Do Zoom Recordings Automatically Save
Here’s how Zoom recordings are typically handled:
Where you can see your Zoom recordings depends on whether you have chosen local recording or cloud (Zoom) recording during the meeting. Here’s where to find each type:
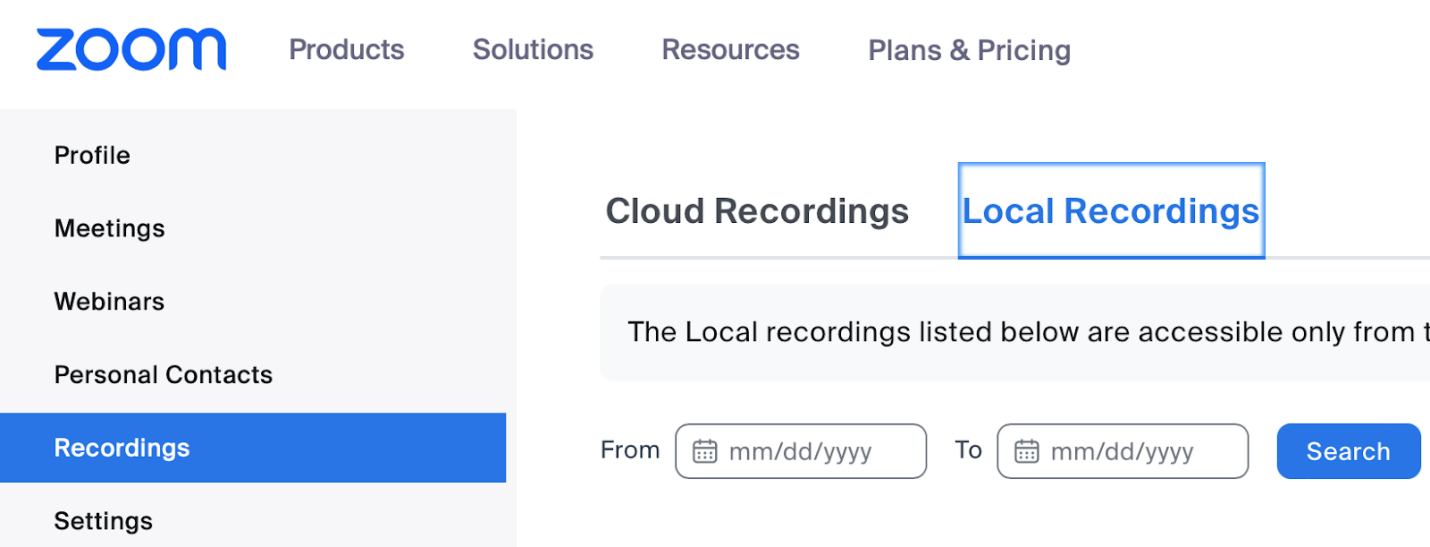
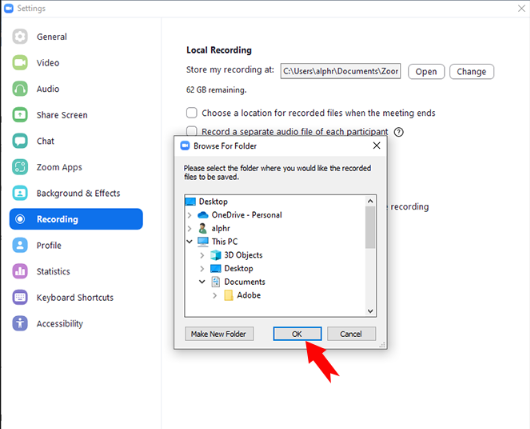
See Zoom Local Recordings
If you or the host selected local recording, the video file is saved directly onto the computer where the recording was started. Here’s how to find it:
If cloud recording was chosen, the recording is saved to the Zoom cloud, and you can access it through the Zoom web portal:
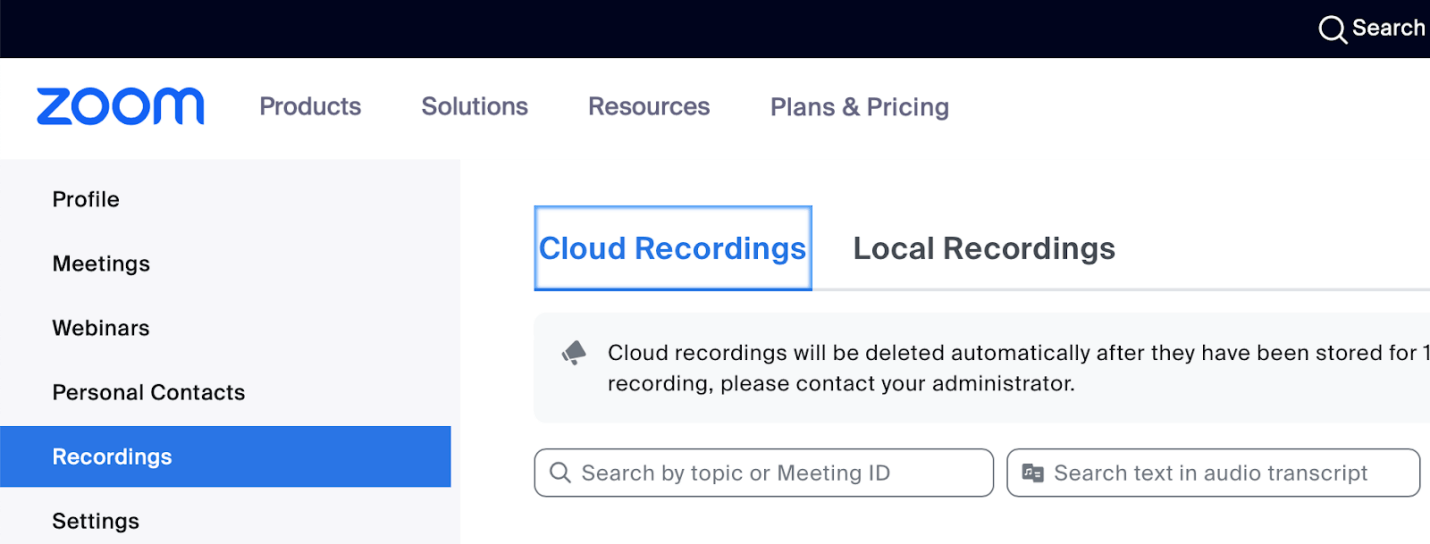
See Zoom Cloud Recordings
Accessing a Zoom meeting recorded by someone else depends on the permissions set by the meeting host or the person who started the recording.
Here are the general steps you would follow:
1. Receive the Invitation: The host or the person who has the recording should invite you to view the recording. They can do this by sharing a direct link to the recording or by sending an email with the link.
2. Click the Link: If you receive a link, simply click on it to be taken to the Zoom recording.
3. Zoom Web Portal: If you are given access through the Zoom web portal, you will need to log in to your Zoom account at https://zoom.us/signin.\
4. Recordings Tab: Once logged in, navigate to the “Recordings” tab on the left-hand side menu.
5. Access the Recording: The host may have uploaded the recording to the “Shared Recordings” section, where you can view it if you have been granted access.
6. Download or View: Depending on the permissions, you may be able to view the recording directly in your web browser or download it to your local storage.
7. Password Protection: If the recording is password-protected, you will need to enter the correct password to access it.
8. Streaming or Downloading: For recordings stored in the cloud, you may have the option to stream the recording online or download it to your computer.
9. Check Your Email: Sometimes, the host may send the recording or the link to the recording via email. Check your inbox, and if the email has been sorted into a different folder, check those as well.
10. Ask the Host: If you are unable to access the recording, contact the meeting host or the person who started the recording for assistance.
Remember that the host has full control over who can access the recording. If you believe you should have access but do not, you will need to follow up with the host to request access. Additionally, always respect the privacy and confidentiality of meeting recordings and use them only for their intended purpose.
If your Zoom recording is not showing up, there could be several reasons for this issue. Here’s a checklist to help you troubleshoot:
Remember to always follow your organization’s guidelines regarding the recording and sharing of meeting content to ensure compliance with privacy and security policies.
While Zoom itself offers a built-in recording feature, you may need a third-party screen recorder to enjoy more advanced video recording features. One such screen recorder that is well-regarded for its functionality and ease of use is FocuSee. Since FocuSee supports high-quality video with webcam and audio recording, it can capture your Zoom meetings in great detail.
FocuSee sets itself apart from other screen recording software by offering a unique auto zoom-in feature that responds to your mouse movements and clicks. This effect allows for a closer look at the actions on the screen, enhancing the viewer’s understanding of the content being recorded. Additionally, FocuSee provides a convenient tool for auto subtitles generation. This feature not only aids in making your videos more engaging but also ensures that your content is accessible to a wider audience, including those who are hearing impaired or prefer to watch videos with subtitles.
Step 1. Free install FocuSee on your computer. Navigate to the Zoom platform and join the meeting you intend to record.
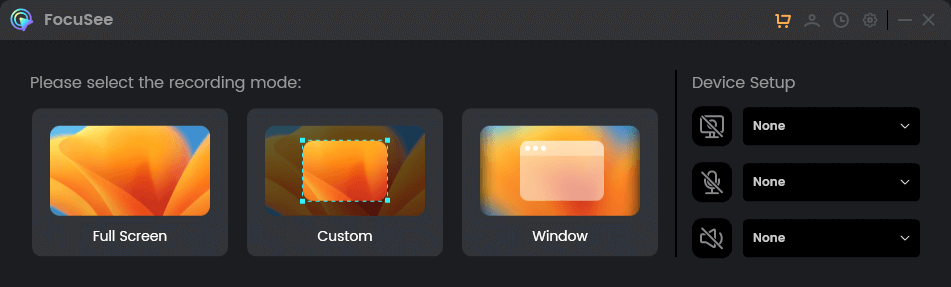
Choose a Recording Mode
Step 2. Click the Custom or Window option to get started. Frame or identify the specific Zoom meeting window that you want to capture. Once you’ve confirmed that you’re in the correct meeting and are ready to begin, initiate the recording process.
Frame an Area to Record
Step 3. Click the red Stop icon when finished recording. Then go to the video editing interface to make any adjustments or enhancements to your video content.
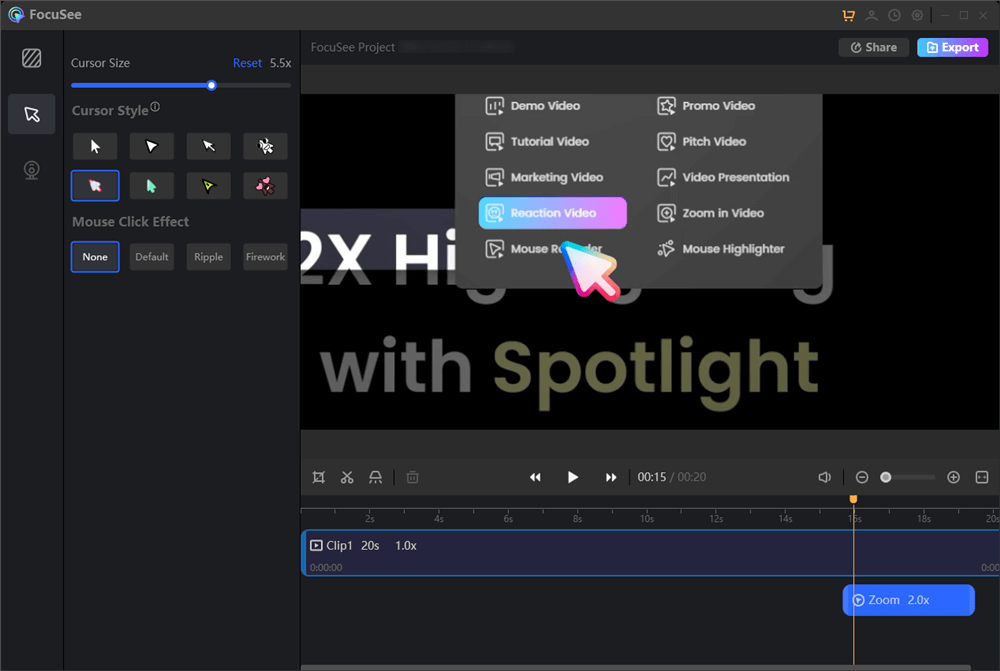
Edit Your Recording
Before you proceed to record a Zoom meeting, it’s essential to verify who has the authority to do so. In Zoom, recording capabilities are reserved for the host of the meeting. If you are not the designated host, you must seek permission from the host and ask them to initiate the recording process. This step ensures that all participants are aware of and consent to the recording, maintaining a respectful and compliant approach to capturing the meeting’s content.
In conclusion, accessing Zoom recordings is a straightforward process that involves a few simple steps, whether you’ve chosen local storage or cloud recording. For local recordings, head to the designated folder on your computer, while for cloud recordings, log into your Zoom account and navigate to the ‘Recordings’ section. Remember, as a participant, you’ll only be able to access a recording if the host has permitted you to do so.

FocuSee
Do Zoom Recordings Automatically Save?
Where Can I See My Zoom Recordings?
How to Access a Zoom Meeting Recorded by Someone Else?
Why Is My Zoom Recording Not Showing Up?
Bonus Tip. How to Record Zoom Meeting?
Final Thought


