Compared to written and recorded speech, the impact of visual communication is much greater. That’s why videos beat out podcasts and website reading in popularity among internet users. People today use webcams to record videos they share on various online platforms, such as social media and video-sharing sites. Companies also use video messaging to communicate with employees and partners.

How to Record Webcam on Mac
Knowing how to capture video with a webcam on a Mac is essential to create videos using your Mac. Full-screen and split-screen (or “Picture-in-Picture”) video of your face and the screen may be recorded. However, if you’re unaware of how to Record Webcam Mac, we’ve got you covered. In this article, you’ll discover the finest methods to record a webcam on your Mac. Let’s dive into the details!
Record Webcam Videos with FocuSee
FocuSee is a top-notch screen recording and video capturing software that should be considered for both Windows and Mac users. It is a highly professional and meticulous tool that offers a range of features necessary for screen recording, including simultaneous recording webcam, customizable screen recording area, and more. With its extensive video editing tools and elements, FocuSee enables users to create captivating and engaging videos with ease.
To record a webcam on a Mac using FocuSee, follow the steps below:
Step 1. Launch FocuSee on your computer > Enter your account and password to create an account, or log in to FocuSee.
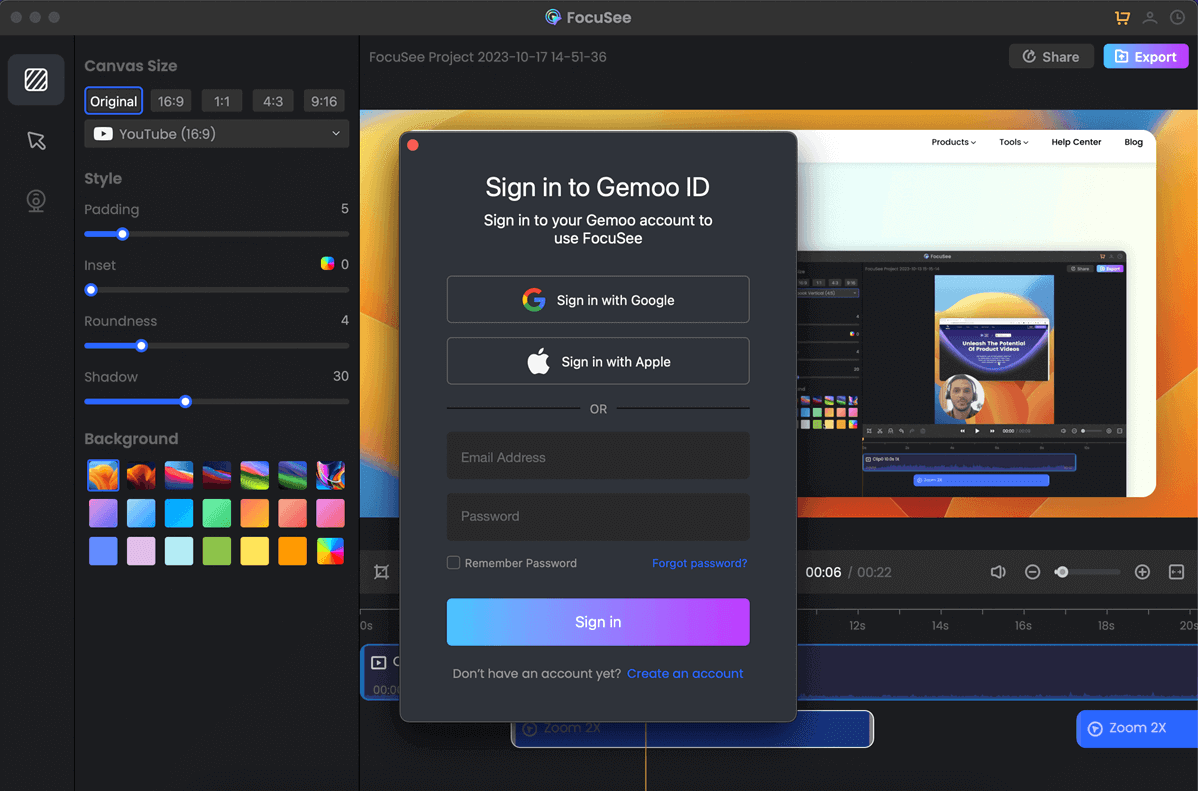
Sign in to FocuSee Account
Step 2. Choose from FocuSee’s 3 screen recording options. Adjust the audio and camera settings in the Device Setup, and start recording.
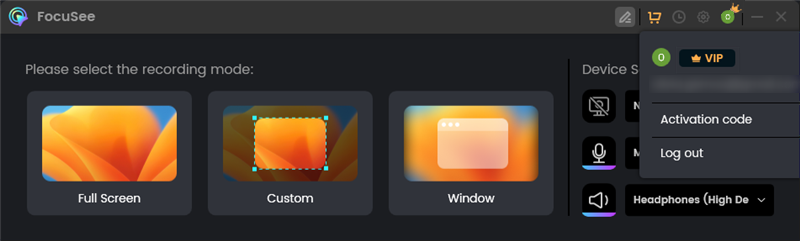
Three recording Modes
Step 3. After recording, you can flexibly further customize the output by changing the background, adjusting the cursor style, adding captions, editing zoom effects, and applying other enhancements to create a refined, professional video.
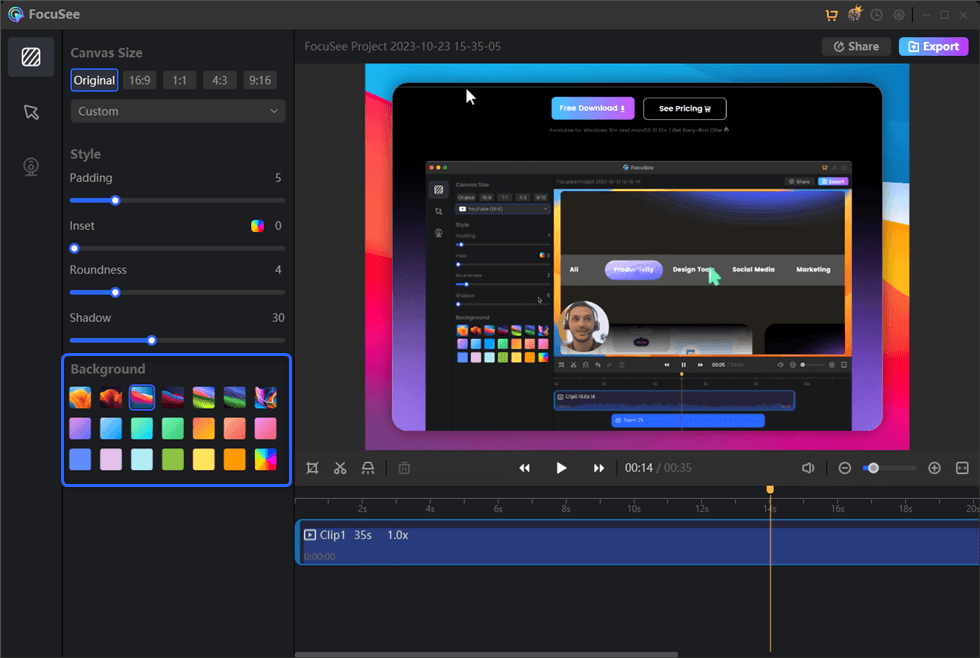
Change out a Virtual Background
Step 4. Export the recorded video as an MP4 or GIF file, or easily share it via a link.
Record Webcam Videos via a Booth
The first tool for recording webcams on Mac is the Photo Booth. Apple Macintosh computers come equipped with a fun and simple photo editing program called Photo Booth. The iSight camera or an external webcam may capture still images and video. Photos and videos may be given a creative boost with the app’s many available filters and effects. Users may also upload material to social networking platforms like Facebook, Twitter, and Flickr without leaving the app. Vintage, black and white, comic book, and other effects are available to the user.
The user may apply these effects in real-time as they capture a picture or record a video, giving them a quick preview of the finished product before they commit to storing or sharing it. In addition, users may fine-tune their effects by tweaking the brightness, saturation, and other parameters. In addition to taking images, it records films that can be edited with the same filters and effects. The software also has a function that lets users take photographs at regular intervals to compile them into a time-lapse movie. The resultant film is sped up, creating a cool and novel viewing experience.
To understand how to record a webcam on Mac using the built-in Photo Booth app, follow the steps below:
Step 1: Go to the Applications folder on your Mac and find the Photo Booth. Once found, click on the Photo Booth icon to launch.
Step 2: Now, if you’re using an external webcam, make sure it’s connected properly. Click on the Record Video button to proceed.
Step 3: After that, click on the Video icon in the bottom middle to start recording once you’ve adjusted.
![]()
Step 4: Once done with the video, click the Stop button to stop recording the webcam. After that, you can click on Share to share the recorded video or click on Export to export the recording.
Record webcam video in iMovie
Another built-in method for recording webcams on Mac is iMovie. iMovie is a popular video editing program used by companies of all kinds for sifting through media and generating original films. Using pre-made templates, users can quickly create unique trailers to distribute on the web. iMovie is intended to be user-friendly, so even those with little prior experience with video editing may produce high-quality finished product videos. Video effects, transitions, titles, and soundtracks are just some tools available in iMovie for editing and improving your films. The sound may be turned up or down, and music can be added from the user’s iTunes library, both of which can be done while the video is playing.
Fonts, colors, gradients, patterns, and logos may be modified for use in iMovie projects by teams. Users have access to a wide variety of editing tools, such as choosing tunes, adding voice-overs for narration, cutting and pasting footage, adding images, and applying filters. Create professional-quality videos in 4K HD using iMovie’s streamlined interface and special effects like split screen, picture-in-picture, and green screen. Importing content from devices like cameras, mobile phones, and external hard drives is a breeze with iMovie. Media may be imported into a project and then placed on the timeline for editing. In addition to saving the video locally, you may upload it to sites like YouTube, Vimeo, and Facebook.
To record a webcam on Max using the built-in video editor iMovie, follow the steps below:
Step 1: Launch iMovie by accessing the Applications folder and clicking the iMovie icon. Select New Movie from the dropdown after clicking on File from the above menu.
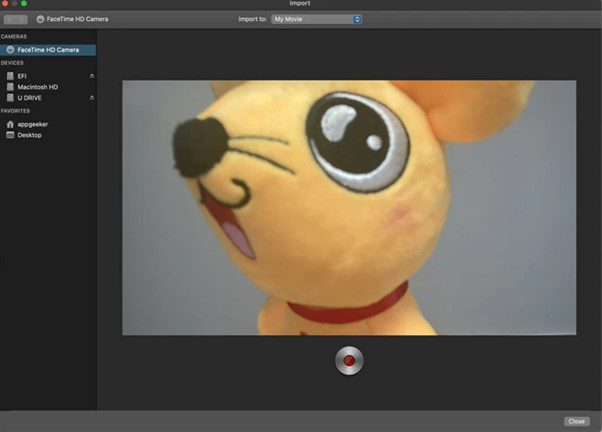
Step 2: Now, select the Import option by clicking the down arrow. In the Camera at the top left, click FaceTime HD Camera and approve the camera access if you’re using iMovie for the first time.
Click on Side Arrow
Step 3: After that, click on the Import option to import the project and then click on the Record button to start recording your webcam video on iMovie.
Step 4: To finish recording, click the Record button again and close the recording window. You can find your recorded video in the Project section.
Click on Stop Button
Also read:
Record Webcam on Mac with Quick Time
Apple’s QuickTime Player is a well-known and simple media player. This media player application has increased in popularity among Mac users because of its ability to open and play practically any media file, including AIFF, WAV, DV-DIF, MP3, MPEG, and many more. In addition to video files, it can play back audio and music files. Video and audio files and still images may be played with QuickTime Player. The application also supports streaming media, so users can watch their favorite programs as they broadcast online.
QuickTime Player enables users to change a video’s file size, quality, and compression to make it viewable on several devices. Capture your whole screen or just a specific section of your screen while breaking up a video or movie into smaller chunks. It accepts a variety of pictures, video, and panoramic file formats. QuickTime Broadcaster can transmit both live video and your favorite online games.
To understand how to record a webcam on Mac using the QuickTime Player or how to stop your recording, follow the steps below:
Step 1: Open QuickTime Player on your Mac and click on File from the top menu. In the dropdown menu, click on New Movie to proceed.
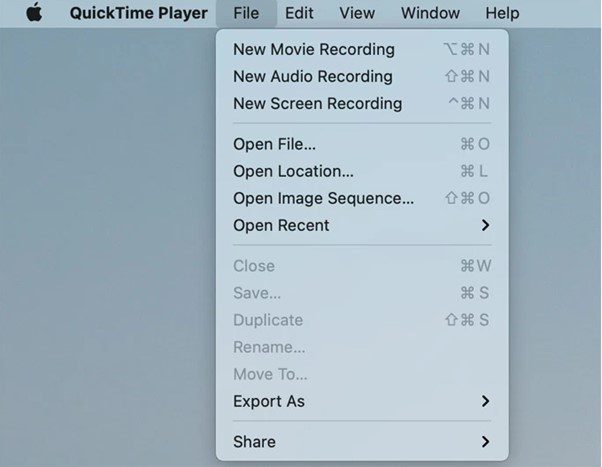
Click on New Movie
Step 2: Click the side arrow next to the red record button and select the FaceTime HD Camera option. After that, select the Record button to start recording yourself.
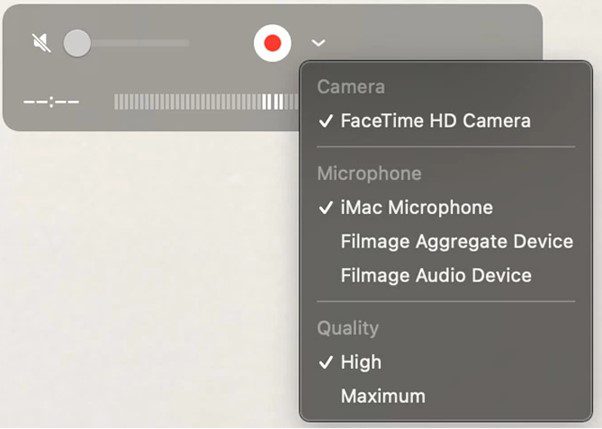
Click on FaceTime HD Camera
Step 3: Once done with the recording, you can click the Stop button to stop the recording and then preview the recording. You can also edit the recording using the provided editing tools in iMovie.
Step 4: Go to the File menu again and click Save to select the folder you wish to save the recorded webcam video on your Mac.
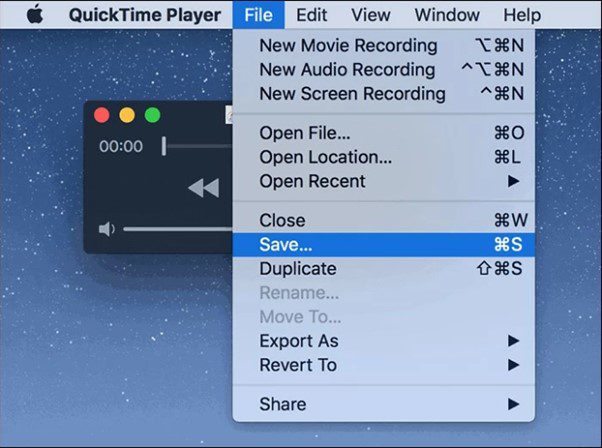
Click on Save
Final Thought
Everyone knows how to record videos on Mac, but the problem comes when you need to record yourself using a webcam. Since not many people know it and visual communication has become essential, it becomes annoying and makes people wonder how to Record Webcam Mac. And we hope you’ve found the ways after reading this article. Moreover, if you’re using any other method or finding issues in recording webcams on Mac in the above methods, please share with us in the comments.
