How to Screenshot a Website on Mac? A Complete Guide

Taking a screenshot on a Mac can be incredibly useful for a variety of reasons, whether it’s for capturing a website for research, sharing important information, or preserving a design. If you’re wondering how to screenshot a website on your Mac, you’re in the right place. This guide will walk you through all the different methods available, offering step-by-step instructions and tips for getting the best screenshot possible.
1. Why Take Screenshots on Mac?
Screenshots are incredibly versatile tools that make it easy to capture and share important information. On a Mac, you have the flexibility to screenshot an entire website, a specific section, or a window, which can be invaluable for various purposes.
- Research: Capture key website elements for research, analysis, or review.
- Sharing: Quickly share valuable web content with colleagues or friends.
- Preservation: Save critical online data or design elements for future use.
- Troubleshooting: Share error messages or interface issues with tech support.
2. Different Ways to Take Screenshots on Mac
Before diving into specific methods for capturing websites, let’s first understand the general ways you can take screenshots on a Mac.
2.1 Capture Entire Screen
One of the most common screenshot options is capturing the entire screen. To do this, press Command + Shift + 3. This will instantly take a screenshot of everything visible on your screen, including your browser window. The image will be saved to your desktop by default.
2.2 Capture a Selected Portion of the Screen
If you want more control over what you capture, you can select a specific portion of your screen. Press Command + Shift + 4 to activate this option. Your cursor will change to a crosshair, and you can click and drag to select the area you want to capture. Once you release the mouse button, the screenshot will be saved to your desktop.
2.3 Capture a Specific Window
To capture a specific window (like a website in a browser), press Command + Shift + 4, then tap the Spacebar. This changes the crosshair into a camera icon. Now, click the window you want to capture, and the screenshot will be taken instantly.
3. How to Screenshot a Website on Mac: Using Built-in Features
MacOS offers several built-in options to take screenshots. Let’s look at how to use them effectively to capture a website.
3.1 Using Command + Shift + 4
If you are working with a portion of a webpage and want to capture a specific area (like a part of an article or image), press Command + Shift + 4. Drag the cursor to select the area, and release to capture the screenshot. This is a quick and easy method for smaller portions of a website.
3.2 Using Command + Shift + 5
For more control over your screenshot options, Command + Shift + 5 brings up an on-screen toolbar. From here, you can:
- Capture the entire screen
- Capture a selected portion of the screen
- Record the screen (video capture)
This tool allows you to choose where to save the file and provides an option to either save it to the desktop or clipboard. You can also set a timer for the screenshot, which is ideal if you want to set up something on the screen before taking the shot.
4. How to Screenshot a Website on Mac: Using Third-party Apps
While Mac’s built-in screenshot tools are useful, there are third-party apps that offer additional functionality and can be ideal for capturing a website with more complex needs, like scrolling captures.
4.1 Using Snagit for Mac
Snagit is one of the most popular screenshot tools for macOS, especially when it comes to capturing long or scrolling websites. Here’s how it works:
- Download and install Snagit from the official website.
- Launch the app and choose the All-in-One capture option.
- Snagit will allow you to select the area you want to capture and will automatically scroll the website, capturing the entire page.
This method is great for websites with long content that doesn’t fit entirely on the screen. Snagit also comes with powerful editing tools to annotate and modify your screenshot.
4.2 Using Lightshot for Mac
Lightshot is another powerful screenshot tool that works well for capturing both images and text from a website. Once you install Lightshot:
- Press the PrtSc (Print Screen) button or use the shortcut Command + Shift + 9.
- Select the area of the website you want to screenshot.
- Once captured, you can immediately edit, share, or save the image to your desired location.
Lightshot is lightweight and quick, making it a good choice for people who want a simple yet effective tool for website screenshots.
4.3 Using Gemoo’s Online Screenshot Editor
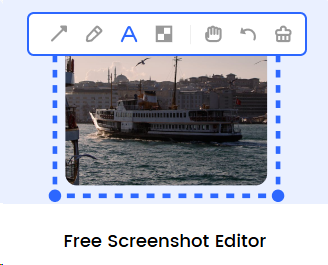
For users who prefer a browser-based solution, Gemoo’s Screenshot Editor offers a seamless way to capture and edit screenshots directly online. This tool is ideal for those who need quick annotations, text overlays, or cropping without installing software. Here’s how to use it:
- Visit the Gemoo Screenshot Editor in your browser.
- Upload your screenshot or use the tool’s capture feature to take a new one.
- Edit the image with text, shapes, or highlights, then save or share it instantly.
This tool is perfect for collaborative projects or quick edits on the go.
5. Capturing a Full Website: Scrolling Screenshots
If you need to capture a full webpage, including content that requires scrolling, the process becomes a little more complicated. Fortunately, there are methods and tools available for this.
5.1 Using Safari’s Built-in Tools
If you’re using Safari on macOS, you can capture a full webpage directly through the browser. Safari has an integrated screenshot tool that allows you to save an entire webpage as a PDF, but it also supports saving full-page screenshots:
- Open the webpage you want to capture in Safari.
- Press Command + Shift + 4 and select the entire window.
- In the options that pop up, select the “Full Page” option. This will capture the entire webpage, including the parts that aren’t currently visible.
5.2 Using Chrome Extensions
For Chrome users, there are several extensions available that make scrolling screenshots easy. A popular one is GoFullPage, which allows users to capture entire webpages by scrolling automatically. Here’s how:

- Install GoFullPage from the Chrome Web Store.
- Navigate to the webpage you want to capture.
- Click the GoFullPage extension icon in your browser toolbar.
- The extension will automatically scroll through the webpage, capturing the entire page and saving it as an image.
5.3 Using Third-party Screenshot Apps
In addition to the built-in methods and browser extensions, third-party apps like Snagit and Awesome Screenshot can also be used to capture full, scrolling websites. These apps allow you to capture an entire website with a single click and save it as an image or PDF.
6. Tips for Better Screenshots on Mac
To make the most out of your website screenshots, here are a few tips:
- Use High-Resolution Screenshots: For crisp, clear screenshots, ensure your screen’s resolution is set to the highest setting.
- Use Editing Tools: After capturing a screenshot, you can use editing tools like Gemoo’s Screenshot Editor to crop, highlight, and annotate images directly in your browser.
- Organize Screenshots: If you frequently screenshot websites, create a dedicated folder to store your captures for easy access.
- Take Multiple Shots: For complex websites, consider taking several screenshots and combining them in a document or image editor.
Conclusion
Capturing a screenshot of a website on a Mac can be done quickly and efficiently with both built-in tools and third-party apps. Whether you’re using the native Mac shortcuts, installing a specialized app like Snagit, or editing images with Gemoo’s Online Screenshot Editor, the process is simple, and the results are highly customizable. Remember to use these tools to their full potential to ensure you capture high-quality, professional screenshots every time.
By following this guide, you’ll be able to capture entire websites, selected portions, or specific windows on your Mac, enabling you to share, preserve, or analyze web content with ease.
FAQs
Can I capture a screenshot of a website with a Macbook Air?
- Yes, all of the methods outlined above work on all Mac models, including the MacBook Air.
How do I capture a scrolling webpage on my Mac?
- Use a third-party app like Snagit, browser extensions like GoFullPage, or Gemoo’s Screenshot Editor for scrolling screenshots.
Where are my screenshots saved on my Mac?
- By default, screenshots are saved to your desktop. You can change the location through the screenshot toolbar (Command + Shift + 5).
Can I edit my screenshot after taking it?
- Yes, you can edit screenshots using Preview, Snagit, or online tools like Gemoo’s Screenshot Editor.
Is there a way to screenshot a website on my Mac without installing any apps?
- Yes, Safari and Chrome offer built-in features or extensions to capture full webpages without third-party apps. For quick edits, try browser-based tools like Gemoo’s Online Editor.