How to Remove Background Noise in OBS Studio?

OBS Studio is widely recognized as one of the best software options for recording computer screens. When we launch the OBS studio application for the first time and begin recording, the software also records the surrounding area. The video’s backdrop is irrelevant to the primary recording; thus, it should be trimmed to improve the audio.
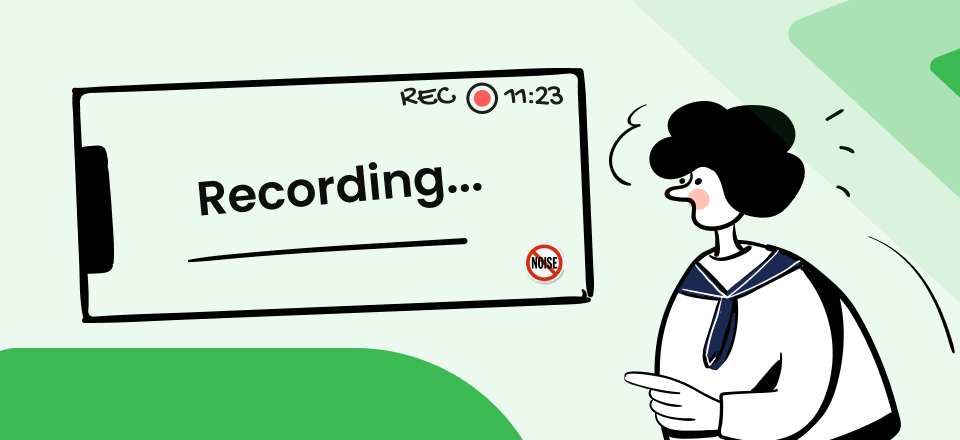
Remove Background Noise in OBS Studio
Nonetheless, the program has several high-end features, such as an audio mixer with per-source filters, to help you get superior results, whether streaming or recording. You may use it either for OBS background noise removal or entirely or significantly for lowering its volume. Let’s have a look at how to remove background noise in OBS.
Also read: Remove Background Music from Video >
Table of Contents: hide
Does OBS Have Noise Suppression?
Remove Background Noise via Noise Suppression
Does OBS Have Noise Suppression?
Yes, OBS does feature a noise suppression OBS filter. If you are in a loud location, you will require “Noise Gate” and “Noise Suppression” to eliminate or significantly lessen the number of annoying noises. White noise and other background noise may be removed from your audio sources by using the Noise Suppression OBS filter.
This filter can be applied to any of your audio sources. Although this strategy is often ineffective at lowering huge volumes of background noise (for example, in a room with a lot of people talking), it may be fairly good at reducing the loudness of other environmental sounds, such as reducing background noise on mic. There are two approaches to eliminating background noise: RNNoise, which provides higher quality at the expense of increased GPU utilization, and Speex, which produces lower quality at the expense of reduced GPU utilization.
How to Remove Background Noise in OBS Studio via Noise Suppression?
The OBS’s sound may be adjusted via the application of filters. The software, to its credit, is equipped with a few filters dedicated only to noise reduction.
Step 1: To add a filter, go to the Audio Mixer area, click on the gear that says Settings, and then from that menu, choose the Filters option.
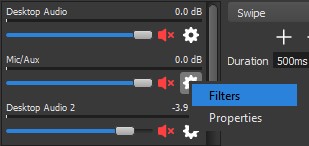
Click on Filters
Step 2: The Filters will now be visible. There are eight different filters available for use with OBS. Two famous filters include the Noise Suppression and Noise Gate, which are designed to reduce or eliminate background noise. You can add them by clicking on the plus sign.
Step 3: Then you need to install a noise suppression OBS filter. It is recommended that you begin with the value of -30dB, the default setting. It would help if you gave the recording a brief sample shot to determine whether or not this setting is sufficient for noise reduction OBS. If this isn’t the case, try adjusting the suppression level.
Step 4: Raise the level of dB if there is still a significant amount of noise, and lower it if the suppression level being applied is too strong and cuts out your speech along with the background noise.
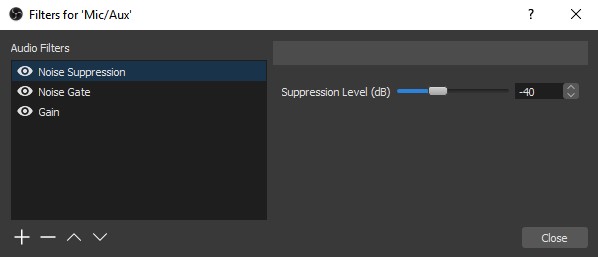
Add Noise Suppression
Faqs About OBS Noise Suppression
In this part, we’ll answer several questions about OBS noise suppression.
Why Do My Videos Have Background Noise?
There can be several reasons why your videos have background noise. To improve the audio quality and reduce background noise in your videos, consider addressing these factors. Using higher-quality microphones, selecting quieter recording environments, positioning the microphone closer to the sound source, minimizing electrical interference, and using proper post-processing techniques can all help you achieve cleaner audio in your videos.
What Does Noise Suppression Level Do?
Noise suppression levels refer to the amount of noise reduction that is applied to an audio signal. This can be done through a variety of methods, including software algorithms, hardware filters, and other techniques. The goal is to remove unwanted noise from the audio signal, while preserving the desired sound.
Different levels of noise suppression can be applied, depending on the specific needs of the user. For example, a high level of noise suppression may be necessary in a noisy environment, such as a busy office or a crowded street. On the other hand, a lower level of noise suppression may be sufficient for a quieter environment, such as a home or a studio.
What is Noise Suppression in Stream?
Noise suppression is a technique used to reduce unwanted background noise in audio streams. This is particularly important for live streaming, where background noise can be distracting and reduce the overall quality of the stream.
There are several ways to implement noise suppression in a stream. One common method is to use software that analyzes the audio stream and removes any background noise that is detected. This can be done in real-time so that the noise is removed as soon as it is detected.
Should I Use Noise Suppression in OBS Studio?
Among OBS’s many useful features are its audio filters. If the source of the sound is weak, the “Gain” filter may amplify it. In contrast, “Noise Gate” and “Noise Suppression” are needed to eliminate or at least lessen background noise in a loud setting. If any audio source has a light background or white noise, you may eliminate it using the Noise Suppression filter. While this doesn’t help much with ambient noise (say, in a noisy room), it can do a great job of canceling out more specific types of noise, like a computer fan.
Some of the limitations of OBS Noise Suppression features are:
- This tool has a great impact on the musical quality of your game.
- Not effective at reducing noise levels at large.
- The OBS app uses a lot of space; as a result, it ends up freezing and crashing.
- Noise Suppression alone is not enough to filter out noise.
- The feature has a learning curve that is difficult for everyone to understand.
Bonus Tip. How to Record Screen without Background Noise
It might be tedious to add some filters for OBS Studio. You can choose several OBS Studio alternatives to record screen without unwanted noise. FocuSee is one of the screen recording software that supports users to capture expected sound – internal or extermal when recording. As it can record your screen in high resolution and audio quality, you don’t need to add extra filters before or after the recording. It is especially workable when screen recording Zoom Meetings and recording your favorite YouTube channel. Moreover, it can work well with Mac and Windows computers.
After installing FocuSee, let’s look at how to record the screen without background noise with FocuSee.
Step 1. Install and launch FocuSee on your computer. Choose a recording mode based on your needs.
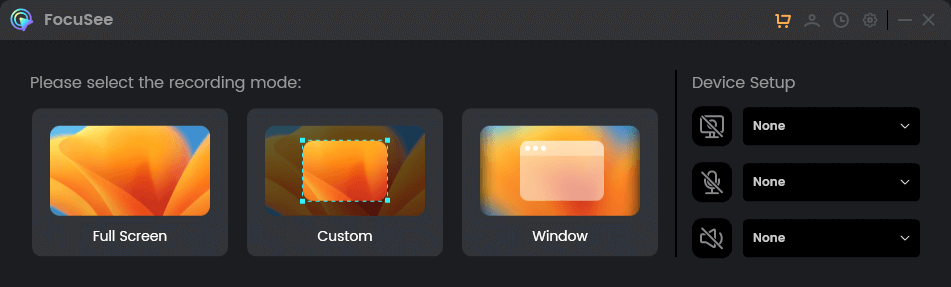
Choose a Recording Mode
Step 3. Open the window you’d like to record before clicking on the red Start button.

Frame an Area to Record
Step 4. When you finish recording, tap on the Red Stop button on the left sidebar. Then you will be navigated to the video editing interface.
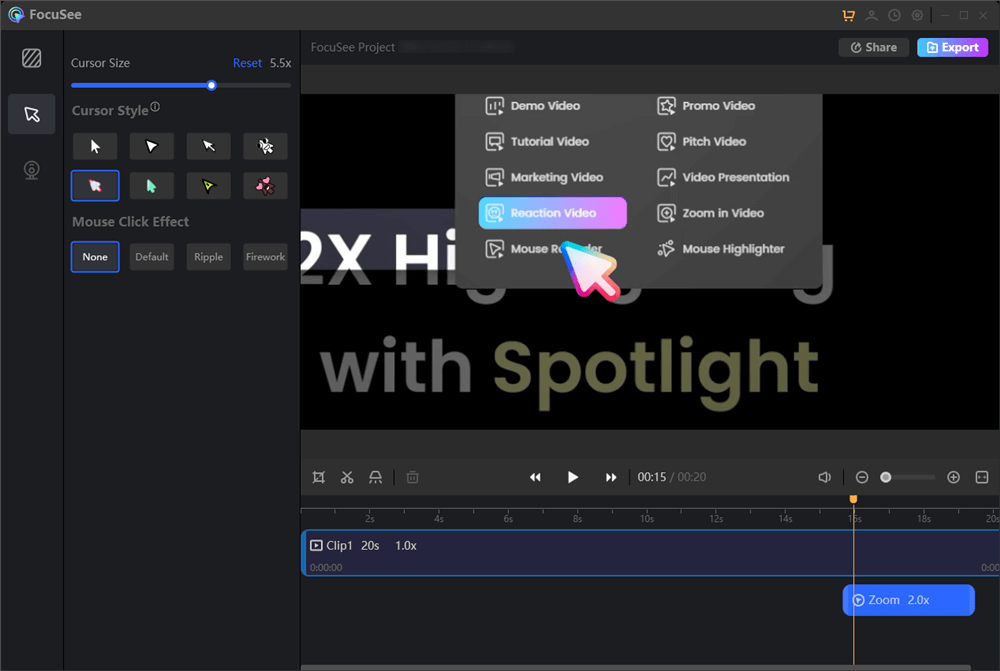
Edit the Recording
Final Thought
You’ve probably heard the expression “Seeing is believing,” but the reality is that a video’s soundtrack is just as crucial as the video itself. Marketing the material will be much easier if your video has amazing music. The audience tends to zone out if there is background noise. Here is a rundown of how to remove background noise from OBS Studio to save you trouble.