How to Remove Watermark in Zoom Meetings and Recordings

A watermark is a semi-transparent logo or text overlay that appears on your screen during Zoom meetings or in recorded videos. It’s a branding element that Zoom adds to identify the source of the video. While watermarks may not be a major concern for personal use, they can be distracting or unprofessional in business settings or if you need to share the recordings externally. In this article, we’ll discuss different methods to remove the watermark in Zoom meetings and recordings.
Remove Watermark in Zoom Meetings and Recordings
What is Zoom Watermark?
Zoom Watermark is a feature that allows users to add visual and audio identifiers to their recordings and live streams in order to protect their content and prevent unauthorized sharing. There are three types of watermarks available in Zoom: video watermarks, audio watermarks, and live streaming watermarks.
Video Watermarks: This feature adds a visible watermark of the user’s information to the recorded video. For example, if the user’s name is Joy and the email is joy@gmail.com, the watermark would display “joy” on any recordings they make during Zoom meetings with watermarks enabled. The purpose of video watermarks is to deter others from claiming credit for the content and to discourage unauthorized sharing of the video.
Audio Watermarks: The Audio Watermark, also known as an Audio Signature, is a feature that embeds the user’s personal information into the audio recording of a meeting. This watermark is inaudible to the human ear. If the audio file is shared without permission, Zoom can assist in identifying the participant who recorded the meeting by analyzing the embedded watermark.
Live Streaming Watermark: With this feature, users can upload a logo or custom image to their Zoom account, which will be displayed during live streaming to platforms such as Facebook, YouTube, Workplace by Facebook, or a custom streaming service. This watermark helps to brand the live stream and provides a visual identifier for the content being streamed.
In summary, Zoom Watermark offers various options for adding visual and audio identifiers to recordings and live streams, serving as a deterrent against content misappropriation and unauthorized sharing.
How to Add or Remove Video Watermark in Zoom?
If you’re using the free basic Zoom account, your meetings and recordings will have the Zoom watermark by default. Upgrading to a paid Zoom account is the simplest way to remove the watermark. Zoom offers several subscription plans to suit different needs and budgets:
- Pro Plan ($14.99/month): Removes the watermark from meetings and recordings, and provides additional features like cloud recording, custom personal meeting IDs, and more.
- Business Plan ($19.99/month/host): Includes all Pro features, plus additional administrative controls and security features suitable for small to medium-sized businesses.
- Enterprise Plan ($19.99/month/host): Designed for larger organizations, with additional scalability, management, and support options.
By upgrading to a paid Zoom account, you’ll not only remove the watermark but also gain access to additional features and capabilities that can enhance your virtual meetings and collaboration experiences.
How to Remove Watermark in Zoom Meetings via Wipit
Removing watermarks from Zoom meetings and recordings can be achieved using Wipit, which is a powerful tool that helps you remove any watermarks, captions, objects, people, and emojis from images and video clips easily with AI technology. Here are the key features of Wipit – the amazing AI watermark remover:
- AI-powered Watermark Remover: Remove watermarks from videos and images using advanced AI processing algorithms.
- Wide Format and System Support: Compatible with popular formats such as MOV/MP4 (videos) and PNG/JPG (images), and works seamlessly on both Windows and Mac operating systems.
- Automatic Edge Recognition: AI automatic edge recognition feature helps you accurately select the areas you want to erase, without worrying about affecting other parts.
- Slide View: Wipit utilizes a slideshow format to showcase all uploaded images and videos, offering a convenient way to preview the content and seamlessly switch between different videos and images.
Free download Wipit and follow the steps below to remove watermarks from images and videos efficiently:
Step 1. Upload the watermarked images or videos:
Once you have installed Wipit, open it on your computer > Upload the image or video that contains the watermark.
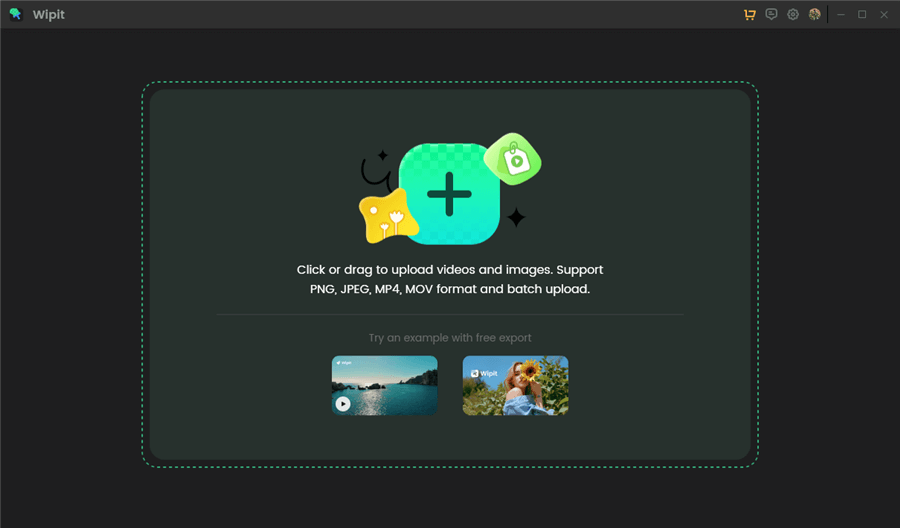
Upload Images from Your Computer
Step 2. Select the watermark area:
Click the “Select Area” button on Wipit to outline the watermark area accurately with the AI automatic edge recognition feature. Wipit will apply algorithms to remove the watermark while preserving the quality of the image.

Frame the Unwanted Watermark with AI
Step 3. Preview and Download
Once the removal process is complete, you can click the Preview button to check the effect. Then, download the image or video by clicking the Export button. Ensure that the downloaded image meets your quality standards and requirements.
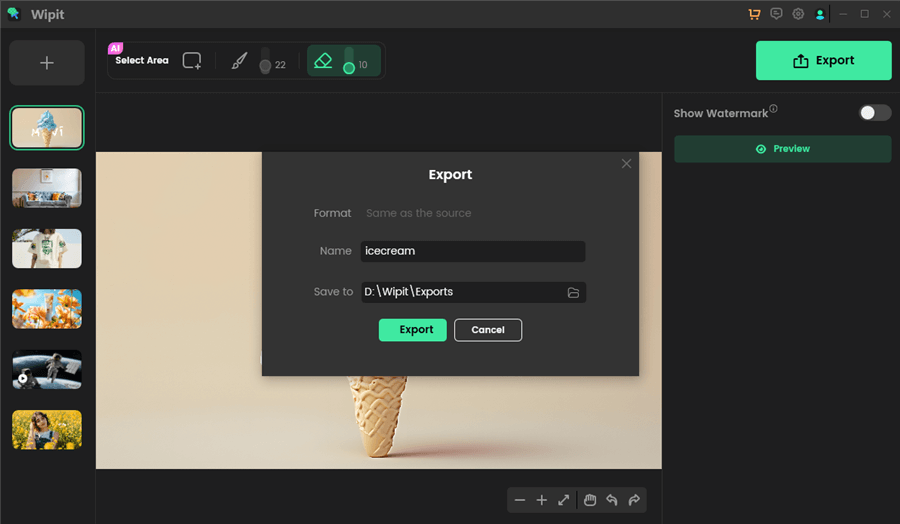
Export the Photo without Watermark
Use a Third-Party Recording Tool
If you don’t want to purchase a Zoom subscription, you can use a third-party screen recording software to capture your Zoom meetings without the watermark. These tools allow you to record your screen, webcam, and system audio simultaneously, bypassing Zoom’s built-in recorder and its watermark.
Some popular free and paid third-party recording tools include:
- FocuSee (free, macOS & Windows): FocuSee is a software application that automates the post-production process for screen recordings, allowing users to create visually appealing videos without manual editing. It automatically tracks cursor movement, applies zoom-in effects, and adds backgrounds to generate professional-looking videos. FocuSee is designed for various purposes such as demos, tutorials, promotional videos, and product launches.
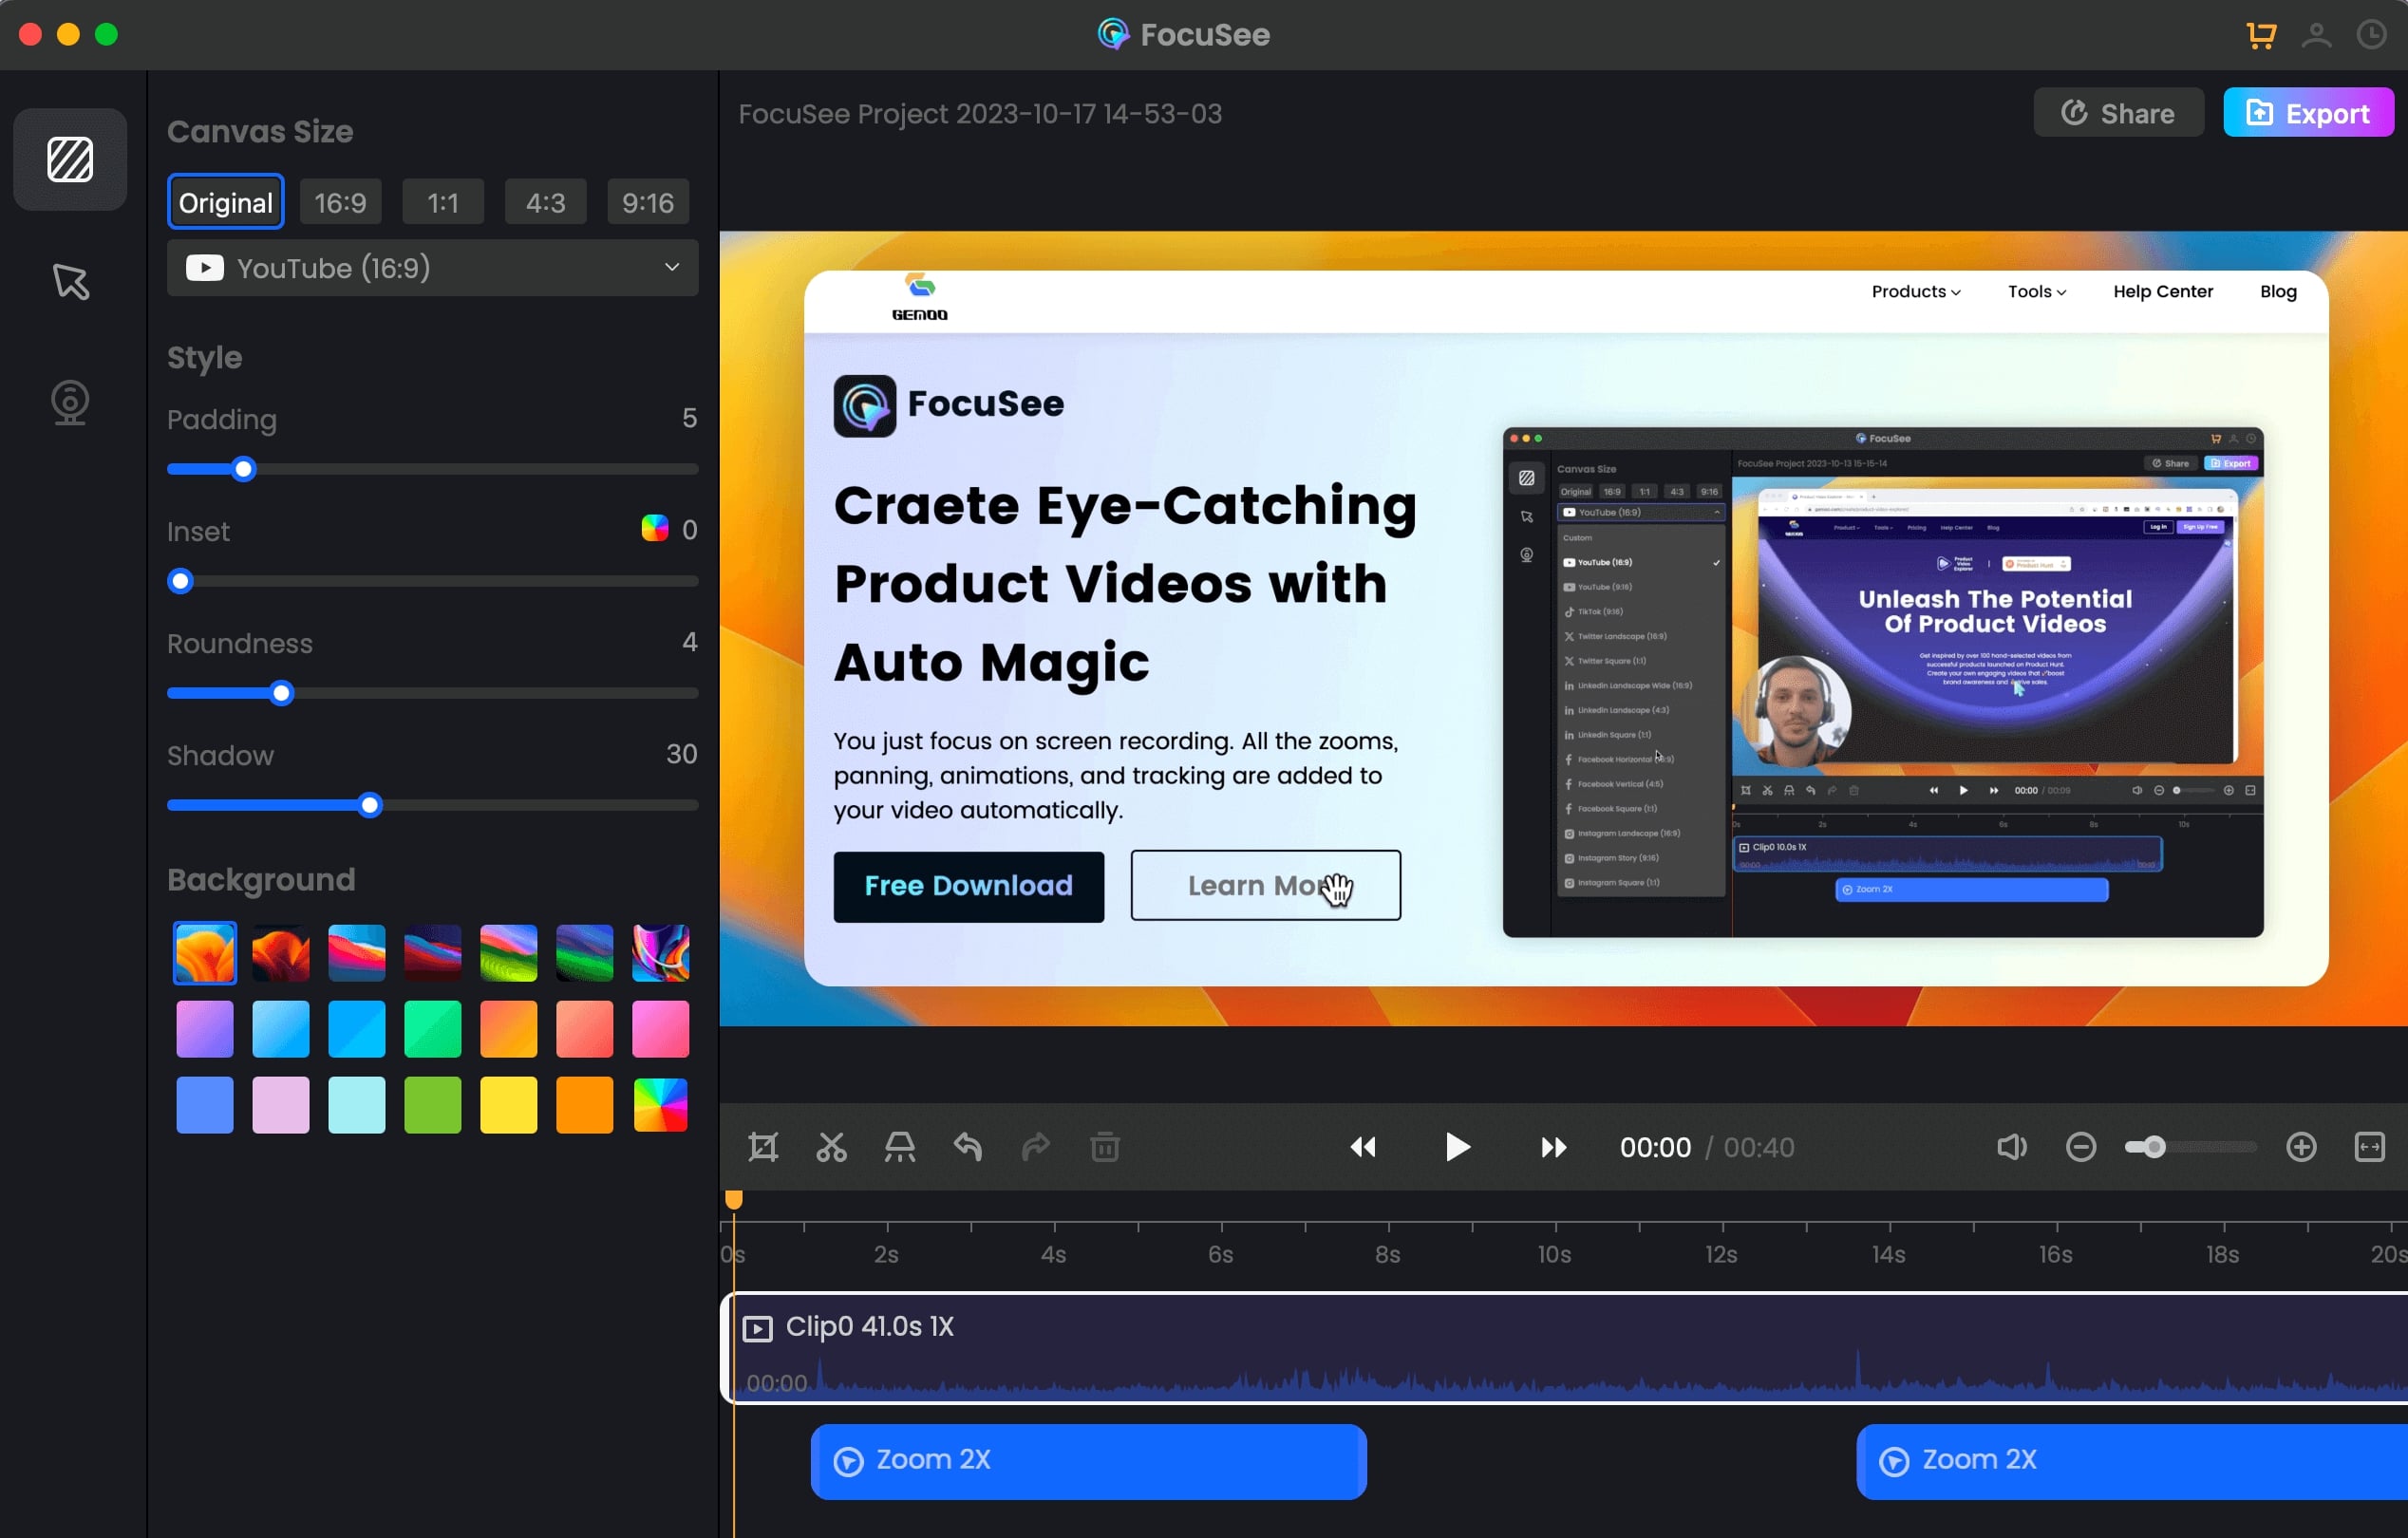
Onboarding Video Maker – FocuSee
- Screencast-O-Matic (free and paid plans): A user-friendly screen recorder with editing capabilities.
- OBS Studio (free): A powerful open-source screen recording and live streaming software.
- ScreenFlow (paid, Mac only): A robust screen recording and video editing tool for macOS.
- Camtasia (paid): A comprehensive screen recording and video editing suite for Windows and Mac.
Edit Watermark Out After Recording
If you’ve already recorded a Zoom meeting or video with the watermark, you can use a video editing program to remove it. This method involves trimming or cropping the video to exclude the visible watermark area.
For example, if you’re using Windows Movie Maker or iMovie, you can import the recorded video, then use the trimming or cropping tools to remove the watermark area from the video. This technique can be time-consuming and may result in some loss of video quality or content, but it can be a viable option if you don’t have access to a paid Zoom account or third-party recording tool.
FAQs About Zoom Watermarks
Here are some common questions and answers about Zoom watermarks:
Where does the watermark appear?
The watermark is typically displayed in the bottom-right corner of the Zoom meeting window or recorded video.
What file formats are affected?
The watermark is present in all recorded video formats supported by Zoom, including MP4, M4V, and MOV files.
At what resolutions does the watermark appear?
The watermark is visible in all resolution settings, from low-quality recordings to high-definition video.
When does the watermark start/stop appearing?
The watermark is present throughout the entire duration of the Zoom meeting or recorded video when using a free basic account.
Conclusion
In summary, there are several methods to remove the watermark in Zoom meetings and recordings. The easiest way is to upgrade to a paid Zoom account, which provides a watermark-free experience along with additional features and capabilities. Alternatively, you can use a third-party screen recording tool or edit the watermark out after recording using video editing software.
While each method has its pros and cons, upgrading to a paid Zoom account is often the most convenient and reliable solution for removing the watermark and enhancing your virtual meeting and collaboration experiences. Consider your specific needs and budget to choose the best approach for your situation.