Are you on the hunt for a viewing experience that’s as smooth as silk? 🧐
Look no further than the captivating world of high frame-rate videos. Making the leap to 60 frames per second (FPS) isn’t just a passing fad, it’s a game-changer that can seriously boost the fluidity of your video content, especially when it comes to those fast-paced, heart-racing sports or action scenes.
In this detailed guide, we’re going to shine a light on the perks of 60FPS video and take you on a journey through the conversion process, complete with step-by-step instructions and a variety of methods to suit your needs.
Get ready to transform your video viewing experience to the next level!
What is the Frame Rate?
Frame rate refers to the number of individual frames that are displayed per second in a video. The most common frame rates are 24FPS, 30FPS, and 60FPS. Higher frame rates, such as 60FPS, result in smoother motion and reduced motion blur, creating a more immersive and lifelike viewing experience. However, it’s important to note that higher frame rates also require more storage space and processing power.
Using Adobe Premiere Pro to Convert Video to 60FPS
Adobe Premiere Pro is a powerful video editing software that offers a straightforward way to convert your video to 60FPS. Here’s how:
Step 1. Import your video into Adobe Premiere Pro by dragging and dropping it into the project panel or using the “Import” option in the “File” menu.
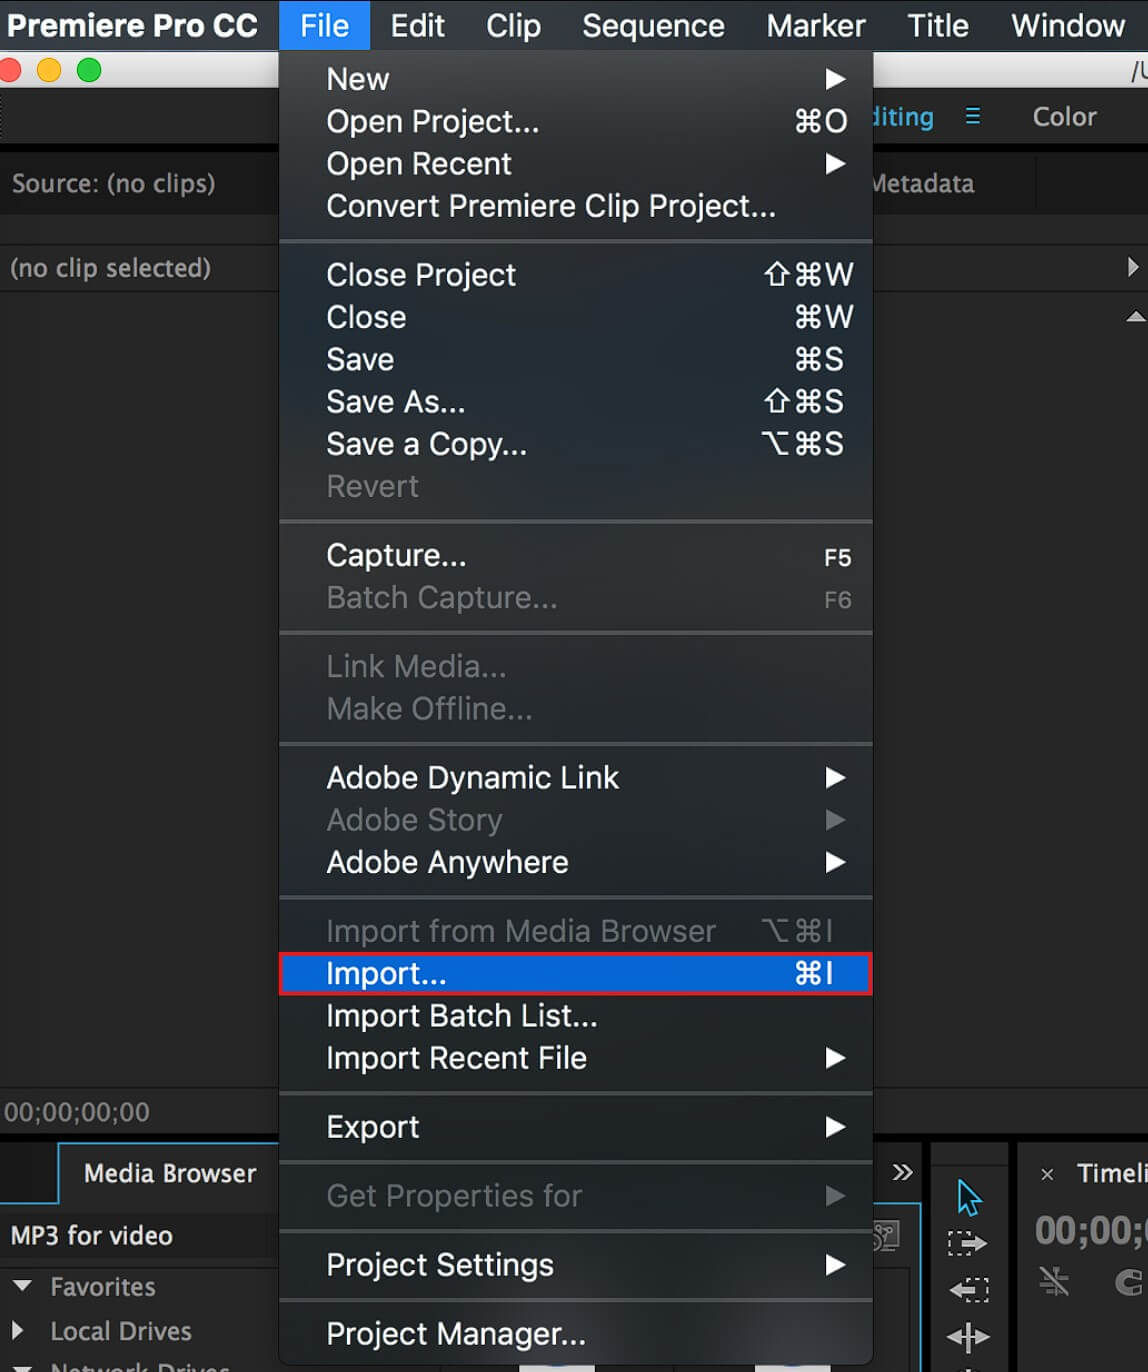
Import Your Shaky Video to Premiere Pro
Step 2. Create a new sequence and adjust the sequence settings to match your desired output, ensuring that the frame rate is set to 60FPS.
Step 3. Drag your video clip into the timeline and right-click on it. Select “Speed/Duration” and choose the “Time Interpolation” option. Set it to “Optical Flow” for the best results.
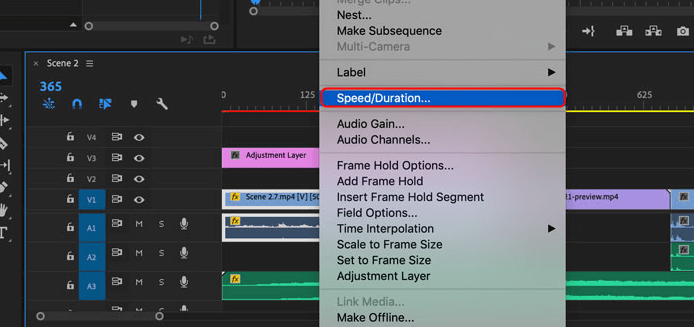
Choose the Speed/Duration Option
Step 4. Once you’ve made the necessary adjustments, export your video by going to “File” > “Export” > “Media.” Choose the appropriate format and settings for your 60FPS video and click “Export.”
Using DaVinci Resolve to Convert Video to 60FPS
DaVinci Resolve is another popular video editing software that offers robust features like adding motion blur and converting video to 60FPS. Follow these steps:
Step 1. Create a new project in DaVinci Resolve and import your video by dragging it into the media pool or using the “Import” option in the “File” menu.
Color Workspace in DaVinci Resolve
Step 2. In the “Edit” tab, right-click on your video clip and select “New Timeline with Selected Clips.”
Step 3. Go to the “Deliver” tab and click on the “Render Settings” option. Change the “Timeline Frame Rate” to 60FPS.
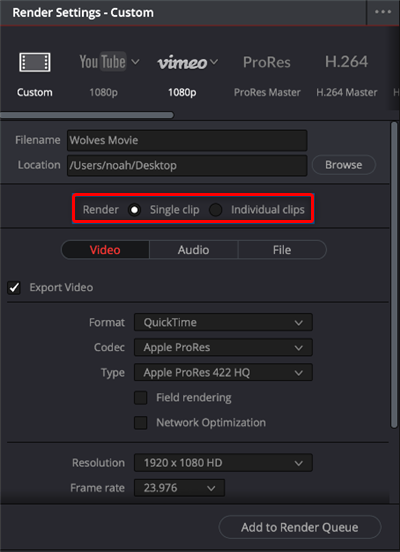
Choose the Render Settings option
Step 4. Return to the “Edit” tab, right-click on your video clip, and select “Change Clip Speed.” Choose “Optical Flow” as the frame interpolation method and adjust the speed to 200% for 30FPS footage or 250% for 24FPS footage.
Step 5. Finally, go back to the “Deliver” tab, choose your desired format and settings, and click “Render” to export your 60FPS video.
Online Tools & Video Converter for Converting Video to 60FPS
If you don’t have access to professional video editing software, there are several online tools available that can help you convert your video to 60FPS. Some popular options include:
- Online Tools: Some online video enhancers such as TensorPix, cutout.pro and Vmake AI can make your video smoother including converting video to 60FPS.
- Video Converter: Gemoo Converter offers a simple interface for converting videos to different formats and frame rates.
- EZGIF: Provides a straightforward process for converting videos to 60FPS, with options to adjust resolution and other settings.
While online tools offer convenience, they may have limitations in terms of video length, quality, and customization options compared to professional software.
Conclusion
Converting your video to 60FPS can greatly enhance the viewing experience, providing smoother motion and a more immersive feel. Whether you choose to use professional video editing software like Adobe Premiere Pro or DaVinci Resolve, or opt for online tools, the process of converting your footage to 60FPS is relatively straightforward. By experimenting with different conversion methods and following best practices, you can achieve high-quality, smooth video playback that captivates your audience.
FAQs on Convert Video to 60FPS
Can I convert any video to 60FPS?
While it’s possible to convert most videos to 60FPS, the results may vary depending on the original frame rate and the content of the footage. Videos with fast-paced motion or action scenes tend to benefit more from 60FPS conversion.
Will converting my video to 60FPS improve its quality?
Converting to 60FPS will not necessarily improve the overall quality of your video, but it will enhance the smoothness of motion and reduce motion blur, resulting in a more fluid and immersive viewing experience.
Is it necessary to have a high-end computer to convert video to 60FPS?
While converting video to 60FPS can be resource-intensive, most modern computers with decent specifications should be able to handle the process. However, having a more powerful computer with a faster processor and ample RAM will make the conversion process quicker and smoother.
Can I convert 60FPS video back to a lower frame rate?
Yes, you can convert 60FPS video to a lower frame rate using the same video editing software or online tools. Simply adjust the output settings to your desired frame rate during the export process.
Are there any drawbacks to converting video to 60FPS?
The main drawbacks of converting video to 60FPS are the increased file size and the higher processing power required for playback. Additionally, not all devices or platforms may support 60FPS video playback, so compatibility should be considered.