How to Take Minecraft High Resolution Screenshot?

Minecraft is definitely one of the best computer games of all time. It’s a popular game well-known among players of all ages. This game can be played alone, with family and friends, depending on whether you select single or multiplayer mode.
Minecraft is fun-filled but becomes more enjoyable when you capture those lovely moves and breathtaking moments or stunts you create, then share them with friends. The best way to do this is to take screenshots. There are different techniques to can capture your computer screen, depending on the operating system you use. Here we will look at the methods. Let’s delve in!
How to Take a Screenshot in Minecraft on Different Devices?
For the different computer operating systems we have, find below the corresponding stepwise guide and apply it accordingly.
Take a Screenshot in Minecraft on Windows 11/10/8/7
If you run the Minecraft game on a Windows or Mac computer system and need a free screen-capturing program, Gemoo Snap is your best option. As one of the professional screenshot tools available in 2023, Gemoo Snap enables you to take screenshots of important events you find on our screens. Gemoo Snap captures Windows 11/10/8/7 computer screens in different dimensions. You can either take a full screenshot in Minecraft or screenshot a partial screen of it. Besides, Gemoo Snap lets you take a picture of your Minecraft gaming screen easily and quickly using hotkeys.
To take screenshots in Minecraft on your Windows computer using Gemoo Snap, apply the procedures below:
Step 1. Free install Gemoo Snap and open it on your computer. Open Minecraft and navigate to the interface you need to take a screenshot.
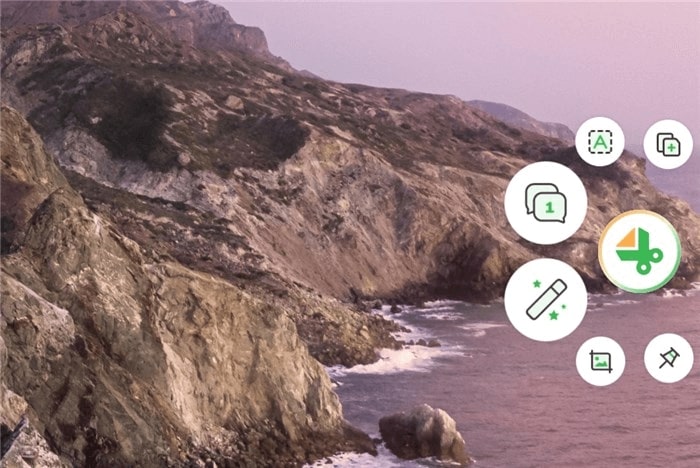
Gemoo Snap interface
Step 2. Choose a screenshot mode on the right-circle toolbar. You can take a quick screenshot, beautify your screenshot, get the screenshot to the clipboard and etc. Here, we choose the Quick Screenshot mode to get started. And then capture a desired area.
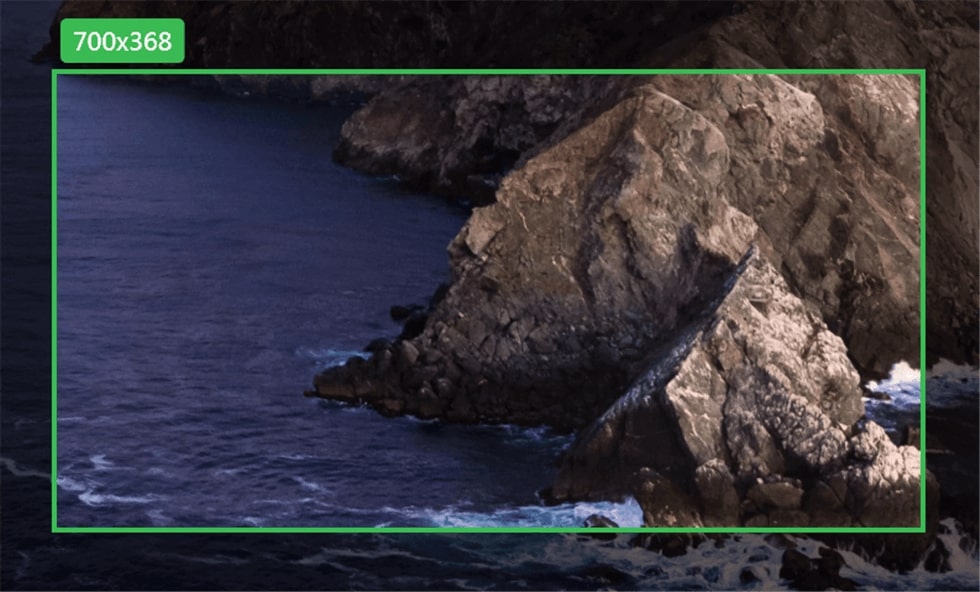
Select a function and customize the screen
Step 3. When you finish capturing your screen, it will be uploaded to the image library automatically, where you can preview, edit and share it with others with simple clicks.
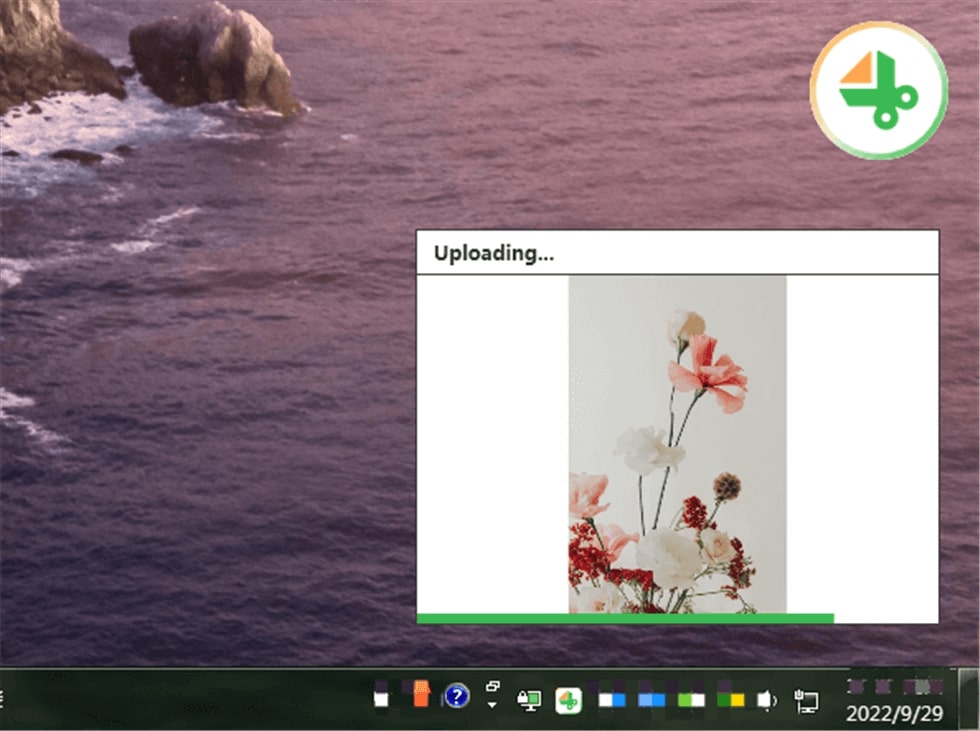
Upload the screenshots
Further Reading: How to Turn On/Off Motion Blur in Minecraft >
Take a Screenshot in Minecraft on Mac
For people with Mac computer systems, you can take a picture of your Minecraft gaming screen via the Mac Preview tool. Mac Preview is a pre-installed program tucked into Mac OS to help you capture your screen.
Mac Preview is a well-known program suitable for amateurs and experts to record their gaming screen in image format. The resulting files are usually printed in high quality. Preview is completely free to use, and is readily available on all Mac devices, whether old or new generation.
Taking screenshots with Preview is simple, and here’s the guide to follow:
Step 1. Head to the Preview program page by clicking the appropriate keys. When the program opens, click the File tab at the upper right corner of the page. The corresponding options underneath will come up. Click Take Screenshot.
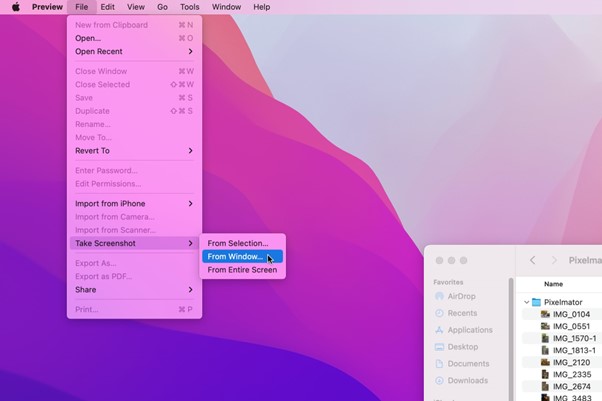
Take Screenshots on Mac via Mac Preview
Step 2. Preview will showcase the different screen capturing modes; From Entire Screen(Full Screen), From Selection (Selected Portion), and From Window (for Specific Window). Select your preferred mode, and Preview will capture it accordingly.
Take a Screenshot in Minecraft on Chromebook
Similar to other operating systems, Chromebook does come with a built-in screen-capturing feature. The device supports keyboard shortcuts that you can hold to launch the screenshot tab to capture your Minecraft gaming screen.
Chromebook screenshots shortcuts are simple to use and generate resulting content at a remarkably high speed. No subscription fee is required to use this program. Thus, we can take screenshots freely with Chromebook screenshot shortcuts.
Apply the instructions below to take screenshots on Chromebook via screenshot shortcuts:
Take Screenshots in Minecraft on Chromebook via Screenshot Shortcuts
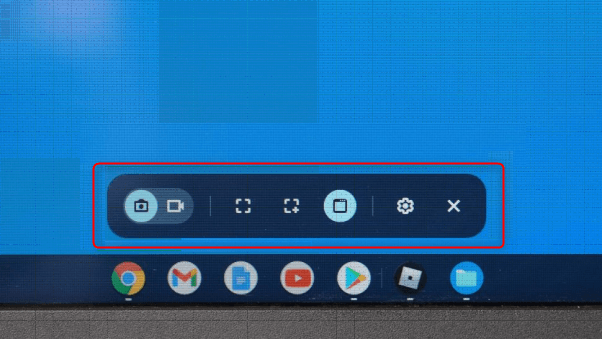
Step 1: Launch the Minecraft game content that you wish to take a snapshot of. After that, hold these hotkeys simultaneously; Ctrl + Alt + Show Windows Keys. Here’s a representative image for this step:
Step 2: Locate the Chrome screenshot toolbar at the bottom of your Chromebook page. Each of the icons has a unique function.?From left to right, you have the camera icon, video tool, full-screen, partial screen, Window screenshot tool, settings icon, and close screenshot toolbar icon.
Step 3: Next, Tap on the camera icon to take a snapshot and select either the full-screen, partial, or window screenshot icon. Once done, position the icon over the page you wish to capture and click. The screenshot toolbar will immediately take a snapshot of the chosen display screen page.
All 3 tools mentioned above aren’t limited to screen capturing. You can also use them to record your computer screen. These 3 tools have proven to be efficient in capturing high-quality recordings, whether full or partial screenshots.
How to Find Minecraft Screenshots?
After learning how to screenshot in Minecraft, you may want to know where do Minecraft screenshots get saved. In this part, we’ll tell you where to find Minecraft screenshots. As a matter of fact, there are different destination paths for storing screenshots on different computer operating systems. Check the corresponding guide for your computer OS:
Find Screenshots in Minecraft on Windows
If you’ve captured your Minecraft gaming screen with Gemoo Snap on your Windows or Mac computer, you can access the captured content by logging in to Gemoo.
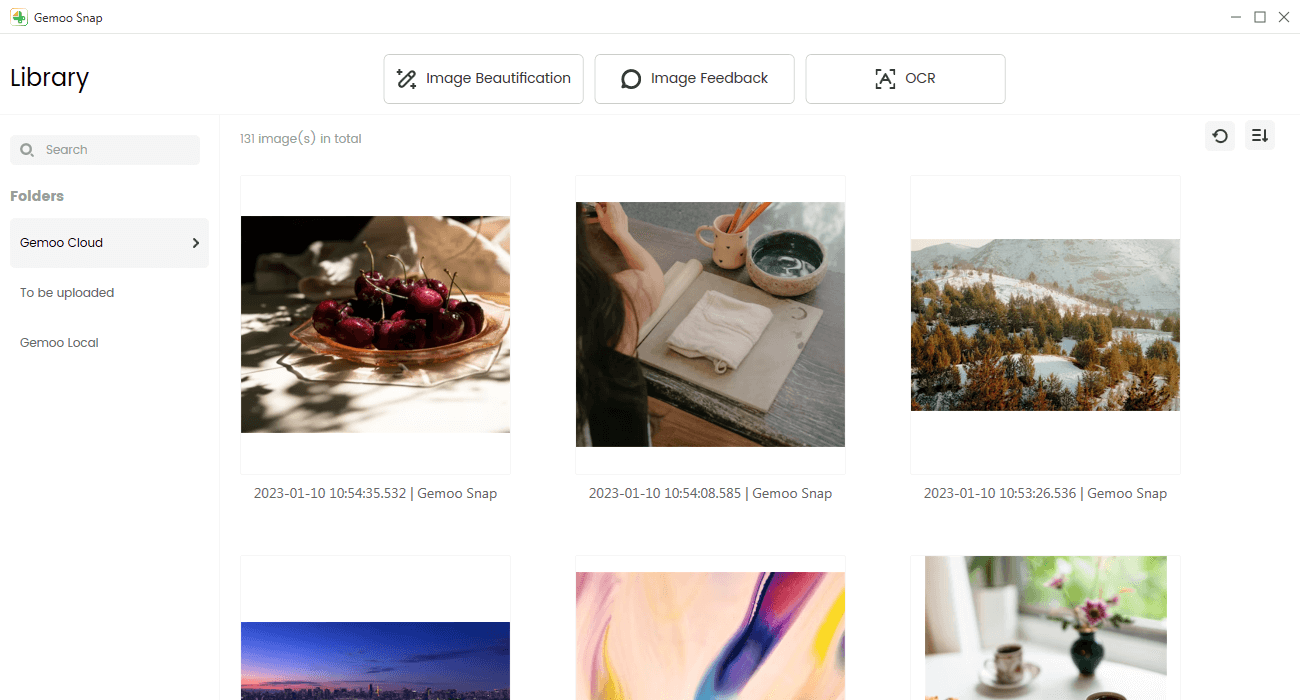
The Library of Gemoo Snap
Find Screenshots in Minecraft on Mac
Mac users who used preview to capture their Minecraft gaming screen should follow the procedures given down here to access their screenshots:
- Right-click your Mac computer screen to access the interface below:
- Scroll through the list and select Preview.
- When the Preview program starts, select File at the top right corner. You should find this response page:
- Click Open Recent to access the recently captured screenshots.
Find Screenshots in Minecraft on Chromebook
Locate your Minecraft screenshots on your Chromebook with the stepwise guide below:
- Navigate to the Windows taskbar and click on it.
- Enter Downloads in the search field and click on the icon.
- Windows will direct you to the download folder where your screenshots are saved. Browse through the list for your Minecraft screenshots.
FAQs About Taking a Screenshot in Minecraft
For extensive knowledge about taking Minecraft screenshots, here are some frequently asked questions and the corresponding answers:
How do I retrieve old Minecraft screenshots?
If you take a screenshot in Minecraft via its built-in tool. You can retrieve old Minecraft screenshots via its default screenshot folder.
Step 1. The location of this folder varies depending on your operating system. For Windows users, the default location is usually “C:\Users\[your username]\AppData\Roaming\.minecraft\screenshots”. Mac users can find it at “~/Library/Application Support/minecraft/screenshots”. Linux users should look for it at “~/.minecraft/screenshots”.
Step 2. Once you have located the Minecraft screenshots folder, open it to see if your desired screenshots are present. Minecraft automatically saves screenshots with a file name in the format “YYYY-MM-DD_HH.MM.SS.png”. If you remember the approximate date and time of the screenshot, it will be easier to locate.
How to take a screenshot in Minecraft bedrock?
For players who run the Minecraft bedrock edition, taking a snapshot of your gaming screen can be quite challenging, but here is a simple guide to follow:
Windows Users
On your Windows PC, find and hold the Print Screen button to quickly capture your screen.
Mac Users
For players with Mac OS, simultaneously hold down these three (3) hotkeys: Command + Shift + 3. These keys will immediately take a snapshot of your entire screen and store the resulting content in your local storage.
Chromebook Users
If you have a Chromebook, hold Ctrl + F5 keys together to capture your Minecraft bedrock edition gaming screen. The resulting screenshot can be found in the files app.
How to take a screenshot in Minecraft education edition?
The Minecraft education edition comes with a unique camera feature that lets you take screenshots or pictures of whatever event you find noteworthy on your Minecraft gaming screen. Resulting images are usually of high quality and can be shared with other players.
Here’s the simple guide to take screenshot with the camera feature in Minecraft education edition:
Launch your inventory and enter Camera in the search field. Once you find the feature drag-and-drop it in the hotbar so the character representing you in Minecraft can get hold of the camera. After that, navigate to any portion of your gaming screen, Right-click, and a letterbox will appear. Release the key to take a snapshot of your screen.
Final Thoughts
Ultimately, capturing your Minecraft gaming screen isn’t a big deal when you have the correct guide. Here, we’ve listed the easiest ways to take snapshots on Windows, Mac, and Chromebook computer systems. Follow, and apply the guide accordingly to get desired results. Once done, follow the procedure that follows to preview the screenshots.