OBS Separate Audio Tracks: The Ultimate Guide to Multitrack Recording

If you’re serious about improving the audio quality of your streams, videos, or podcasts, recording separate audio tracks in OBS Studio is a game-changer. This technique allows you to isolate individual audio sources, such as microphones, game audio, music, and system sounds, giving you granular control over each element during editing.
Imagine being able to adjust the volume of your microphone independently from your game audio or remove background noise from a specific track without affecting the others. That’s the power of multitrack recording!
This comprehensive guide will walk you through the process of setting up and recording separate audio tracks in OBS Studio, empowering you to achieve professional-level audio mixing and editing in post-production.
Separate Audio Tracks in OBS for Recording [Step-by-Step Guide]
OBS Studio has built-in functionality to record separate audio tracks, making it a straightforward process to achieve multitrack recording without any additional software.
What are OBS Audio Sources?
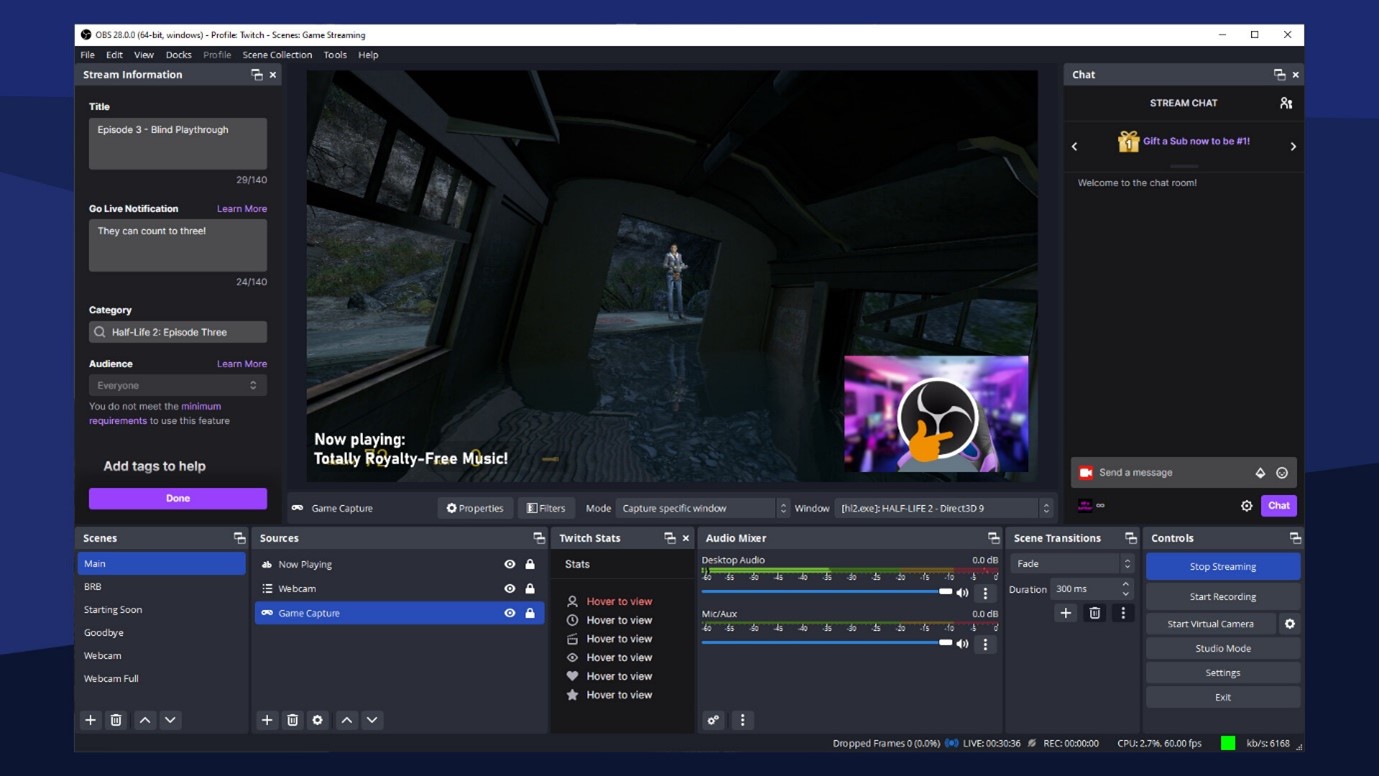
OBS Studio treats each audio source independently. This means your microphone, desktop audio, and any other audio sources you’ve added are already separated within OBS.

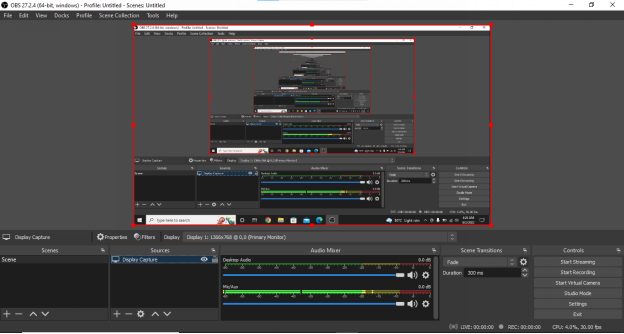
OBS Studio Interface
Common default audio sources include:
- Mic/Aux: Your primary microphone input.
- Desktop Audio: Your computer’s system sounds and audio from applications.
- Mic/Aux 2, 3, etc.: Additional microphone or auxiliary inputs.
Configuring OBS Advanced Audio Properties
- Navigate to Settings: Open OBS Studio and click on the “Settings” button in the bottom-right corner.
- Go to Output Settings: Select the “Output” tab in the Settings window.
- Choose Recording Format: In the “Recording” section, set the “Recording Format” to “mkv.” This format supports multiple audio tracks within a single file.
- Enable Separate Tracks: Under “Audio Track,” you’ll see a numbered list corresponding to your audio sources in OBS. For each source you want as a separate track, select “1.” For example, to separate your microphone and desktop audio, set both “Track 1” and “Track 2” to “1.”
How to Record on OBS Studio with Separate Audio Tracks
Here is the step-by-step guide to help you record on OBS Studio with separate audio tracks:
Step 1: Open OBS and Create a New Scene
Launch OBS. In the “Scenes” box, click the “+” button to create a new scene. > Name your scene and click “OK.”
OBS Studio Interface
Step 2: Add Sources to Your Scene
In the “Sources” box, click the “+” button to add a new source. You can add various sources such as a window capture, display capture, game capture, image, text, etc. Configure the source settings as needed.
Setup OBS
Step 3: Configure Audio Sources
Go to the “Audio Mixer” section at the bottom of the OBS window. Here, you can see all the audio sources currently being captured. To separate audio tracks, you’ll need to add audio input captures.
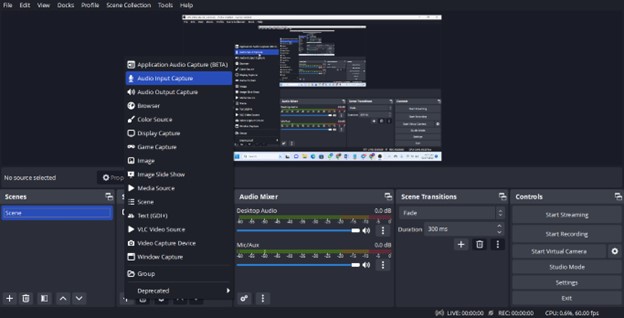
Step 4: Add Audio Input Captures
In the “Sources” box, click the “+” button and select “Audio Input Capture.” > Name the audio source, for example, “Mic Audio” or “System Audio.” Configure the audio device and other settings as needed. Repeat this step for each separate audio source you want to capture.
Step 5: Assign Audio Sources to Different Tracks
In the “Audio Mixer,” you’ll see each audio source you’ve added. Next to each source, there’s a “Speaker” icon. Click on it to assign the audio source to a specific track. You can assign each audio source to a different track by selecting the desired track number.
Step 6: Record with Separate Audio Tracks
Click the “Start Recording” button in the lower-right corner of OBS. OBS will now record your scene with each audio source on its separate track.
Record Screen via OBS Studio
Step 7: Monitor and Adjust Audio Levels
While recording, keep an eye on the audio levels in the “Audio Mixer.” Adjust the volume sliders for each audio source as needed to balance the audio.
Step 8: Stop Recording
Once you’re done, click the “Stop Recording” button. OBS will save the recording with separate audio tracks.
Step 9: Edit Your Video
Use video editing software that supports multiple audio tracks, such as Adobe Premiere Pro or DaVinci Resolve. Import your OBS recording and separate the audio tracks for editing.
Step 10: Export Your Final Video
After editing, export your video with the adjusted audio tracks. > Choose the desired video and audio settings for your final output.
Best Alternative to OBS for Audio Recording – FocuSee
While OBS Studio is a powerful tool, as the alternative to OBS, FocuSee provides a more streamlined approach, especially for those focused on screen recording with high-quality audio. Here’s why it stands out:
- Intuitive Interface: FocuSee boasts a user-friendly design that makes audio track selection and management straightforward.
- System & Microphone Separation: Easily capture your system’s audio on a separate track while simultaneously recording your microphone.
- Auto-Caption: It offers the capability to automatically generate video captions
Use FocuSee for recording your screen and audio:
Step 1. Free download and launch FocuSee on the computer and enter your account and password to log in to FocuSee.
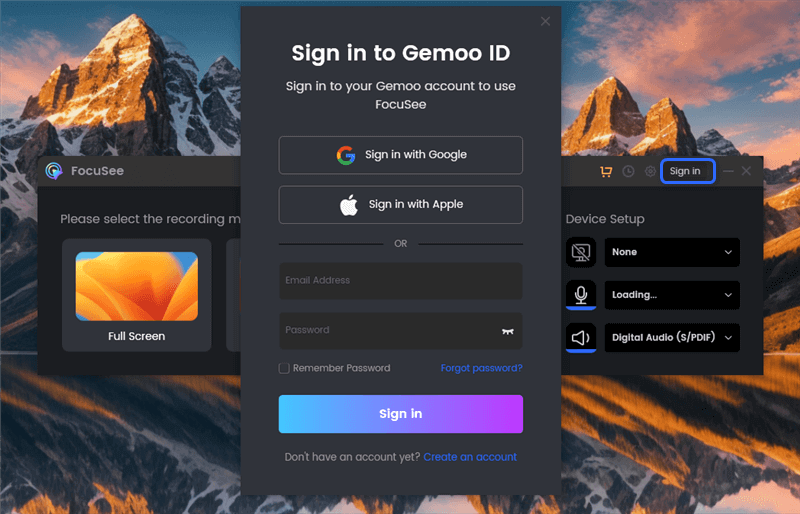
Create an Account and Activate FocuSee
Step 2. FocuSee supports 3 recording modes: record the full screen, custom the recording area, or record the window. You can choose the one you want to record.
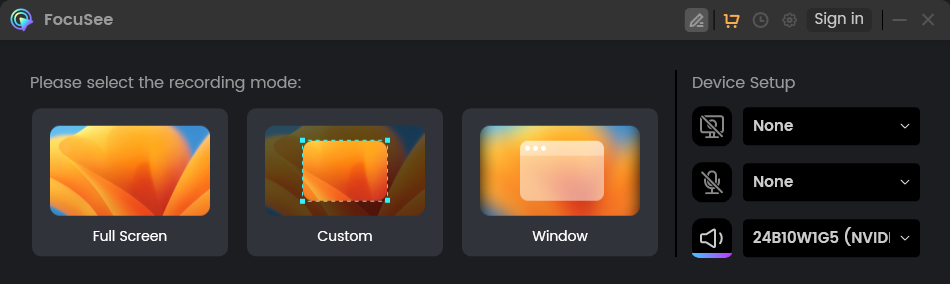
Three Recording Modes for FocuSee
Step 3. After choosing the recording mode, please just focus on your screen recordings. Let FocuSee handle the post-production automatically. You can get a visually appealing video as soon as you finish recording. After recording, you can change the background, adjust the cursor style, add captions and more.
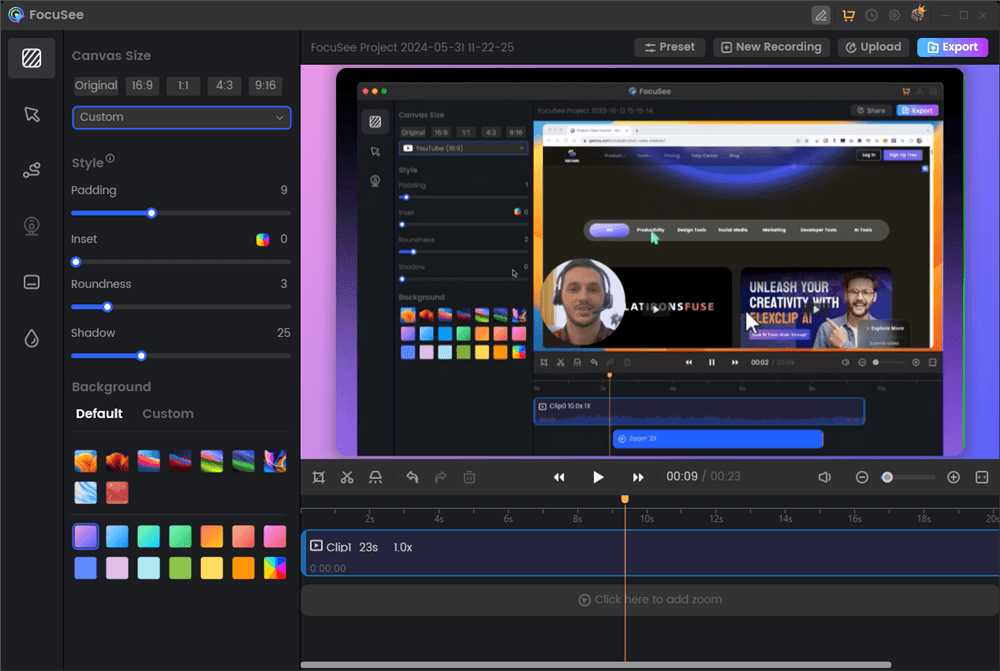
Screen Recording Editing Interface
Step 4. Then, export your recordings as an MP4 or GIF file or share it with a link easily.
How to Export the Video
FAQs: Common Questions About OBS Separate Audio Tracks
Q: What are the benefits of recording separate audio tracks?
A: Separate audio tracks provide greater flexibility and control during editing. You can adjust levels, apply effects, and clean up audio issues on individual tracks without affecting the others, resulting in a more polished and professional final product.
Q: Can I record more than two separate audio tracks in OBS?
A: Yes, the number of separate audio tracks you can record depends on your audio hardware and OBS settings. With an audio interface, you can often record even more tracks simultaneously.
Q: What video editing software is recommended for multitrack audio editing?
A: DaVinci Resolve (free and paid versions), Adobe Premiere Pro (subscription-based), and Audacity (free) are excellent options for multitrack audio editing.
Conclusion
Recording separate audio tracks in OBS Studio is an essential technique for anyone looking to elevate their audio game. By isolating individual audio sources, you gain immense control over your audio in post-production, allowing you to create a more polished and professional final product.
Whether you choose to utilize OBS’s built-in audio track functionality or explore alternative solutions like FocuSee, the key is to experiment and find the workflow that best suits your needs and technical comfort level. With practice and the right tools, you’ll be well on your way to producing high-quality audio that captivates your audience.
Do you have any questions or tips about recording separate audio tracks in OBS? Share your thoughts and experiences in the comments below!