How to Stabilize Video in Adobe Premiere Pro [Step-by-Step Guide]

Shaky footage can be a major distraction in any video project, detracting from the overall quality and professionalism of the final product. Adobe Premiere Pro, a powerful video editing software, offers built-in tools to help stabilize shaky footage and create smooth, polished videos. In this article, we will explore the importance of video stabilization and provide an overview of Premiere Pro’s capabilities in this regard.
Best Practices for Shooting Stable Footage
Before diving into post-production stabilization, it’s essential to understand the importance of capturing stable footage during the shoot.
Using proper equipment such as tripods, gimbals, steadicams, or stabilizers can greatly reduce camera shake and minimize the need for extensive post-production work. Planning your shots and making informed decisions during the shoot can also contribute to more stable footage.
Additionally, ensuring proper exposure is crucial for effective post-production stabilization, as well-exposed footage provides more information for the stabilization algorithms to work with.
How to Stabilize Video in Adobe Premiere Pro [Step-by-Step Guide]
Step 1. Preparing Footage for Stabilization in Premiere Pro
Begin by importing your shaky footage into Adobe Premiere Pro. Create a new sequence and place the unstable clip on the timeline. Ensure that the clip is selected before proceeding to the next step.
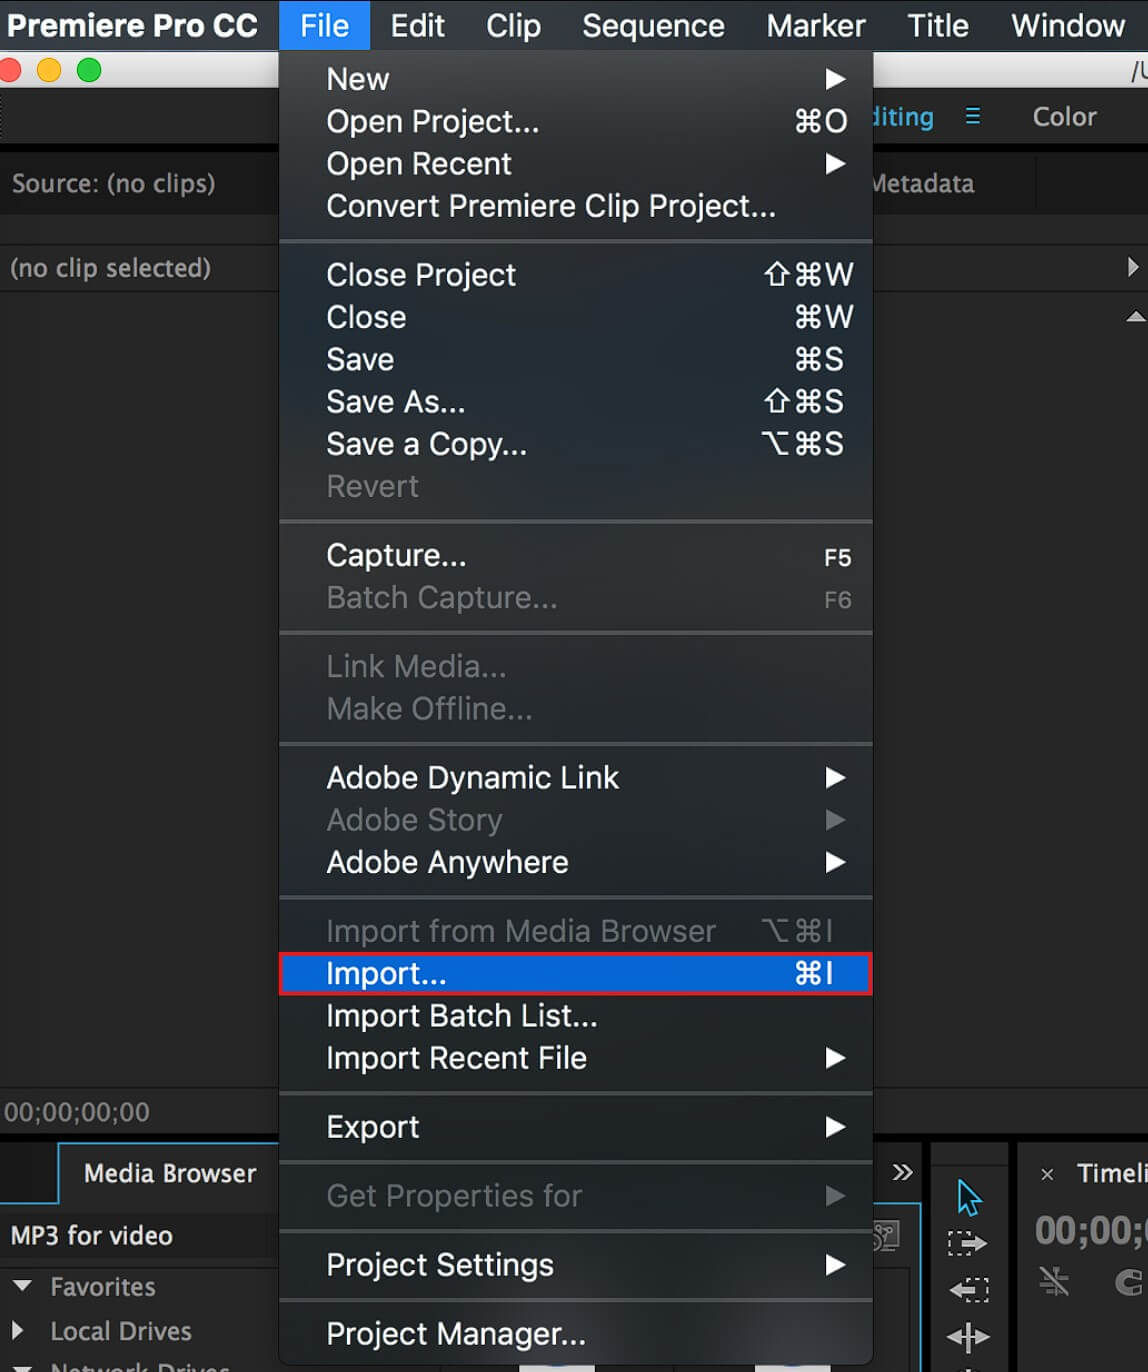
Import Your Shaky Video to Premiere Pro
Step 2. Applying Warp Stabilizer in Premiere Pro
Navigate to the Effects panel in Premiere Pro and locate the “Warp Stabilizer” effect. Drag and drop the effect onto the shaky clip on the timeline. Premiere Pro will automatically begin analyzing the footage to determine the best stabilization settings.
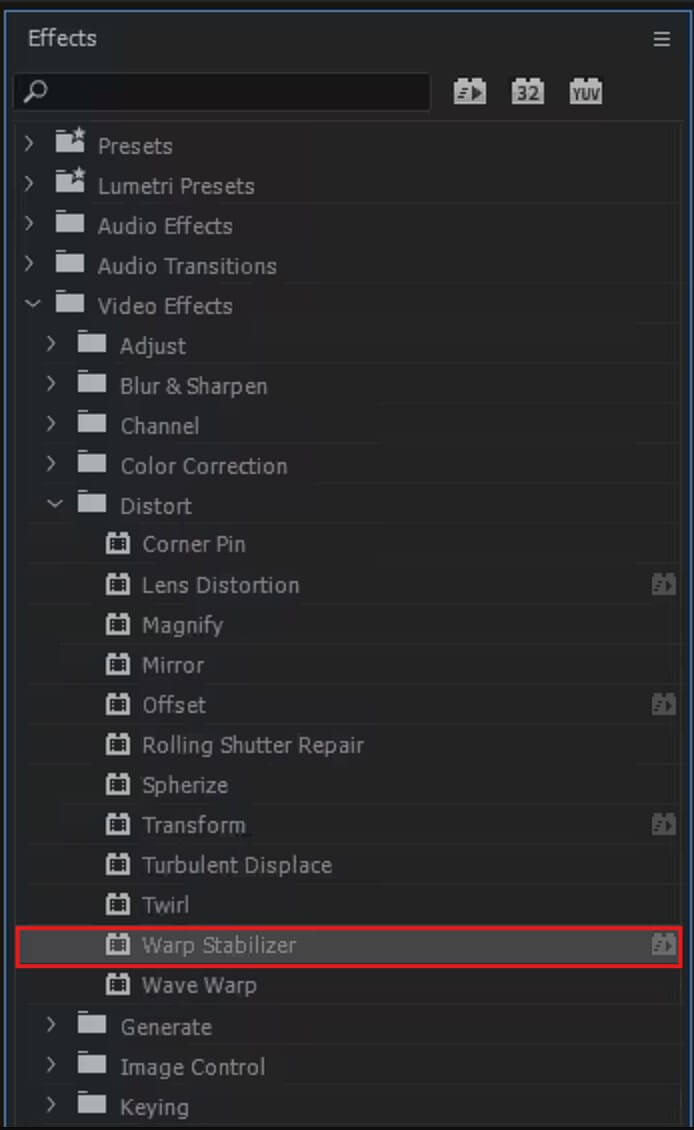
Applying Warp Stabilizer
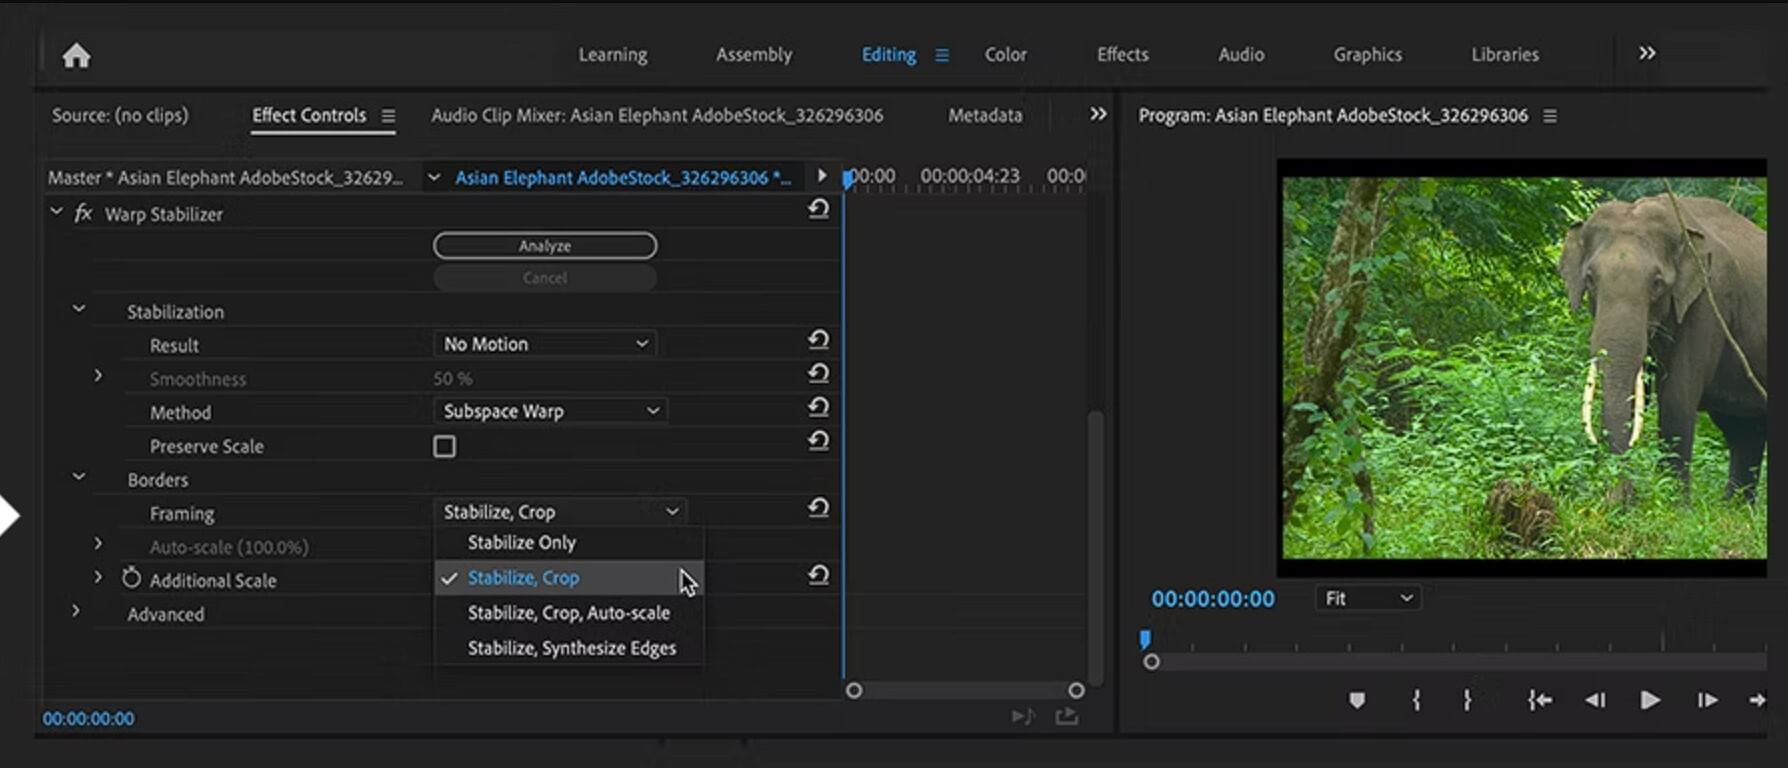
Step 3. Fine-Tuning Warp Stabilizer Settings
Once the analysis is complete, you can fine-tune the stabilization settings to achieve the desired result. Adjust parameters such as smoothness, method, borders, and auto-scale to optimize the stabilization. Preview the stabilized footage to assess the effectiveness of the adjustments.
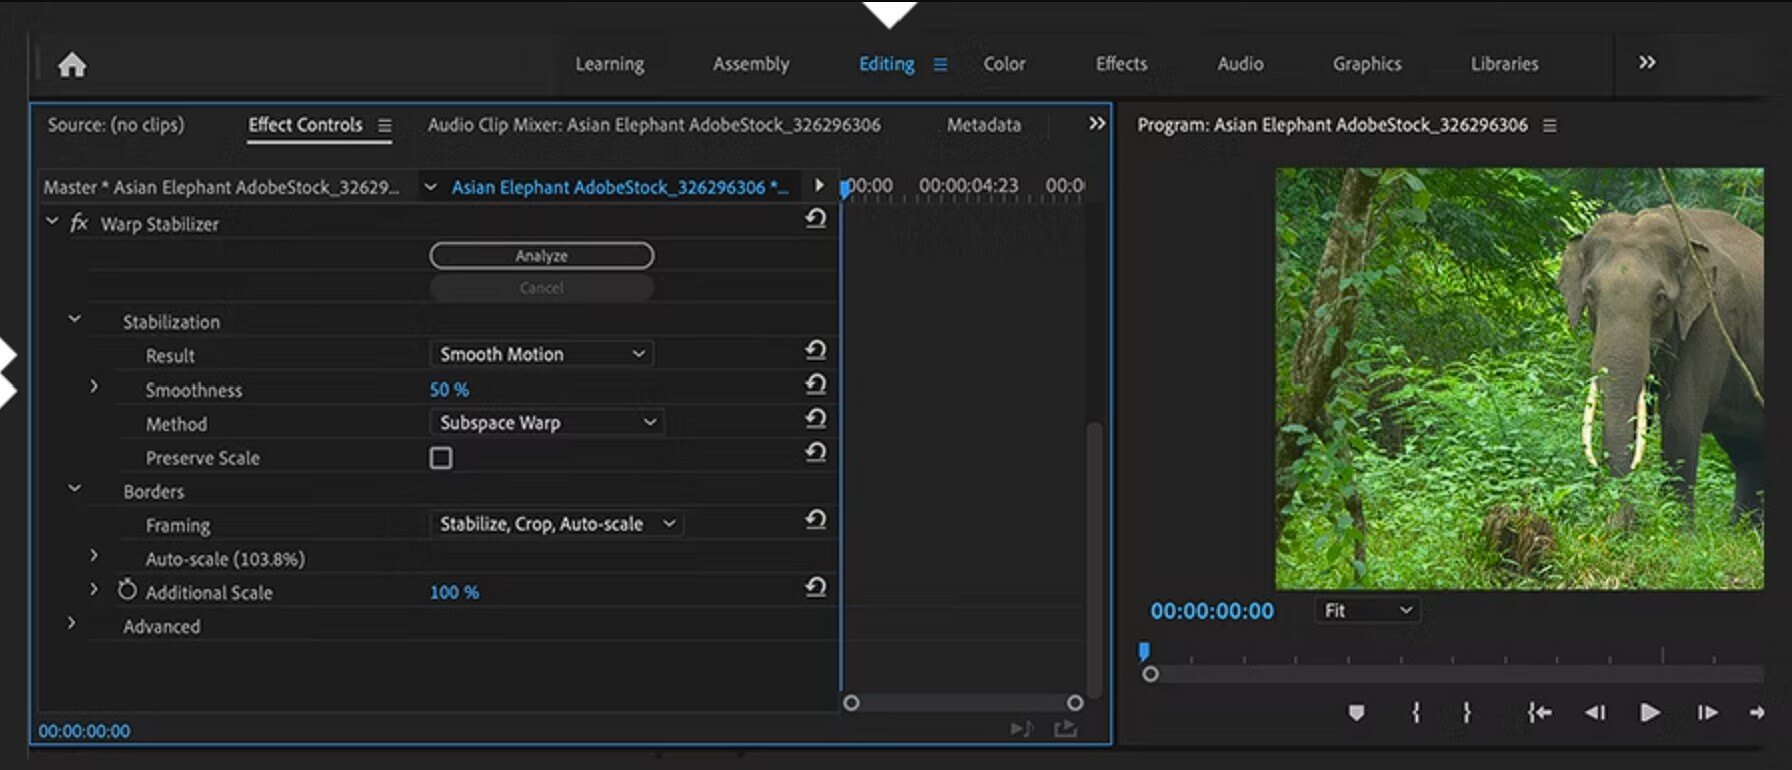
Adjust the Stabilization Settings
Step 4. Advanced Fine-Tuning Options
For more granular control, explore the advanced settings within the Warp Stabilizer effect. These options allow you to adjust the stabilization on specific axes, set rolling shutter reduction, and define the area of the frame to be stabilized.
Step 5. Correcting Unsatisfactory Results
If the stabilized footage still exhibits unwanted artifacts or excessive cropping, consider using masks or manual stabilization techniques. Masking allows you to isolate specific areas of the frame for stabilization, while manual stabilization involves tracking points on the footage and applying the tracking data to the clip.
Correcting Unsatisfactory Results
Additional Tips and Tricks
To ensure the best results when stabilizing video in Premiere Pro, it’s important to have adequate hardware performance. Stabilization can be a resource-intensive process, so a powerful computer with a fast processor and ample RAM is recommended. Additionally, utilizing other Adobe Creative Cloud tools, such as After Effects, can provide even more advanced stabilization options. When exporting your stabilized footage, be sure to choose appropriate settings to maintain the quality of the final video.
Conclusion
Stabilizing shaky footage in Adobe Premiere Pro is a straightforward process that can greatly enhance the quality of your video projects. By understanding the importance of stable footage, employing best practices during the shoot, and following the step-by-step guide for stabilization in Premiere Pro, you can achieve professional-looking results. With practice and experimentation, you’ll be able to master the art of video stabilization and create stunning, smooth videos.
FAQs and Troubleshooting
What if the Warp Stabilizer effect doesn’t work well on my footage?
If the Warp Stabilizer produces unsatisfactory results, try adjusting the advanced settings or consider using manual stabilization techniques, such as point tracking.
How can I avoid excessive cropping after stabilization?
To minimize cropping, increase the “Smoothness” setting in the Warp Stabilizer effect or use the “Synthesize Edges” feature to fill in missing edges.
Can I stabilize 360-degree video in Premiere Pro?
Yes, Premiere Pro offers a dedicated “VR Stabilize” effect for stabilizing 360-degree video footage.
What should I do if my computer struggles with the stabilization process?
Ensure that your computer meets the minimum system requirements for Premiere Pro. If possible, upgrade your hardware or optimize your system for better performance.
Are there any third-party plugins for video stabilization in Premiere Pro?
Yes, there are several third-party plugins available, such as CoreMelt Lock & Load and proDAD Mercalli, which offer additional stabilization features and customization options.