Picture this: you’ve just captured the perfect moment on video, but when you go to watch it back, the footage is so shaky that it’s almost unwatchable. It’s a frustrating experience that many of us have had, especially when zooming in on a subject. Don’t worry, there’s a solution! Video stabilization software is here to save the day. In this ultimate guide, we’ll explore how you can use various tools and techniques to transform your shaky clips into smooth, professional-looking videos.
Table of Contents: hide
Using AI to Stabilize Shaky Clips
Using Adobe Premiere Pro to Stabilize Shaky Video
The Problem with Shaky Videos
Shaky videos are a common issue that can ruin even the most precious moments. Whether you’re trying to capture your child’s first steps or a once-in-a-lifetime vacation, a shaky video can make it difficult to relive those memories. Shaky footage can make your brand appear unprofessional and sloppy if you create social media content or your website.
There are many reasons why videos can turn out shaky, such as:
- Handheld filming without a stabilizer
- Zooming in on a subject without a tripod
- Filming while walking or moving
- Windy conditions that cause camera shake
But don’t let these challenges discourage you from capturing video altogether. With the right tools and techniques, you can stabilize even the shakiest of clips.
Using AI to Stabilize Shaky Clips
One of the most exciting developments in video stabilization is the use of artificial intelligence (AI) technology. AI-powered software can analyze your footage and make intelligent decisions about how to stabilize the video, resulting in incredibly smooth and professional-looking videos.
Here’s how it works: AI algorithms examine your footage frame by frame, looking for stationary elements such as buildings or landmarks. The software then uses this information to create a virtual “camera path” that removes the shake and wobble from your footage.
The beauty of AI-powered stabilization is that it can handle even the most challenging footage, such as videos shot while walking or running. And because the software is constantly learning and improving, the results continue to improve over time.
Using Adobe Premiere Pro to Stabilize Shaky Video
Adobe Premiere Pro is a go-to software for video editors, known for its versatility and powerful features. Among its many capabilities, Premiere Pro includes a built-in stabilization tool that can help you smooth out shaky footage and create professional-looking videos.
The Warp Stabilizer effect in Premiere Pro is a crucial tool for fixing shaky clips. It’s incredibly easy to use, even if you’re new to video editing. With just a few clicks, you can turn your shaky footage into a stable and polished video in just a few seconds. Here’s how to use it:
Step 1: Import your shaky footage into Premiere Pro.
Step 2: Select the clip you want to stabilize in the timeline.
Step 3: Go to the “Effects” panel and search for the “Warp Stabilizer” effect.
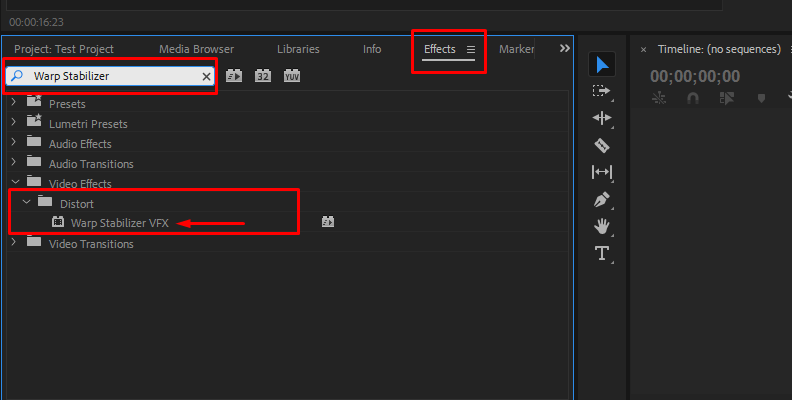
Warp Stabilizer Effect
Step 4: Drag the Warp Stabilizer effect onto your clip in the timeline.
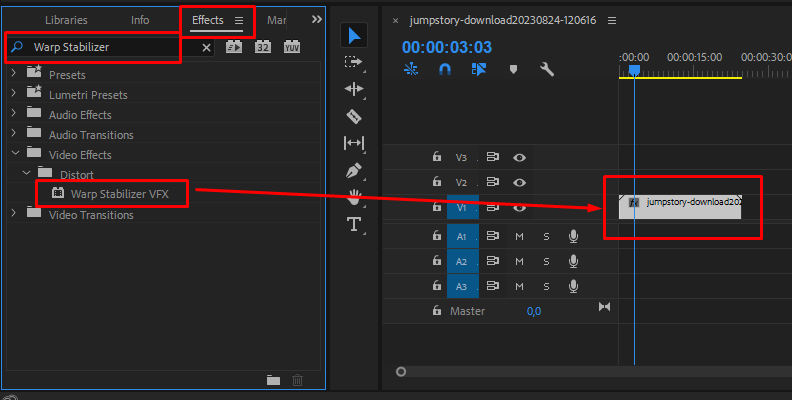
Drag the Warp Stabilizer Effect onto the Timeline
Step 5: Adjust the stabilization settings to your liking. You can choose from various levels of smoothness and framing options.
Step 6: Let Premiere Pro work its magic! The software will analyze your footage and apply the necessary stabilization.
Premiere Pro’s Warp Stabilizer is a great option for quick and easy stabilization, but if you want even more control over the process, you can use the software’s “Anamorphic Stabilizer” effect instead. Here’s how:
Step 1: Import your video media into Premiere Pro.
Step 2: Split the clip at the point where you want the stabilization to start and end. This allows you to only apply the effect to the shaky portions of your footage.
Step 3: Go to the “Effects” panel and search for the “Anamorphic Stabilizer” effect.
Step 4: Drag the Anamorphic Stabilizer effect onto your clip in the timeline.
Step 5: Adjust the stabilization settings to your desired level. You can select from various levels of smoothness, and framing options, and even specify the direction of stabilization.
Using iMovie to Stabilize Shaky Video on a Mac
If you’re a Mac user, you’re in luck – you already have access to a powerful video stabilization tool right on your computer. iMovie, Apple’s user-friendly video editing software, makes it incredibly easy to stabilize shaky clips and create professional-looking videos.
iMovie is known for its intuitive interface and simple, straightforward tools. Even if you’ve never edited a video before, you’ll find that iMovie is user-friendly and easy to use. When stabilizing shaky footage, iMovie’s built-in stabilization feature is a game-changer. Here’s how:
Step 1: Import your shaky footage into iMovie.
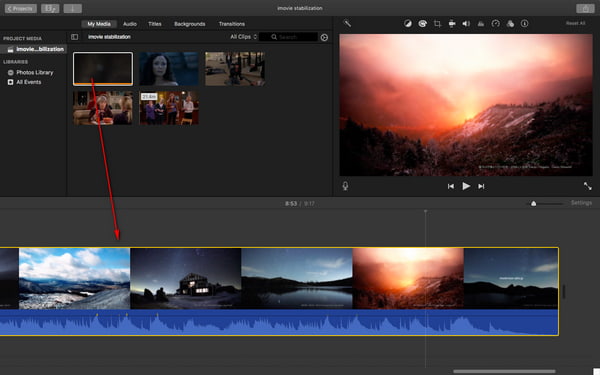
Import your shaky footage
Step 2: Select the clip you want to stabilize in the timeline.
Step 3: Click the “Stabilization” button in the toolbar above the viewer. It looks like a little camera with arrows pointing outward.
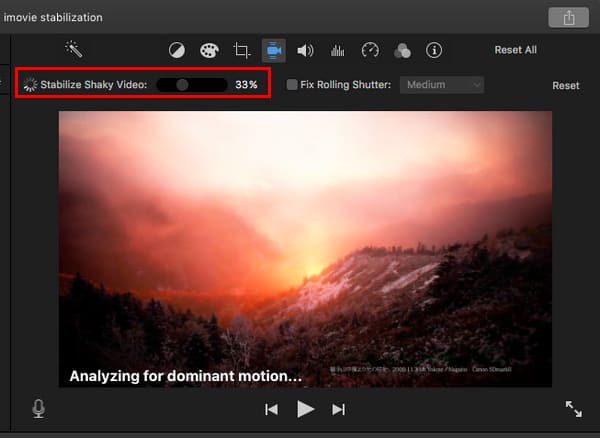
Click the Stabilization
Step 4: Adjust the stabilization level using the slider. The higher the level, the smoother your footage will be, but keep in mind that this may also result in some cropping of your video.
Step 5: Let iMovie work its magic! The software will analyze your footage and apply the necessary stabilization.
Using CapCut to Stabilize Shaky Video:
CapCut is a popular video editing app that’s available for both iOS and Android devices. It’s a great option for stabilizing footage on the go, and it’s incredibly easy to use. Here’s how:
Step 1: Import your shaky footage into CapCut.
Step 2: Select the clip you want to stabilize in the timeline.
Step 3: Click the “Stabilize” button in the toolbar at the bottom of the screen. It looks like a little triangle with a play button inside.
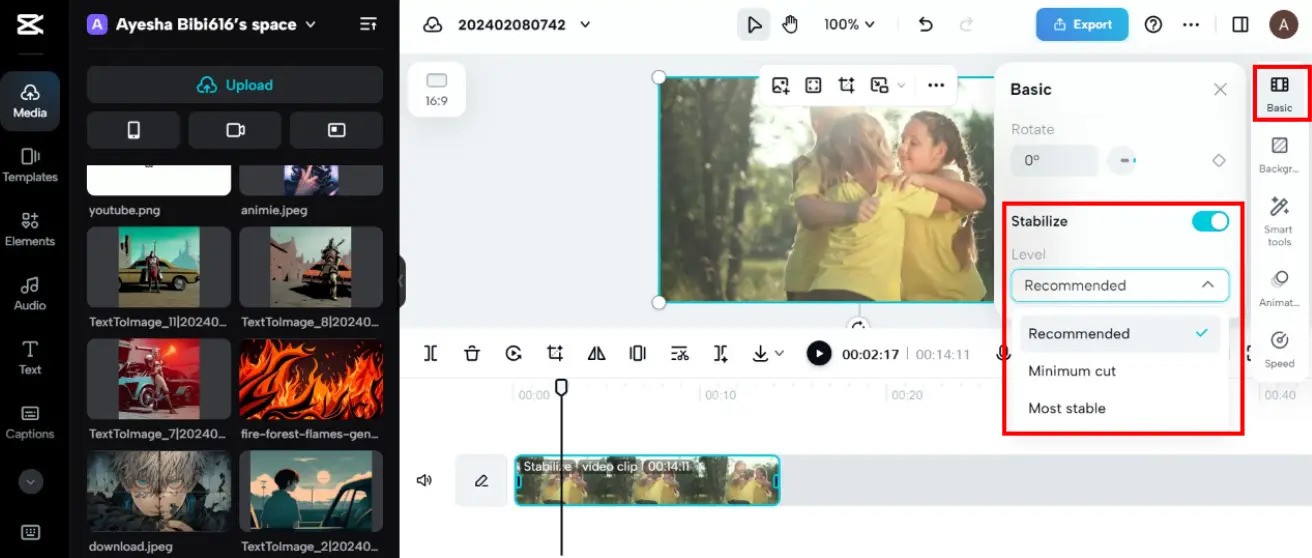
Click the Stabilize
Step 4: Adjust the stabilization level using the slider. The higher the level, the smoother your footage will be.
Step 5: Let CapCut work its magic! The app will analyze your footage and apply necessary stabilization.
Conclusion
Video shake is a common problem, but it doesn’t have to ruin your precious memories or make your brand look unprofessional. With the right tools and techniques, you can stabilize even the shakiest footage into smooth, polished videos.
So the next time you capture a shaky video, don’t panic! With the tools and techniques presented in this guide, you’ll be able to stabilize your video footage and create videos that you’ll be proud to share with the world.