In the world of working from home, Zoom has become super important. It’s the go-to place for meetings, interacting with colleagues, and talking with clients online. But sometimes, Zoom acts up, especially on Macs. One big issue is when your Mac needs help connecting to Zoom’s main computers, which messes up important online meetings and chats.
Fix Zoom Not Working on Mac
Luckily, there are ways to fix these problems and improve Zoom on your Mac. We’ll start with the basics and go step by step to solve this Zoom not working on Mac issue. This way, you can ensure Zoom runs smoothly on your Mac, and your work meetings can go on without a hitch. So, let’s start!
Table of Contents: hide
Why Is Zoom Not Working on Mac?

Zoom Not Working on Mac
Zoom not working on Mac can be due to various reasons, ranging from technical glitches to compatibility issues. Firstly, check your internet connection; a weak or unstable connection can result in Zoom not functioning properly. Ensure that your Mac’s operating system and Zoom app are updated to the latest versions, as outdated software can lead to compatibility problems. If the issue persists, consider uninstalling and then reinstalling the Zoom application. It’s also recommended to check if any security software or firewall settings are blocking Zoom’s functionality.
Problems with audio and video can be attributed to incorrect settings within the Zoom app or Mac’s system preferences. Make sure Zoom has the necessary permissions to access your microphone and camera. By testing them with other applications, please verify that your microphone and camera hardware are functioning properly. For users experiencing frequent freezes or lags during Zoom meetings, closing other resource-intensive applications and freeing up system memory often resolve the issue.
Common Zoom Issues for 2023
In 2023, despite technological advancements, Zoom users on Mac computers still encounter various common issues that can disrupt virtual meetings and collaborations. These issues can stem from software glitches, hardware limitations, network problems, or compatibility concerns. Here are some of the most prevalent Zoom issues that Mac users might face:
🔎 Audio and Video Glitches: Audio and video disruptions are still a common problem in Zoom meetings. Participants might experience pixelated video, frozen screens, audio delays, Zoom virtual background still loading, or even complete disconnection of audio and video streams. These issues can arise due to insufficient processing power, network congestion, or software conflicts.
🔎 Screen Sharing Problems: Mac users often encounter issues while trying to share their screens during a Zoom meeting. It can include screen sharing freezing, distorted screen content, or the inability to share specific applications. These problems might result from conflicts between Zoom and other software running on the system.
🔎 Camera Not Detected: Some Mac users might find that Zoom camera not working. It could be due to driver conflicts, privacy settings, or hardware malfunctions.
🔎 Login and Authentication Errors: Users might encounter difficulties logging in to their Zoom accounts or joining meetings due to authentication failures or password-related issues. These problems stem from outdated software, incorrect login credentials, or account security measures.
🔎 Unreliable Internet Connection: A stable Internet connection is crucial for seamless Zoom meetings. Mac users may face connectivity problems, such as slow or intermittent Wi-Fi, resulting in poor audio and video quality and dropped calls.
🔎 Software Compatibility Issues: Zoom’s frequent updates might lead to compatibility problems with certain Mac operating systems or other applications. It can cause crashes, freezes, or unexpected behavior during meetings.
6 Ways to Resolve Zoom Not Working on Mac
Let’s explore significant ways to resolve Zoom not working issue:
Restart Zoom and Retry
If you’re encountering difficulties with Zoom, a simple solution might be to restart the application and give it another try. Sometimes, technical glitches can be resolved by a quick restart, allowing for a smoother and more successful experience with your online meetings and interactions. The procedure remains consistent whether you’re utilizing the Zoom application or accessing a meeting via your web browser. Here are the steps for it:
Step 1: Initiate a two-finger click on the desired application.
Step 2: From the drop-down menu, select “Quit.”
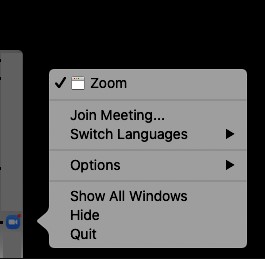
Select Quit
Step 3: Afterward, attempt to reopen the app and assess if Zoom is operational.
Restart your Mac
When facing persistent issues with applications or system performance, one effective step is to restart your Mac. This action helps clear temporary caches, refreshes system processes, and resolves software glitches. Restarting your Mac gives it a clean slate to operate from, which often leads to improved overall functionality and a better user experience. To restart Mac:
Restart Your Mac
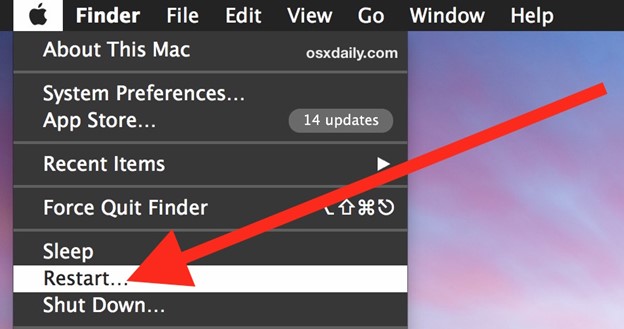
Step 1: Access the Apple logo in the upper left corner.
Step 2: Select “Restart” from the menu.
Step 3: Once your Mac has rebooted, attempt to utilize Zoom. The application will function smoothly after the restart.
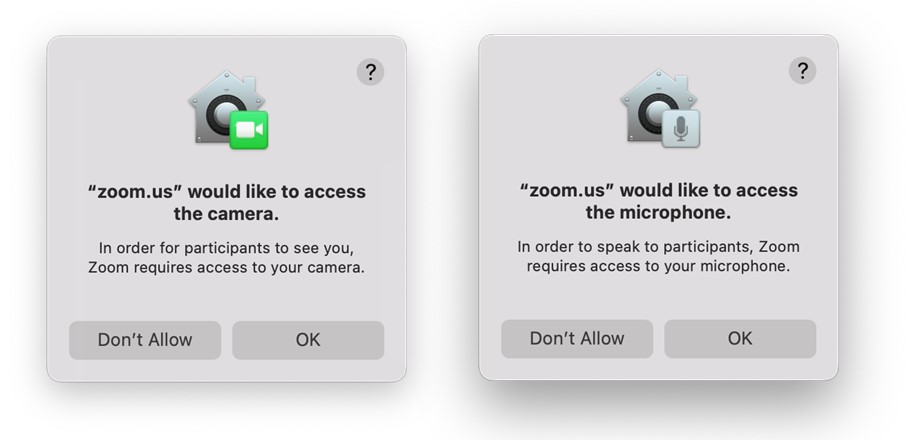
Grant Necessary Permissions to Zoom
To provide a comprehensive video conferencing experience, Zoom necessitates access to your microphone, camera, and various other permissions. Ensuring the application possesses these appropriate permissions is vital for its proper functionality. By granting these permissions, you enable Zoom to utilize essential features seamlessly, enhancing your online meeting and communication encounters. Take a moment to verify and adjust these permissions in your device settings to optimize your Zoom experience. To do this, follow:
Step 1: Select the Apple icon in the upper-left corner of your screen. Then, click on “System Preferences.”
Step 2: Navigate to ” Privacy & Security,” which can be identified by the hand-shaped icon.
Step 3: Grant access to zoom.us for the following:
Grant Necessary Permissions to Zoom
- Camera: Enable webcam use during calls.
- Microphone: Permit audio transmission during conversations.
- Accessibility: Allow remote use during calls.
Step 4: For macOS Catalina or macOS Big Sur users, click “Files and Folders” and mark the box for Zoom. It enables file sharing, saving chat files, and local call recording.
Step 5: Proceed to “Screen Recording” and mark Zoom. It empowers screen sharing within Zoom calls.
Step 6: Close and reopen the Zoom app after configuring the necessary permissions. Your app should now function as expected.
Temporarily Turn Off Mac’s Firewall
Your Mac’s firewall, designed to enhance security, can occasionally hinder Zoom’s functionality. The firewall might misconstrue Zoom as a potential security risk and impede its operation. To mitigate this, consider disabling the firewall temporarily.
While this action may slightly reduce your system’s security during the Zoom session, it can assist in troubleshooting any issues arising from firewall interference. Remember to reactivate your firewall once the Zoom session concludes to maintain your Mac’s protection. Below are the steps for this:
Step 1: Access System Preferences and navigate to “Security & Privacy.”
Step 2: Within the Security & Privacy menu, locate and select the “Firewall” tab.
Step 3: Click “Turn Off Firewall” to disable the firewall on your Mac.
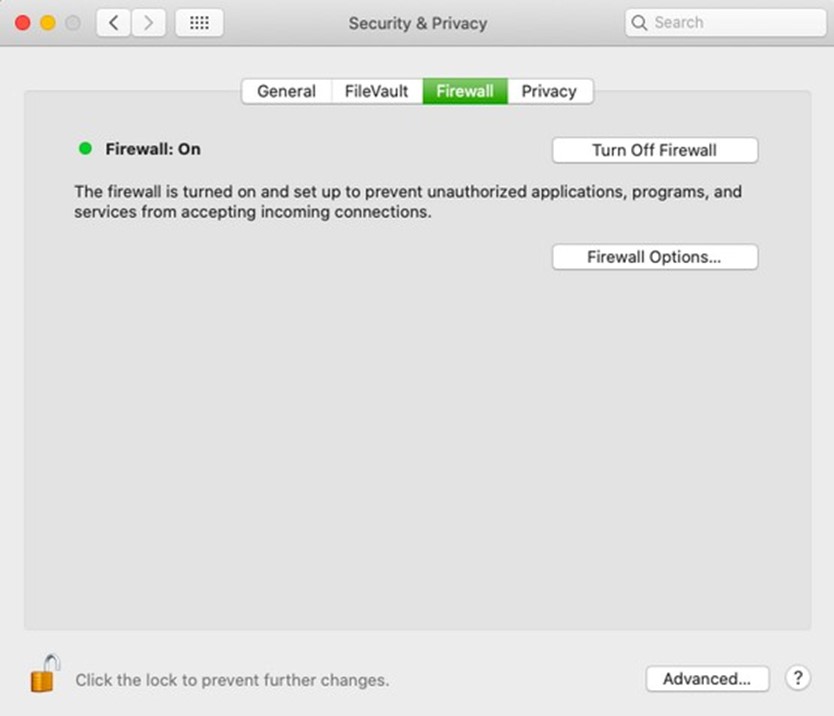
Click Turn Off Firewall
Step 4: For adjustment purposes, your Mac password might be required before modifying the firewall settings.
Uninstall Zoom on Your Mac
Certain errors might necessitate the reinstallation of Zoom, providing the application with a pristine beginning that can address caching problems or corrupted files. By removing the existing installation and then installing Zoom anew, you ensure a clean slate for the application. This process is particularly helpful when conventional troubleshooting steps prove inadequate, allowing you to overcome persistent difficulties and experience a smoother Zoom performance. To do this, follow:
Step 1: Launch Finder on your Mac and select “Applications” from the left side of the screen.
Step 2: Perform a two-finger click on Zoom and choose “Show Package Contents.”
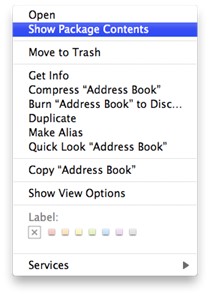
Select Show Package Contents
Step 3: Navigate through “Contents” and then “Frameworks,” followed by clicking on “ZoomUninstaller.”
Step 4: Adhere to the provided instructions to uninstall Zoom and, subsequently, restart your Mac.
Step 5: Complete the process by reinstalling Zoom on your Mac. This method often resolves persistent issues by starting afresh with a clean installation.
Close Applications using a Camera
When the Zoom application continues to exhibit functionality issues on your Mac, it’s beneficial to investigate whether other applications employ your camera which hinders access to the resource. For instance, if you’ve recently participated in a Teams or Skype meeting and subsequently intend to use Zoom, conflicts arise where the camera is already engaged by one of these apps.
In such scenarios, it’s advised to forcefully close the competing applications utilizing the camera. This action liberates the camera’s resources, allowing you to employ it seamlessly with Zoom. After closing these conflicting apps, reattempt using Zoom to determine if the challenge has been rectified. Here are the steps for it:
Step 1: Access your Mac’s menu by clicking the Apple Logo positioned at the top left corner of the screen.
Step 2: Opt for “Force Quit” from the ensuing dropdown.

Choose Force Quit
Step 3: Inside the Force Quit window, while holding the Command key, selectively mark all applications using the camera, excluding Zoom. Subsequently, choose “Force Quit.”
Step 4: Respond to prompts by clicking “Force Quit” again. This process ensures a smooth transition, freeing up the camera’s usage for Zoom.
Step 5: Following this, resume using Zoom and assess whether the camera-related issues have been resolved.
Final Thought
These established techniques are reliable solutions for restoring Zoom audio not working on your Mac. While these approaches typically resolve the problem, contacting Zoom Support is advisable if Zoom continues to exhibit issues. Are there any alternative strategies for addressing Zoom-related concerns on a Mac? We encourage you to share your insights in the comments below! By combining our troubleshooting knowledge, we can improve our comprehension and help those facing similar issues.