Taking notes is a fundamental habit that improves memory, organization, and productivity in classrooms and workplaces. The value of taking notes cannot be overstated in today’s quick-paced world. The procedure of taking notes has been streamlined and made more effective with the development of digital tools. Microsoft OneNote is one such tool that has become incredibly popular. This flexible application provides a digital platform for capturing ideas, thoughts, and crucial information while enabling users to create and organize notes without hassle.
Nevertheless, despite its advantages, some users have reported that OneNote does not sync correctly on their computers. This can be annoying and obstruct the efficient transfer of data between devices. Fortunately, there are a variety of causes for this syncing issue. This article will explore the potential causes and offer 6 practical solutions to help you fix the problem. Let us get started with the fixes so you can get your OneNote app to sync properly once more.
Table of Contents: hide
Does OneNote Desktop Sync Automatically?
Does OneNote Desktop Sync Automatically?
As one of the productivity tools for students, the seamless synchronization feature of Microsoft OneNote across various devices, guaranteeing constantly updated notes, is a notable aspect. By default, OneNote is designed to automatically sync your notes, allowing convenient access from any device. Consequently, any changes made to your notes on one device will be automatically updated and synchronized with all other devices associated with your account. Nevertheless, multiple factors can influence the automatic syncing behavior of OneNote on a desktop.

Does OneNote Desktop Sync Automatically
Accessing the latest version of your notes is effortless, regardless of your location, thanks to real-time synchronization. It is worth noting that automatic syncing does not necessitate meeting all requirements. To begin with, OneNote should be open on all devices where your Microsoft account is signed in. Moreover, be aware that manual intervention may sometimes be necessary to initiate a sync or resolve any potential syncing issues.
Why is OneNote Notebook Not Syncing?
Are you wondering why your Notebook is not syncing up? Look no further! There may be several causes for your OneNote notebook not to sync. To properly troubleshoot and fix the syncing issue, it is critical to comprehend these possible causes. OneNote frequently fails to sync for the following reasons:
Insufficient Room for Storage
To effectively store and synchronize your notebooks, OneNote requires enough storage space on your device and in your OneDrive account. It is essential to regularly check and manage your storage space to guarantee smooth syncing. Running out of storage space can interfere with syncing and lead to problems. Clear up space on your device and OneDrive account by deleting unnecessary files. This may entail deleting large attachments or files, removing unused notebooks, or archiving previous content you do not need access to immediately.
Sync configurations
Reviewing and modifying your sync settings is critical to guarantee that your OneNote notebooks sync correctly. Incorrect preferences or settings may interfere with syncing and cause problems with synchronization. Start by going to the OneNote application’s sync settings. Make sure synchronization is turned on by looking for a setting that enables or disables it. Besides this, you can control how frequently OneNote syncs your notebooks in some programs. Ensure the interval is appropriate for your requirements, balancing real-time updates with resource-effective use.
Updates to the application:
Keeping your OneNote application updated is essential to ensure consistent and dependable synchronization. Incompatible or outdated OneNote versions can frequently cause syncing issues and prevent the seamless transfer of your notes across devices. Most programs have an automatic update feature that alerts you when a new version is available. Alternatively, you can manually check for updates by going to the preferences or settings menu of the app.
How to Fix Onenote Not Syncing?
Are you facing the issue of the Notebook not syncing? Do not panic; we are here to help! Sometimes, your notebook fails to sync, causing inconvenience and potential data inconsistencies. However, it is important to remember that there is always a solution to every problem. This section will explore six practical solutions to address the syncing problems with your notebook. So let us dive into these options immediately and choose the most effective one for you.
Ensure OneNote is Up to Date
Keep your OneNote application updated with the most recent version to resolve the OneNote notebooks not syncing issue. Not only does update the app fix any existing bugs, but it also ensures compatibility with your device and other software components. As a result, the syncing process becomes more seamless and efficient. Follow the steps below to update OneNote on Windows 10.
Step 1. Click the Start button in the lower-left corner of your screen, then scroll down and select Microsoft Store.
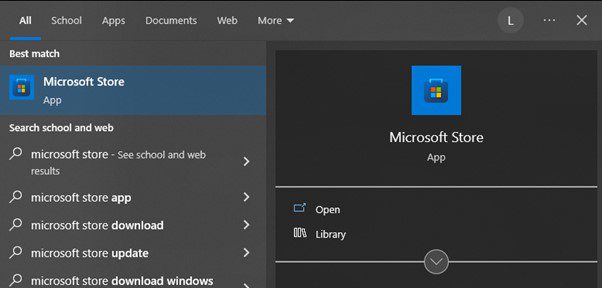
Search Microsoft Store After Clicking Windows Start Button
Step 2. In the resulting Microsoft Store window, click the three-dot icon (usually in the upper-right corner) and select Download and Updates.
Step 3. Click Get Updates in the Download and Updates section to check for available updates for your installed applications.
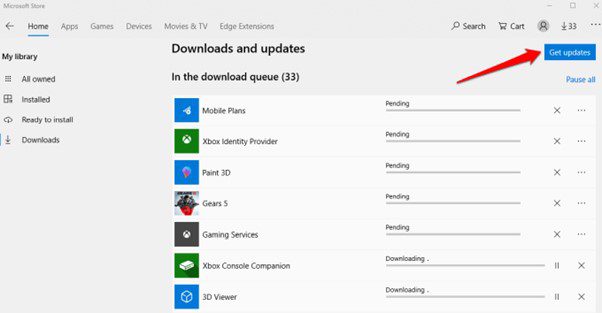
Click The Get Updates Button in The Download and Updates Section
Step 4. Find OneNote in the list of available updates and click the Update button to the right of it.
Try Signing out and logging in back:
Sometimes a bug or glitch can prevent the syncing process, but most of the time, signing out and logging back in will fix it. Signing out of Office applications and back in again can be helpful if you have tried the earlier solutions without success. Following the steps below, you can fix any syncing problems by signing out of your Microsoft account on all Office programs, including OneNote.
Step 1. Launch OneNote or any other Microsoft Office program.
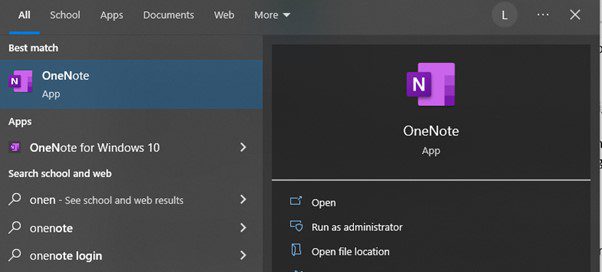
Launch The OneNote Notebook App
Step 2. Navigate to “File” and then “Account.”

Click On File And Then On Accounts
Step 3. Select “Sign out.”
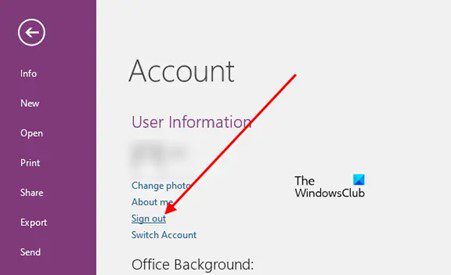
Click On Sign Out
Step 4. A prompt will warn you that deleting this account will sign you out of this and other Office programs. Click “Yes” to move forward.
Look up Notebook on the web.
If you are having trouble with OneNote not syncing while using the desktop program, check to see if the notebook works properly on the web version. This method assists in determining whether the issue is with the server or the desktop OneNote application itself. In addition, you can learn important information about the root of the syncing problem and take the necessary action to resolve it. The steps below can be used to perform the verification:
Step 1. Launch OneNote and select “File,” then “Info.”
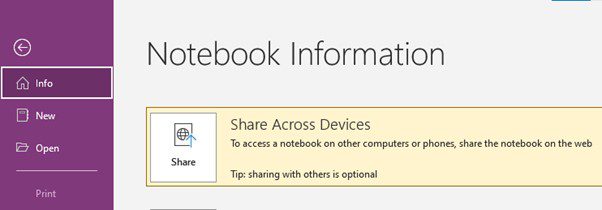
Launch OneNote, Select File, And Then Info
Step 2. Right-click the provided link in the right-hand window and select “Copy.”
Step 3. Open your web browser and paste the copied link into the address bar, then hit “Enter” to view the notebook online.
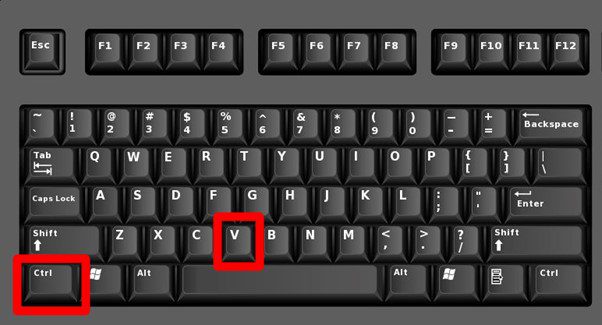
Paste The Copied Link On Your Browser Using Ctrl And V Button
Step 4. If the notebook opens successfully on the web and any changes made there appear, the issue may be with the desktop version of OneNote. Try closing and reopening OneNote to see if this resolves the syncing problem.
Resolve Content Sync Issues
To resolve the OneNote not syncing problem caused by a content sync conflict, you must address the version conflicts when multiple users attempt to edit the same page section simultaneously. To prevent data loss, OneNote makes multiple copies of the page, resulting in an error message on the yellow information bar. To resolve content sync conflicts and restore syncing in OneNote, follow these steps:

Step 1. Click on the yellow information bar at the top of the page in OneNote that displays the conflict message.
Step 2. Copy the content from the temporary page that displays the error message.
Step 3. Paste the copied content onto the primary page where the conflict occurred.
Step 4. To remove the duplicate copies, right-click on the page that caused the hurdle and select Delete.
Synchronize NoteBook manually
To address the issue of the OneNote notebook not syncing, it is potent to understand that the automatic syncing feature may not function as expected due to a system glitch or bug. In such cases, manually syncing the app may help to resolve the problem, especially if you are working on a shared notebook with others. This ensures that all device changes made in a shared notebook are updated. To manually sync a notebook in OneNote, follow the steps below:
Step 1. Launch OneNote and go to “File,” then “Info.”
Step 2. Locate and click the “View Sync Status” button on the right side of the pop-up window.
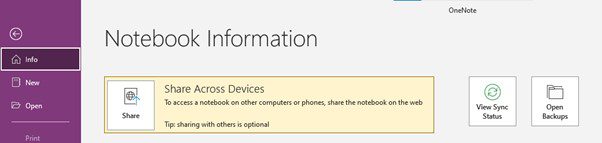
Click On The View Syn Status Button
Step 3. Click “Sync manually” in the “Shared Notebook Synchronization” window to begin the manual syncing process.
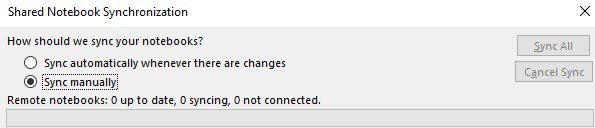
Click Sync Manually In The Shared Notebook Synchronization
Step 4. After completing the manual sync, your notes should be synchronized with OneDrive. If you have syncing problems with OneNote, manually syncing it may help.
Clear up Extra Memory chunks.
To resolve the OneNote notebook not syncing issue, consider your device’s available storage space. If you see the error code 0xE00015E0, your device has insufficient space, or the notebook is too large to sync successfully. To solve the problem of OneNote not syncing on Windows 10, optimize files or delete unnecessary backup files to free up space. To optimize files and manage storage space, take the following steps:
Step 1. Open OneNote and go to “File,” then “Options.”

Click File And then Options
Step 2. Navigate to the “Save & Backup” section in the pop-up window.
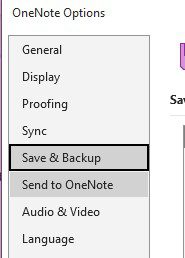
Click On Save And Backup Button
Step 3. In the “File Optimisation” section, click “Optimise All Files Now.” Please keep in mind that optimizing files may take some time.
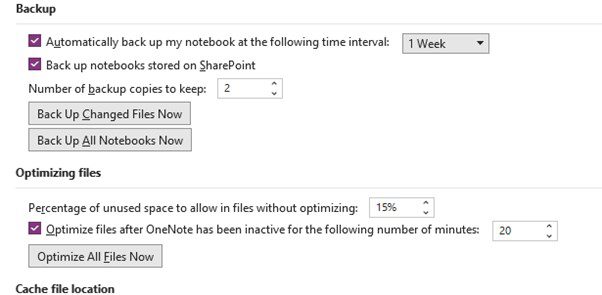
Click On Optimize All Files Now Button
Step 4. You can also delete unnecessary backup files to free up storage space and improve syncing performance.
How to Force OneNote to Sync?
You can manually initiate the synchronization process in OneNote to ensure that any modifications or revisions to your notes are promptly saved and synchronized across all your devices. By manually forcing a sync, you can ensure that you have the latest version of your notes available in OneNote. This manual sync option is particularly useful when encountering issues with automatic syncing or when you want to ensure immediate reflection of your changes on all devices.
Step 1. Launch OneNote.
Step 2. Navigate to the “File” menu and select “Info.”
Step 3. Next, click “View Sync Status.”
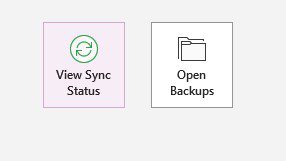
Click The View Sync Status Button
Step 4. After choosing “Sync automatically whenever there are changes” in the Sync Status window, click “Sync all.”
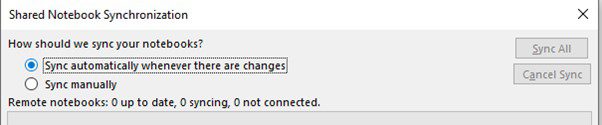
Click The Sync Automatically Whenever There Are Changes
Final Thought
In conclusion, having problems syncing OneNote notebooks can be annoying and disruptive to your workflow. Confusion and a hindrance to collaborative efforts can result from not syncing your notes and changes across devices. But in this article, we have examined the various root causes of this issue and given you six different solutions to fix it. Please comment if this article helped you, and don’t hesitate to share it with your friends and coworkers if you think they would also find it useful.