Mastering Zoom Effects in Adobe Premiere Pro: Enhancing Your Videos

In the world of video editing, Adobe Premiere Pro has become a powerful tool for creating captivating and professional-looking content. One of the key aspects of creating engaging videos is the use of scaling effects, which can add visual interest and direct the viewer’s attention to specific elements within the frame. In this article, we will explore various ways to implement zooming effects in Adobe Premiere Pro, helping you take your video editing skills to the next level.
Table of Contents: hide
How to Zoom a Clip in Adobe Premiere Pro
Try 3 Cool Premiere Pro Zoom Effects
How to Zoom a Clip in Adobe Premiere Pro
Digital zooming is a simple yet effective animation technique that involves enlarging the size of a clip within the frame. However, zooming can result in a loss of video quality, so it’s recommended to use high-resolution footage whenever possible. Let’s explore the step-by-step process of creating a zoom effect in Adobe Premiere Pro.
Step 1: Set the starting point for scaling
Begin by selecting the clip you want to zoom in on the timeline. Position the playhead at the point where you want the zooming effect to start. Navigate to the Effects Control panel and locate the Zoom and Position properties. Set keyframes for both properties, click on the stopwatch icon next to each property.
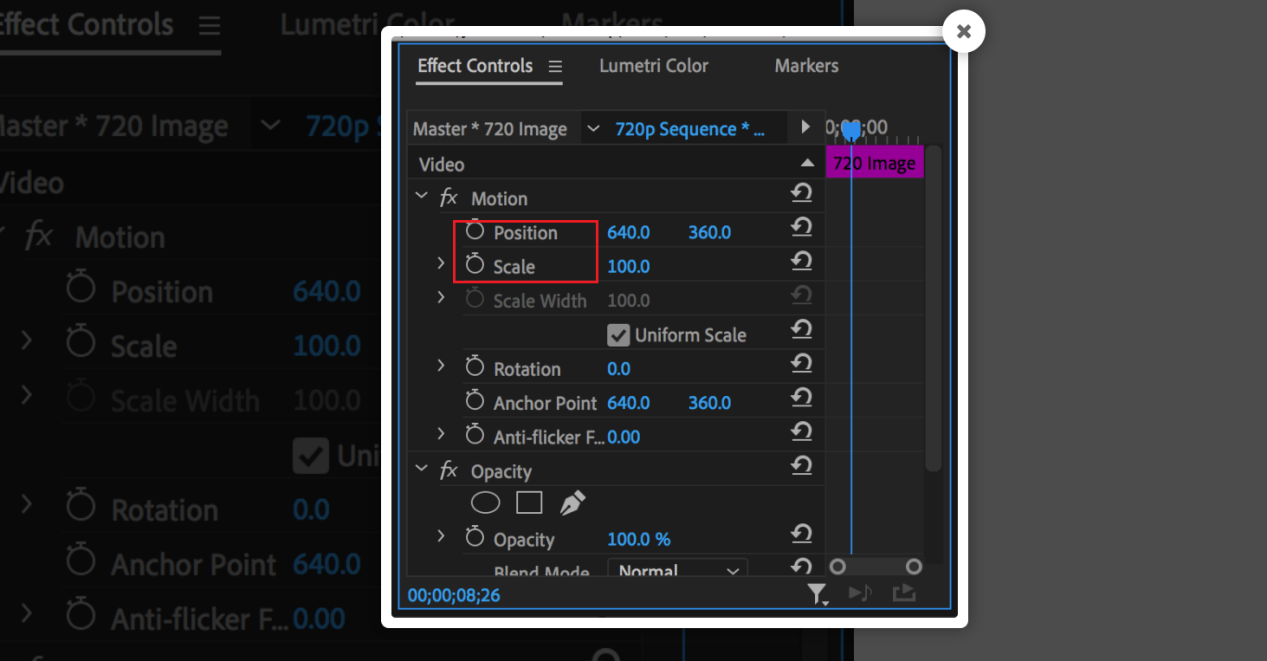
Set the Starting Point for Scaling
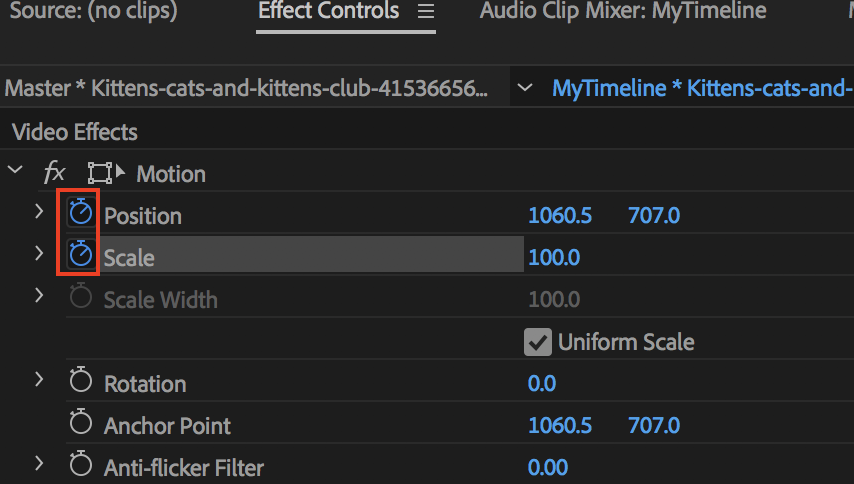
Step 2: Create a zoom animation
Move the play head to the position where you want the zooming motion to end. Adjust the Zoom and Position properties to achieve the desired level of magnification and framing. Adobe Premiere Pro will automatically create a smooth animation between the starting and ending keyframes. Play back the clip to preview the animation and make any necessary adjustments to control the speed and duration of the zoom effect.

Create a Zoom Animation
Step 3: Touch up and finish zooming
Consider applying a slow-in and slow-out effect to the keyframes to give your zoom animation a more natural and polished look. This will create a gradual acceleration and deceleration at the beginning and end of the zoom, mimicking the smooth motion of a camera lens. To do this, right-click on the keyframes in the Effects Control panel and select “Ease In” and “Ease Out,” respectively.
Touch up and Finish Zooming
Try 3 Cool Premiere Pro Zoom Effects
While simple zooming is a great way to add emphasis to your videos, Adobe Premiere Pro offers a range of more advanced techniques to create visual drama and unique transitions. Let’s explore three cool zoom effects that will take your videos to the next level.
Shutter Zoom Transition Effect
The shutter zoom transition effect mimics the look of a camera shutter rapidly opening and closing, creating a dynamic and eye-catching transition between clips. To achieve this effect, duplicate your clip multiple times on the timeline and apply increasingly larger zoom levels to each successive clip. Adjust the duration of each clip to create a rapid, staccato-like effect that simulates the appearance of a camera shutter.
Smooth Zoom Transition Effect
Try the smooth zoom transition effect for a more subtle and seamless transition between clips. This technique involves using adjustment layers and the Transform effect to create a gradual zoom that blends two clips together. Place an adjustment layer above the two clips you want to transition between and apply the Transform effect to the layer. Use keyframes to animate the scale and position properties, creating a smooth zoom that gradually reveals the second clip.
Motion Zoom Effect (Dolly Zoom)
The motion zoom effect, also known as the dolly zoom or Vertigo effect, is a mesmerizing technique that involves physically moving the camera while simultaneously adjusting the lens focus in the opposite direction. This creates a disorienting and unsettling effect that can add a sense of drama or unease to your videos. To recreate this effect in Adobe Premiere Pro, use a combination of keyframe scale and position animations on your clip, along with careful timing and easing adjustments.
Best Alternative to Premiere Pro to Zoom In on Video
If you’re looking for a powerful alternative to Adobe Premiere Pro for zooming in on videos, CapUp is an excellent choice. This online video editing platform offers a user-friendly interface and a wide range of features, making it perfect for content creators who want to enhance their videos with impressive zoom effects.
CapUp utilizes advanced AI technology to analyze your video’s content and automatically generate captivating zoom effects that highlight key moments and draw in your audience. With its extensive library of stylish templates, transitions, and influencer-style effects, CapUp empowers you to create professional-looking videos that stand out and engage your viewers, all without the need for expensive software or extensive editing experience.
Highlight Features of CapUp
- Automatically create accurate, engaging subtitles using advanced artificial intelligence.
- Extensive Sound Effects Library Enhance your videos with a wide range of high-quality sound effects.
- Personalize subtitles with a variety of styles to match your brand.
- Generate subtitles for YouTube clips in multiple languages and add sound effects for global coverage.
- Intuitive User Interface Navigate easily and utilize features efficiently with a user-friendly interface.
Step 1: Log in to CapUp
Log in to your CapUp account. If you don’t have an account, create a new one. Click the “Upload” button and then select the video you want to add subtitles to. Alternatively, drag and drop the video file to the designated upload area.
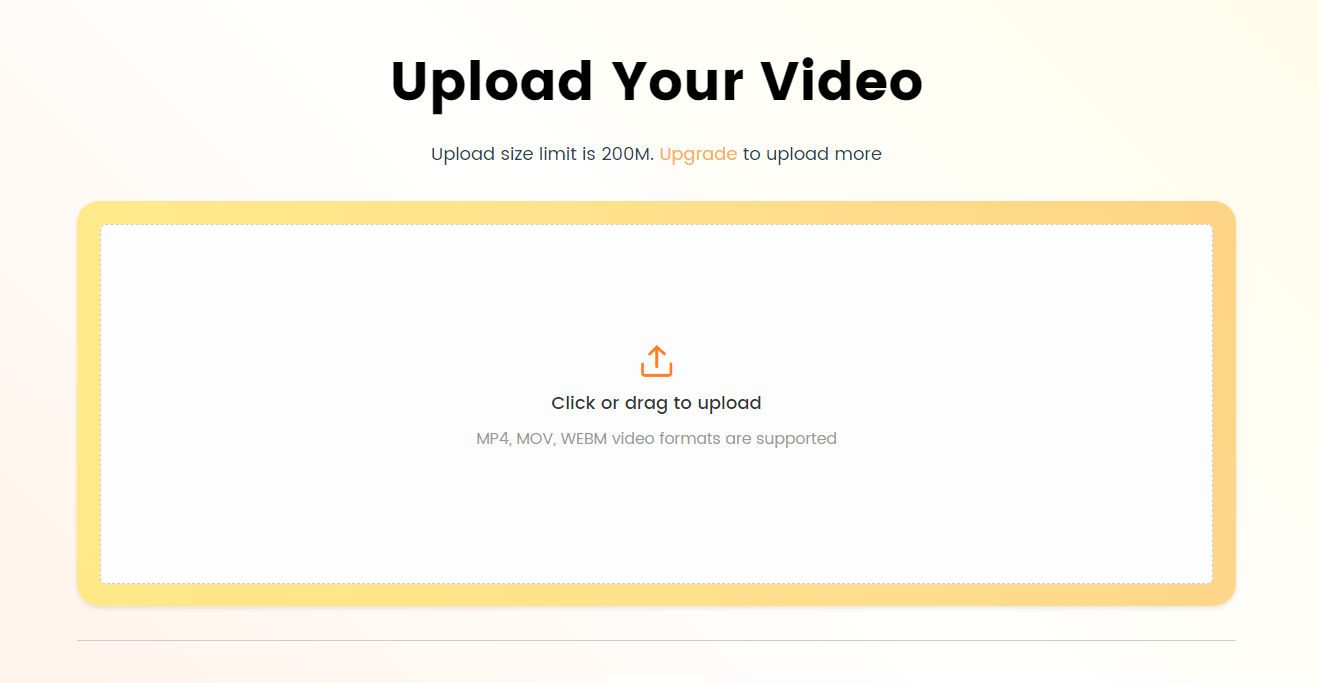
Log in and Upload the Video
Step 2: Select the video language
Select the language used for the YouTube short video from the drop-down menu. CapUp supports multiple languages to meet your specific needs.
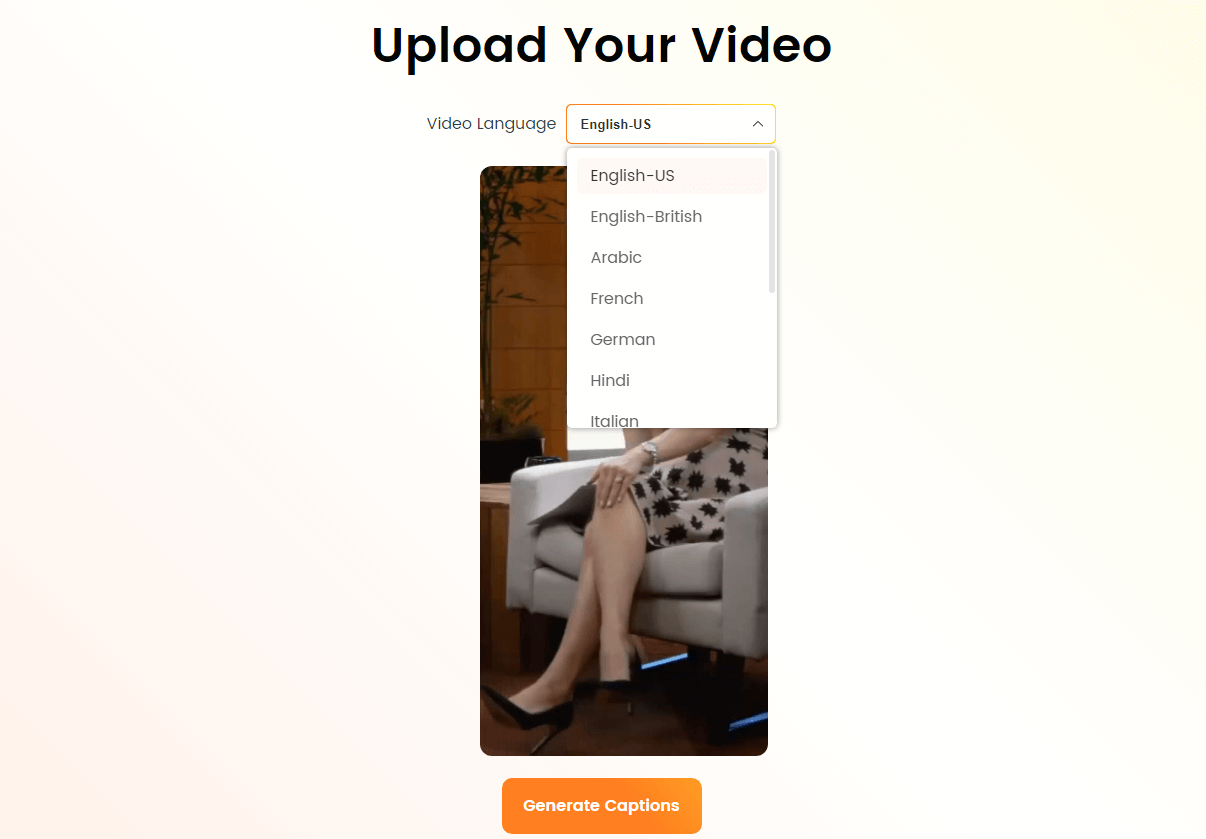
Select the Language that Matches Your Video
Step 3: Generate subtitles automatically
Select the desired template and click the “Save as Template” button to start the AI-driven subtitle generation process.CapUp will analyze your video audio and automatically create accurate, engaging subtitles.
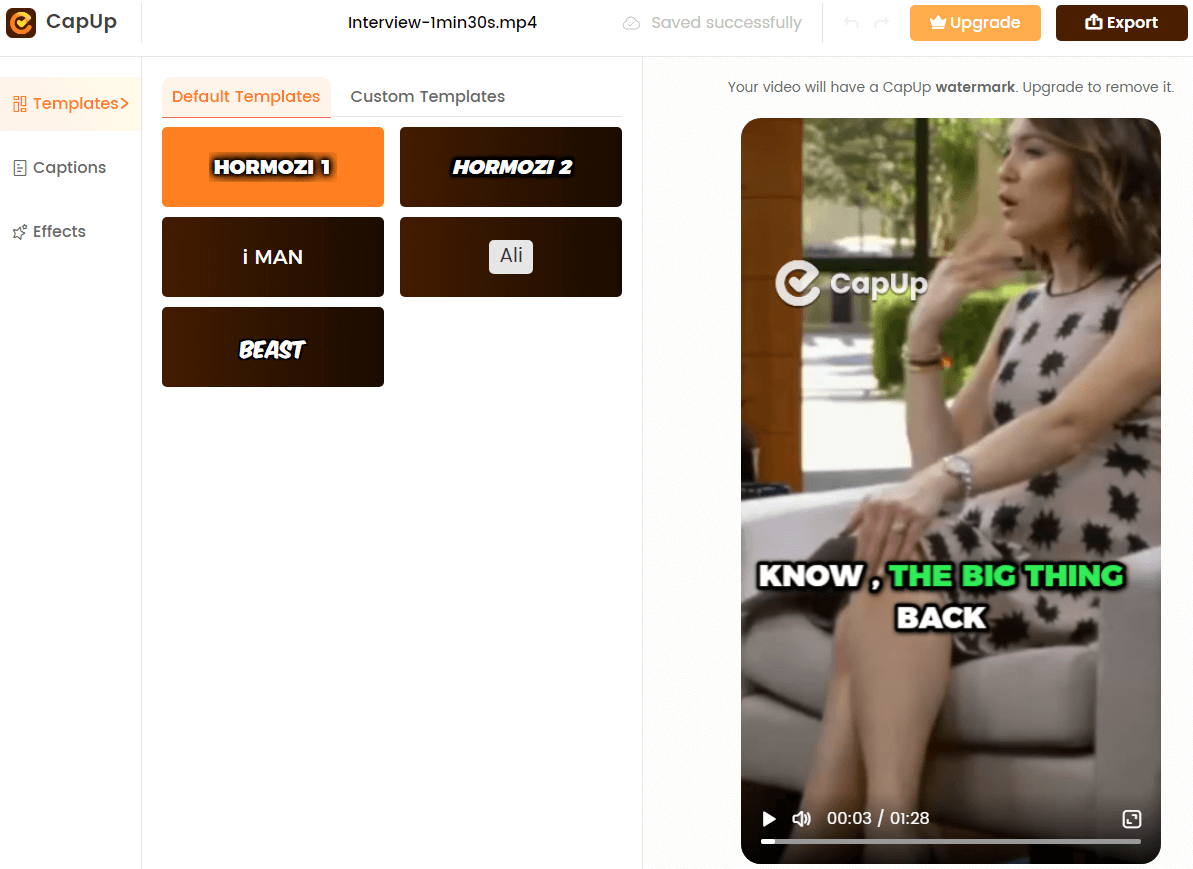
Add Captions to Video Automatically with AI
Step 4: Review and customize subtitles
Once the subtitles are generated, check them for accuracy and make any necessary edits. Use CapUp’s customization options to personalize the look of your captions. Choose from a variety of font styles, sizes, colors, and backgrounds to match your brand’s aesthetic.
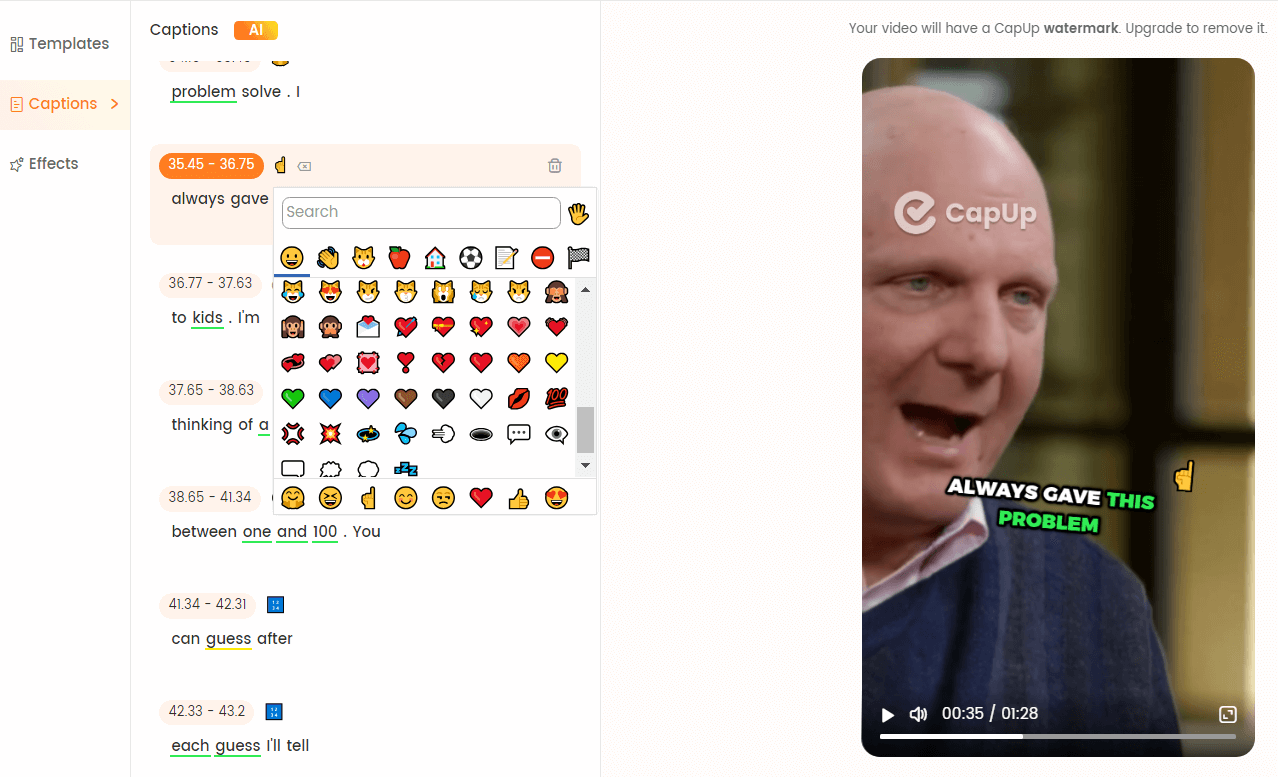
Add Subtitles to Videos
Step 5: Export and download
Once you are satisfied with your captions and sound effects, click the Export button.
FAQs about Zoom in on Premiere Pro
1. Why does my zoom look choppy or not smooth?
Check for large changes between keyframes – big jumps in the Zoom/Position values can cause choppiness.
2. Try adding more intermediate keyframes to make the changes more gradual.
Apply Ease In and Ease Out on the keyframes to create a smoother acceleration and deceleration.
3. How can I control the speed and duration of the zoom?
- Adjust the placement of the keyframes to control the start and end time of the zoom.
- Modify the zoom values at the keyframes to control the amount of magnification.
- Use Ease In and Ease Out to adjust the acceleration and deceleration of the zoom.
4. Can I zoom and pan at the same time?
Yes, you can animate both the Zoom and Position properties together to create a combined zooming and panning effect.
Summary
Zoom effects are a powerful tool in the video editor’s arsenal, capable of adding emphasis, guiding the viewer’s attention, and creating unique visual transitions. Whether you’re working on a narrative feature, a promotional video, or simply want to add some style to your YouTube channel, mastering the art of zooming in Adobe Premiere Pro will elevate your videos to new heights. By following the step-by-step guide and exploring the advanced techniques outlined in this article, you’ll be well on your way to creating stunning, professional-quality videos that captivate your audience.