Video editing tools are in high demand, as videos dominate communication and entertainment. VLC Media Player, well known as a versatile video player, contains a hidden gem among its features: video editing capabilities. This article is about revealing VLC’s capability in the world of video editing, with a focus on one of the most essential aspects: video trimming.
Trim Videos in VLC Media Player
As you learn more about trim video VLC, you’ll discover that VLC is a capable editor and player. VLC includes the tools to delete undesirable areas, produce short video snippets, and fine-tune your content. This comprehensive article will teach you how to trim videos easily, ensuring that your movies are polished and interesting without using complicated video editing software. Let’s dive into video trimming using VLC Media Player and discover how to easily and efficiently enhance your video footage.
Table of Contents: hide
How to Split and Trim a Video in VLC?
Can I Edit a Video with VLC?
VLC Media Player, known for playing almost any multimedia format, has many uses beyond playback. Many people may be surprised that VLC has some basic video editing features, making it a flexible tool for anyone needing rapid video alterations.
The ability to trim and cut videos is one of the key video editing functions provided by VLC. This feature allows you to crop specific video regions, removing unnecessary bits and creating a shorter, more concise clip. In addition, VLC lets you alter the brightness, contrast, and saturation settings, which might be important when fine-tuning video quality.
While VLC works well for basic video editing, Adobe Premiere and Final Cut Pro are more powerful compared to it. As an alternative to learning complex professional software, VLC is a useful tool for consumers looking for a simple way to edit their movies.
How to Split and Trim a Video in VLC?
VLC Media Player, well-known for its video playback capabilities, provides an easy way to divide, trim, and edit video files. VLC can help you trim unneeded video segments, generate shorter clips, and refine video content. Here’s how to use VLC to split and trim a video:
Step 1. Open VLC Media Player, click “Media” in the top-left corner, and select “Open File.” Find the video you wish to work on your computer.
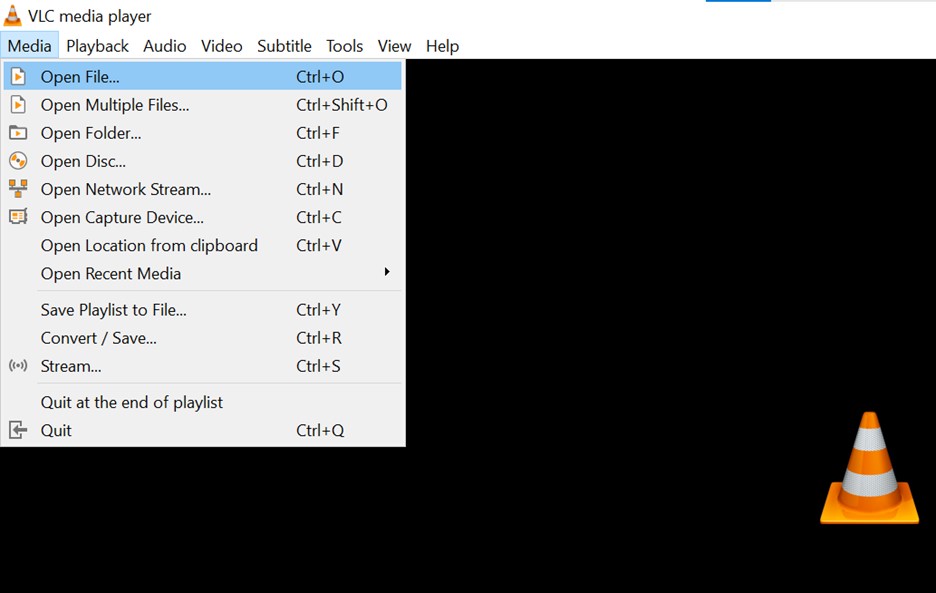
Open Media File in VLC
Step 2. Select “Advanced Controls.” from the “View” menu when your movie loads. This adds several buttons to VLC, including the record button.
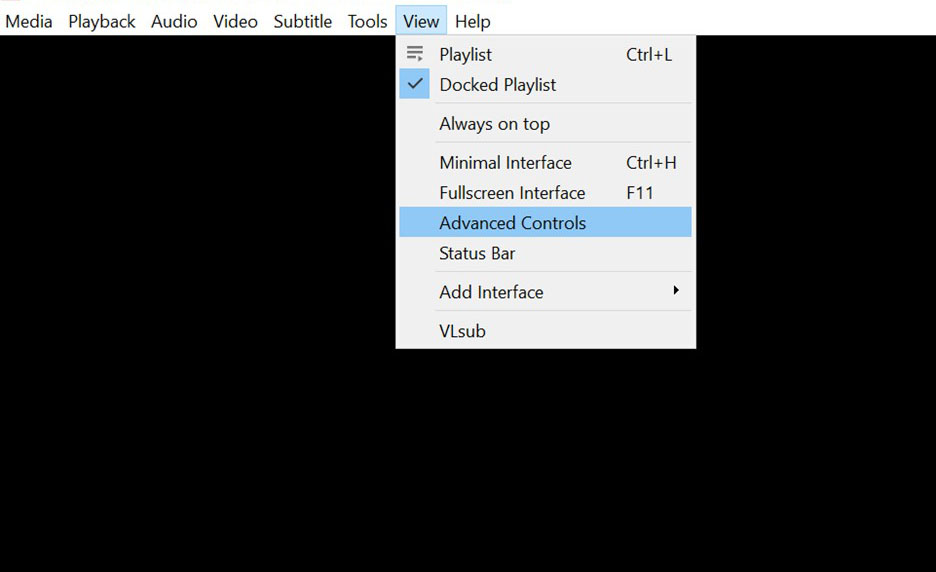
Select Advanced Controls From The View Tab
Step 3. When ready to trim, pause the video. Click “Record” to record and start playing the video. Continue watching the video and click “Record” to stop, highlighting the portion to trim.
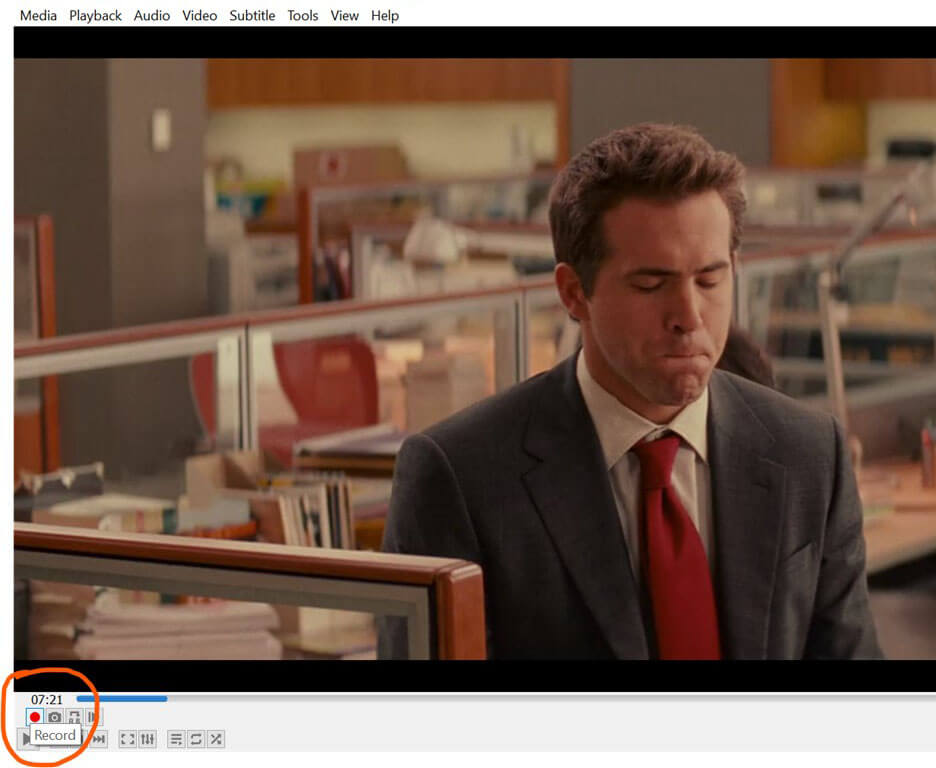
Record Video Trim Parts
Step 4. After you’ve recorded your trim parts, click “Media” in the upper-left corner and then “Convert/Save.”
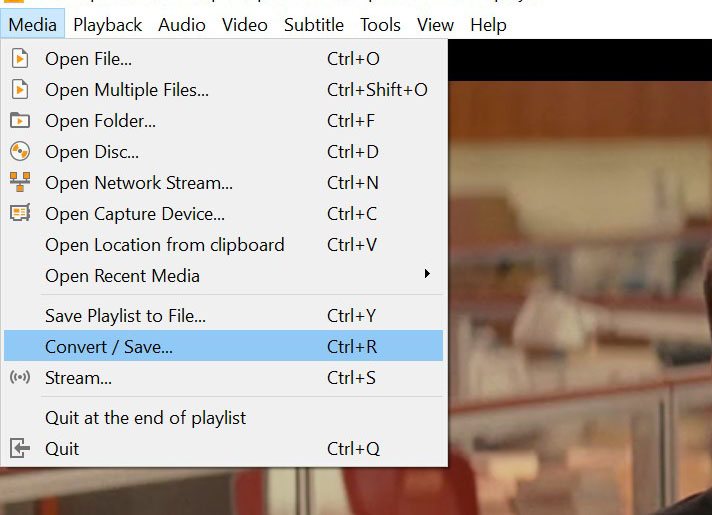
Convert/Save Trimmed Video
Step 5. Select your trimmed video’s destination file and format it in the “Convert” window. By pressing the “Browse” button, you may choose where to download the trimmed video. Finally, click the “Start” button to begin pruning.
VLC will now trim your video depending on the start and end points you specified and save it to your specified location. With VLC, you can effortlessly divide and trim videos, giving a simple and effective solution for basic video editing chores.
What Does Trimming a Video Clip Allow You to Do?
Trimming a video clip with VLC or other video editing software provides various advantages and functions that can improve your video content and better satisfy your demands. Trimming allows you to do the following:
- Trim Unwanted Content: Trimming allows you to remove any undesired or extra parts of your video, such as awkward pauses, errors, or irrelevant content. This is very useful for creating a more compact and compelling video.
- Make Highlight Reels: Trimming is perfect for making highlight reels or compilation videos. You can condense the most exciting or important bits from a longer video into a shorter, action-packed version.
- Improve Video Flow: You may keep your viewers engaged and interested throughout the video by deleting or cutting elements that disturb the flow or rhythm.
- Reduce File Size: Trimming and eliminating areas of your movie can drastically reduce file size, making it easier to share, upload, or save. When dealing with enormous video files, this is extremely beneficial.
- Trim Videos for Social Media: Trimming is essential for optimizing videos for social media platforms with time limits. Because platforms like Instagram and Twitter have video length restrictions, editing allows you to adjust your material accordingly.
- Correct Faults: Trimming is a useful technique for video editing when you need to correct mistakes, retakes, or faults. You can trim off the problematic section while maintaining video continuity.
- Customize Content for Audience: Trimming content also helps you make it more relevant to certain groups of people. You may make your material more relevant and interesting by adapting videos for different viewers or platforms.
Bonus Tip. How to Trim a Video Online?
While VLC Media Player is a powerful desktop video editing tool, you may prefer the ease of an online application for simple video-cutting jobs. Clippa, an online video editor, provides a simple and effective method for trimming videos without requiring software installations. Clippa can be used to trim a video online in the following ways:
Step 1. Open your web browser and go to Clippa’s online video editor. Click the “Upload a file” button and pick the video clip you wish to trim. Clippa supports a variety of video formats, ensuring compatibility with the majority of files.
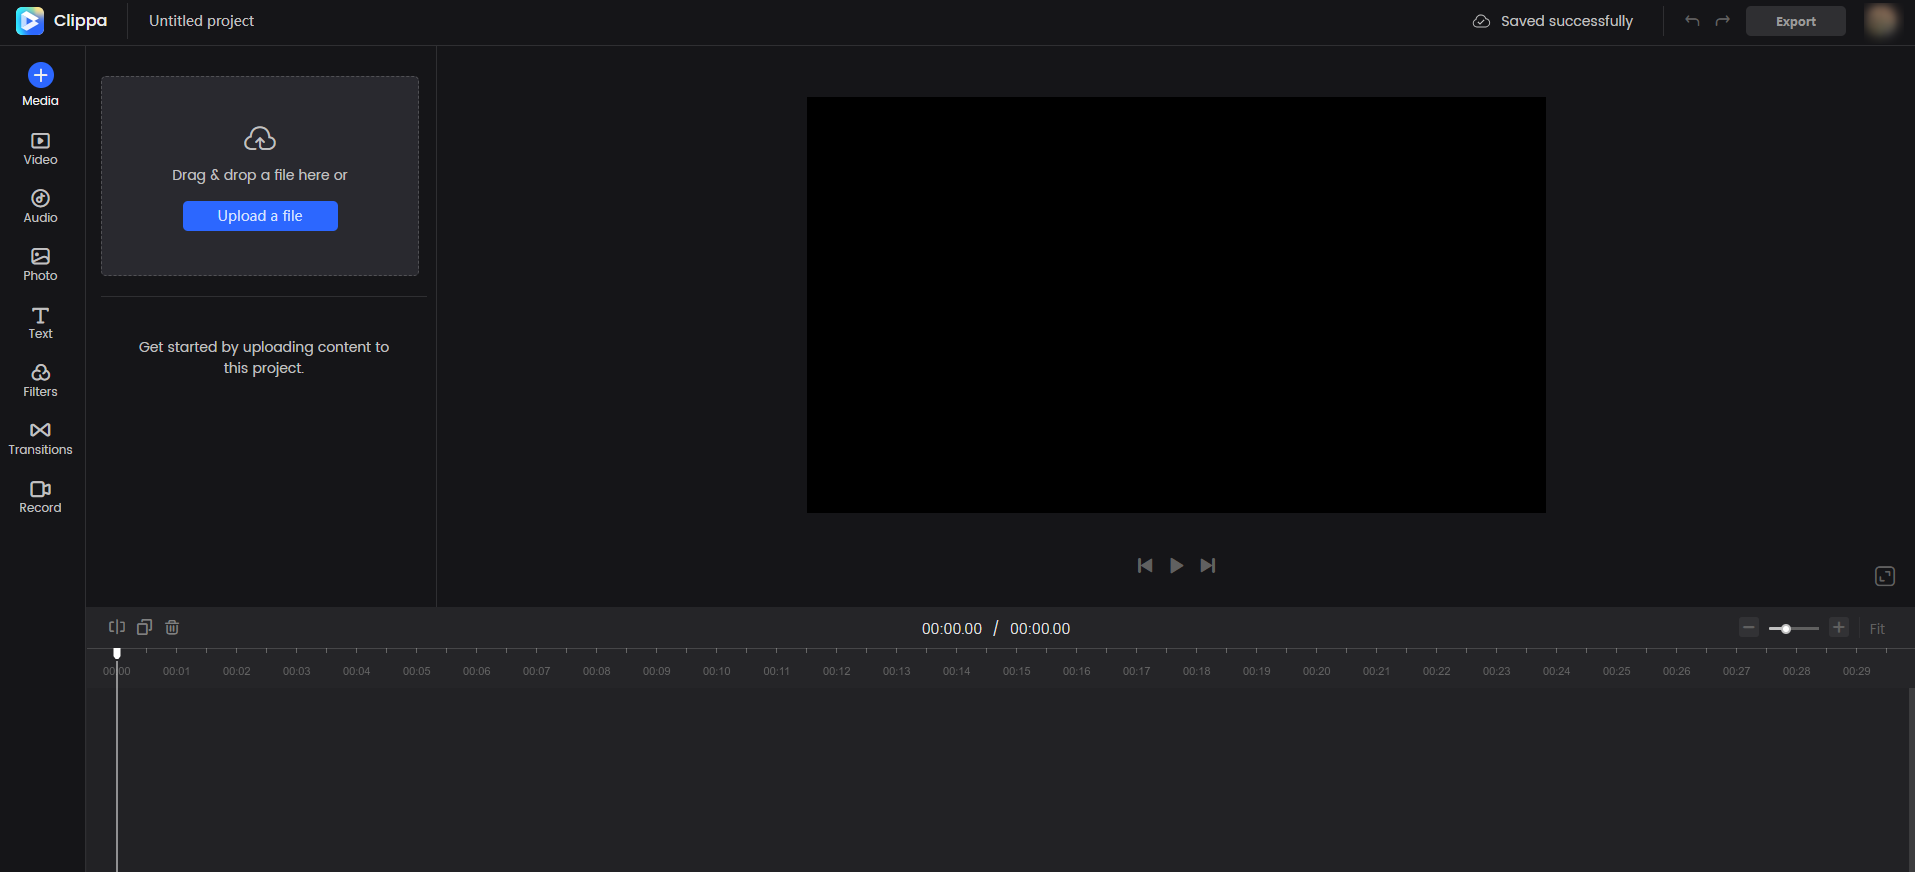
Clippa Main Interface
Step 2. Clippa displays a timeline of your video. Drag the pointer on the timeline and click on the Split icon to select the segment you want to trim.
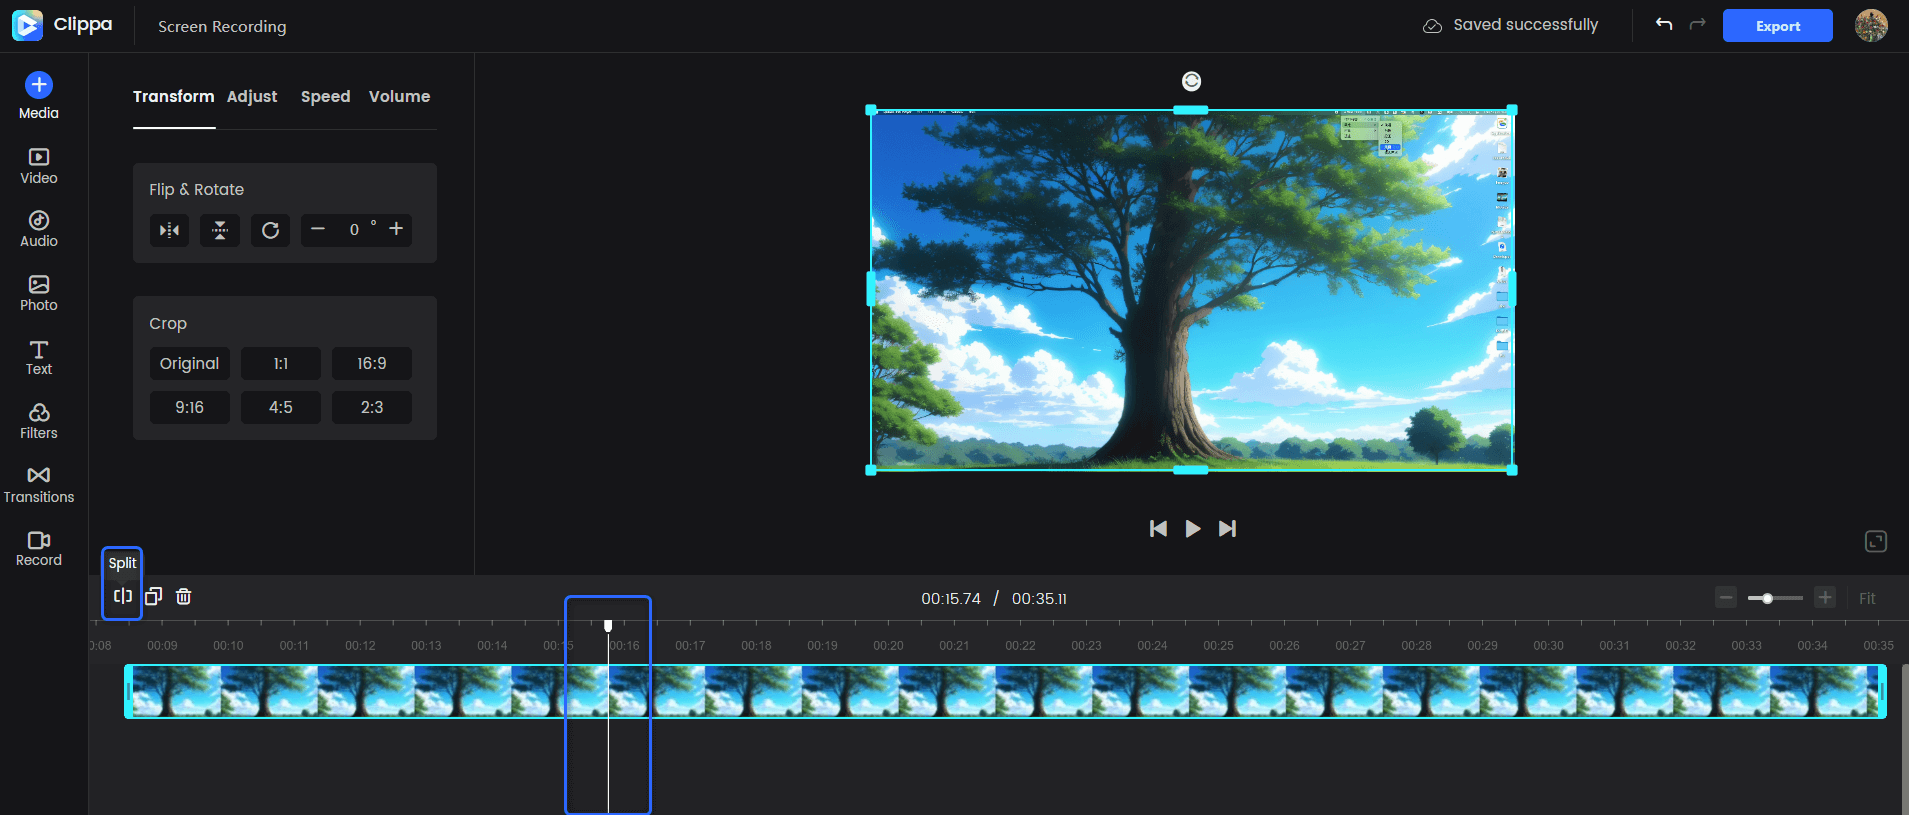
Upload and Split the Video Clip
Step 3. Click on the Delete button to trim the video. Before finalizing your edit, use the full-screen preview option to confirm that the reduced video matches your expectations. This preview allows you to double-check your choice and make any required changes.
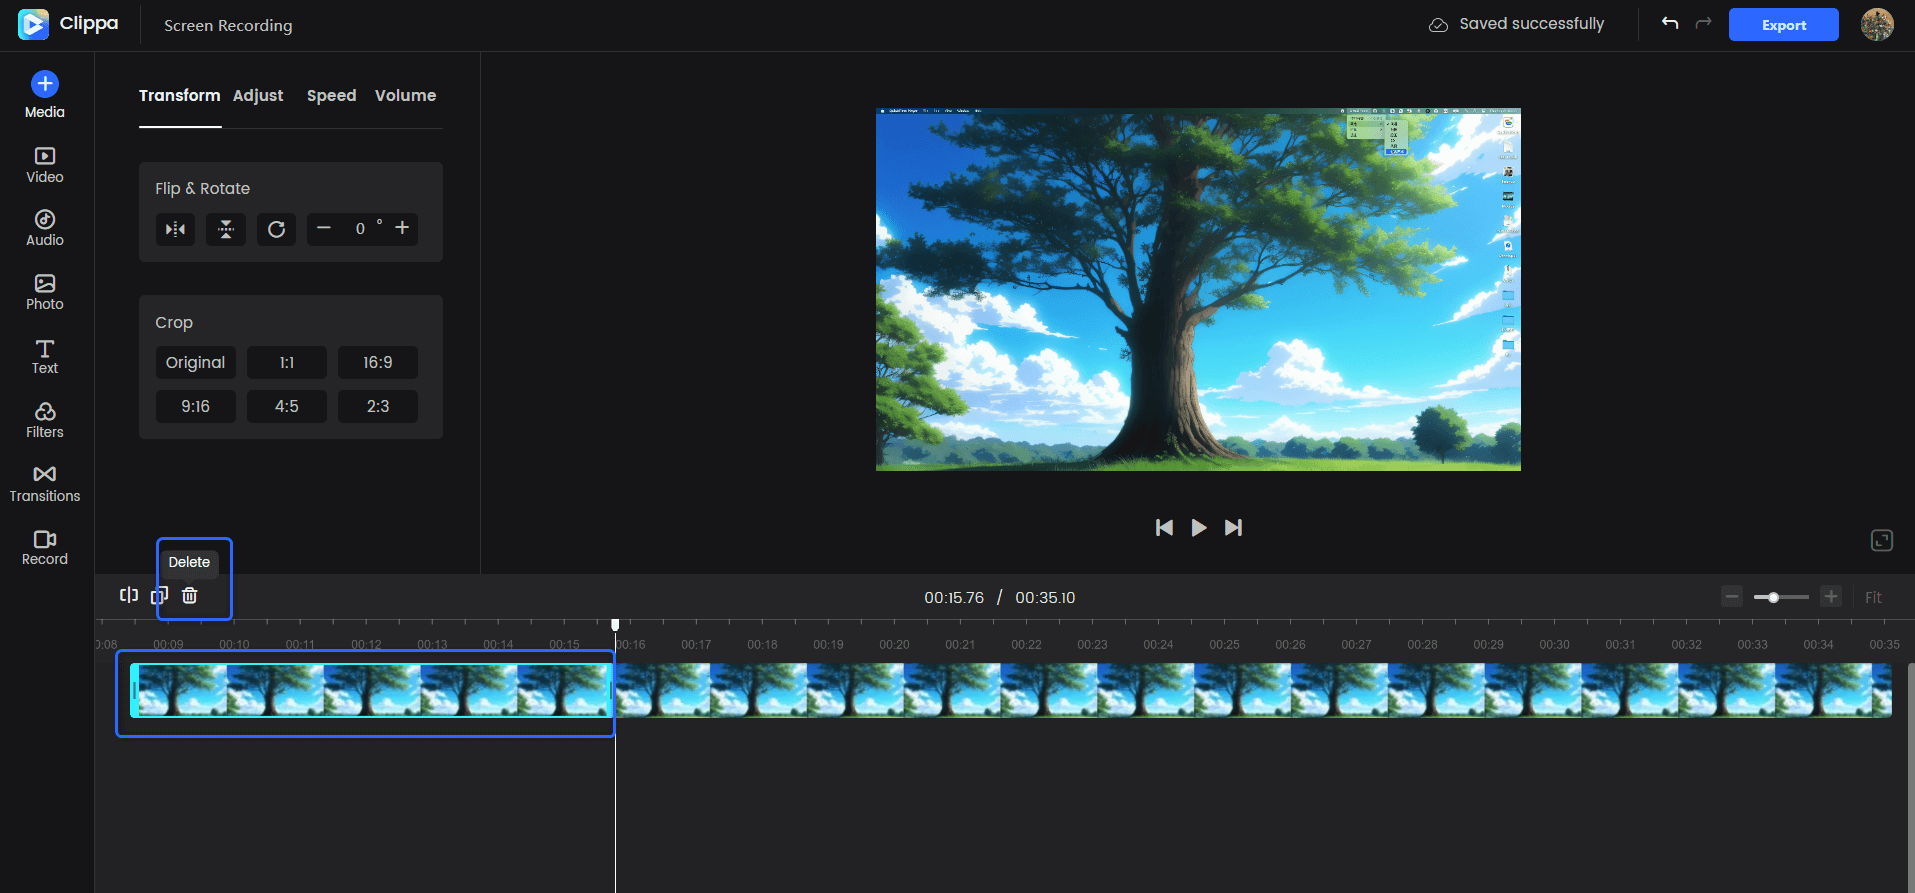
Trim the Video Clip
Step 4. Click the Export button on Clippa’s interface. Your video will be processed, and you can download the reduced version.
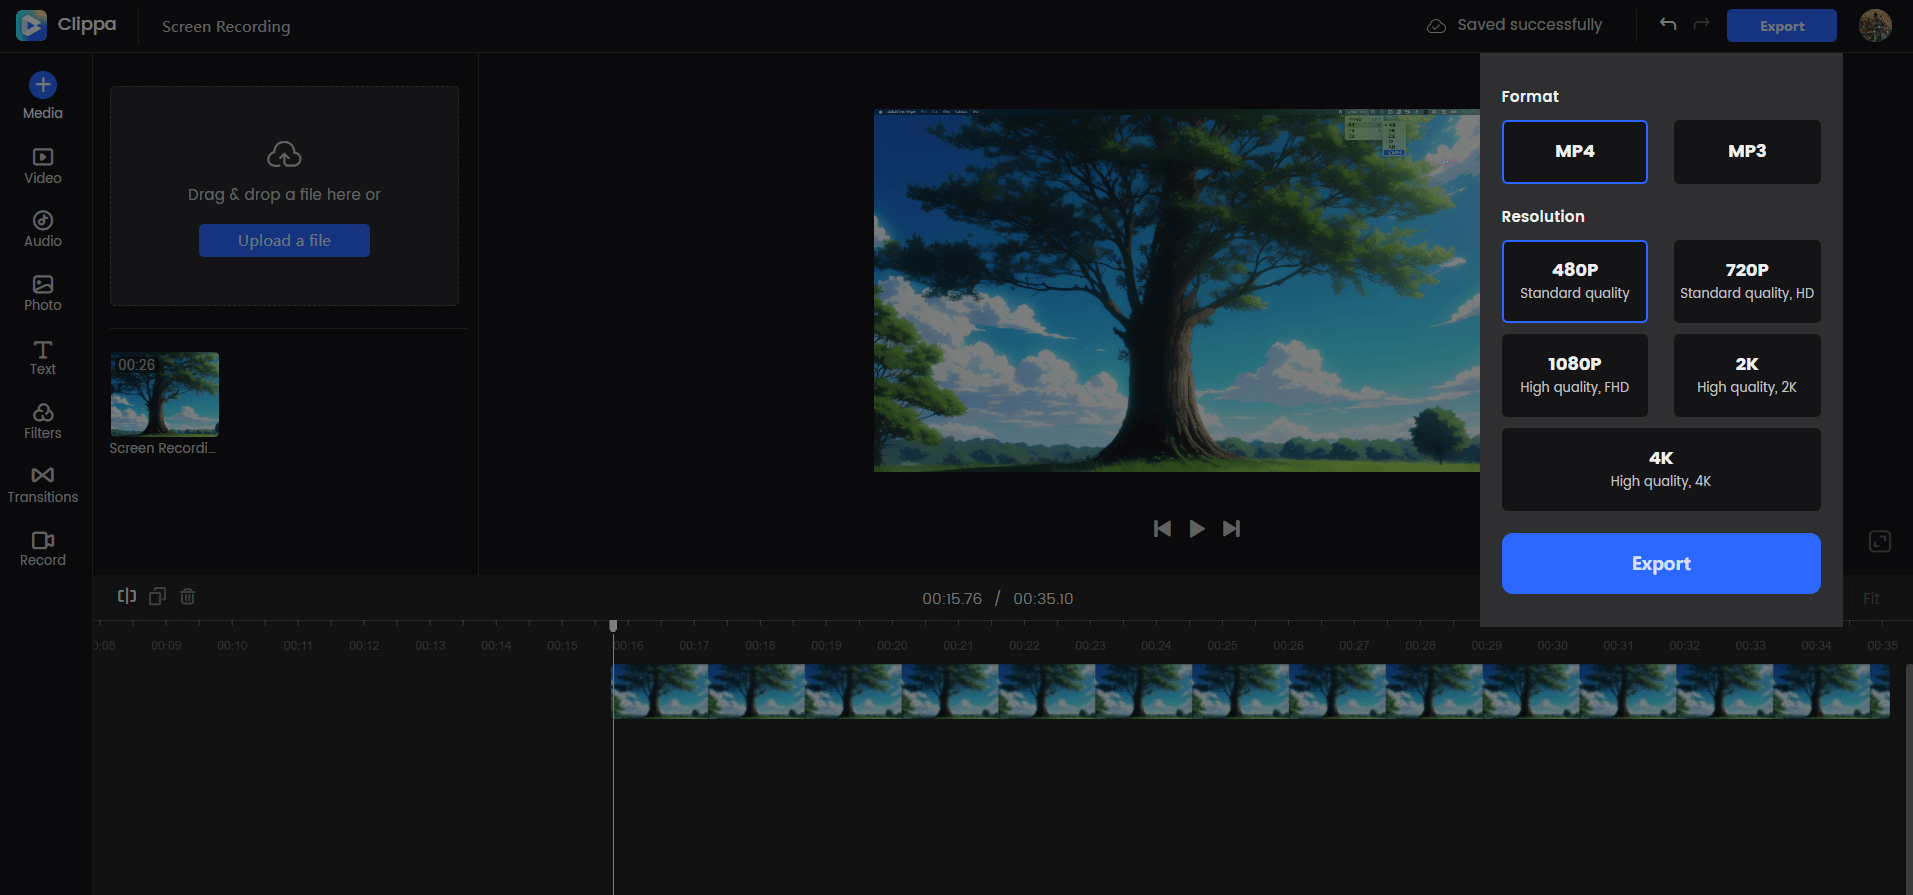
Export the Trimmed Video
Using Clippa to trim your films online is a quick and easy approach to achieving professional results without complicated software. Clippa simplifies and streamlines video editing chores, whether you need to trim a video for social media or delete unwanted pieces.
Final Thought
VLC Media Player is a versatile, powerful desktop program for trimming and editing videos. Its simple interface, vast format compatibility, and several features make it an excellent choice for video enthusiasts. VLC’s capabilities allow you to remove undesirable chunks, split a movie into smaller parts, and create bespoke clips. Furthermore, employing Clippa for online video cutting provides additional flexibility and accessibility. With these tools, you can easily reach your video editing goals, ensuring your content is polished and ready to share. So, to release your creativity, dive into video editing with VLC and Clippa.