Microsoft Teams has become a popular tool for online meetings, webinars, and virtual collaborations. But let’s face it: not every minute of a team’s recording is pure gold. Awkward silences, off-topic tangents, and technical hiccups can make your
Fortunately, trimming your Microsoft Teams recordings is a straightforward process that can significantly enhance their quality and ease of sharing.
Table of Contents: hide
Why Trim Your Team’s Recordings?
How to Trim a Teams Recording Using Microsoft Stream
Alternative Methods for Trimming Teams Recordings
Why Trim Your Team’s Recordings?
- Remove Unnecessary Content: Eliminate those awkward silences, off-topic conversations, and technical difficulties that can distract viewers and make your
- Create More Focused Videos: Highlight the most important points of your meeting or presentation, making the content more engaging and easier to digest.
- Save Storage Space: Shorter videos take up less storage space in Microsoft Stream, freeing up valuable cloud storage.
- Improve Shareability: Concise and focused recordings are more likely to be watched and shared by colleagues or clients.
How to Trim a Teams Recording Using Microsoft Stream
Microsoft Teams recordings are automatically saved to Microsoft Stream, a video-sharing platform with a built-in video editor. Here’s how to trim
Step 1: Access Microsoft Stream
- Find your recording in the “Recordings” tab of your Teams channel.
- Alternatively, go to and log in with your Microsoft account. Your team’s recordings will be available in your “My Content” library.

Trim Teams Meeting
Step 2: Open the Video Editor
Click on the recording you want to trim.
Click the pencil icon (Edit) below the video player to open the video editor.
Step 3: Set Trim Points
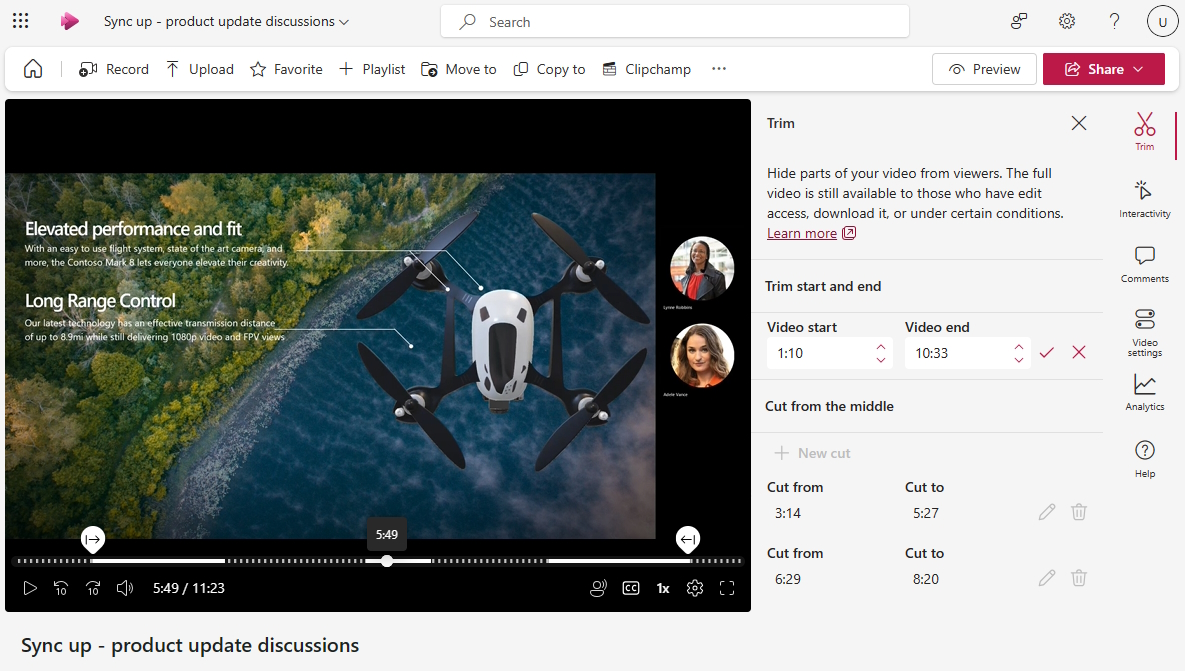
- In the editor, select the “Trim” tab.
- You can define the section you want to keep by dragging the blue sliders at the beginning and end of the video timeline. You can also specify specific timecodes for precise trimming.

Set Trim Points
Step 4: Preview and Apply Trim
- Click the “Play” button to preview your trimmed video and make sure you’ve selected the correct trim points.
- Once you’re satisfied, click “Apply.”
Step 5: Save the Trimmed Recording
- You can save the trimmed version as a new video or replace the original recording. Choose the option that best meets your needs.
Alternative Methods for Trimming Teams Recordings
Record and Trim Teams Meetings Like a Pro with FocuSee
While Microsoft Stream provides basic trimming functionality, FocuSee takes recording and editing your Teams meetings to the next level. This intuitive screen recording software is packed with features that make it ideal for capturing and refining your meeting content.
Why FocuSee is Perfect for Teams Meetings:
- Capture Everything: Record your screen, webcam, and audio simultaneously, ensuring that you don’t miss any crucial details.
- Highlight Key Moments: Use FocuSee’s zoom and spotlight features to highlight specific parts of the screen during the recording, making it easier for viewers to follow along.
- Create Engaging Content: Trim unwanted sections, add smooth transitions, and even generating subtitles automatically to make your recordings more professional and engaging.
- Perfect for Meeting Minutes: FocuSee’s ability to record webcam footage and generate subtitles makes it an excellent tool for creating detailed meeting minutes.
How to Record and Trim a Teams Meeting with FocuSee:
Step 1: Download and Launch FocuSee.
Step 2: Select the “Windows” recording mode that encompasses your Teams meeting window.

Choose a Recording Mode
Step 3: Adjust the Setup (system audio, microphone, or both).
Step 4: Click the record button to start recording your Teams meeting.
Step 5: Click the stop button when the meeting is over.
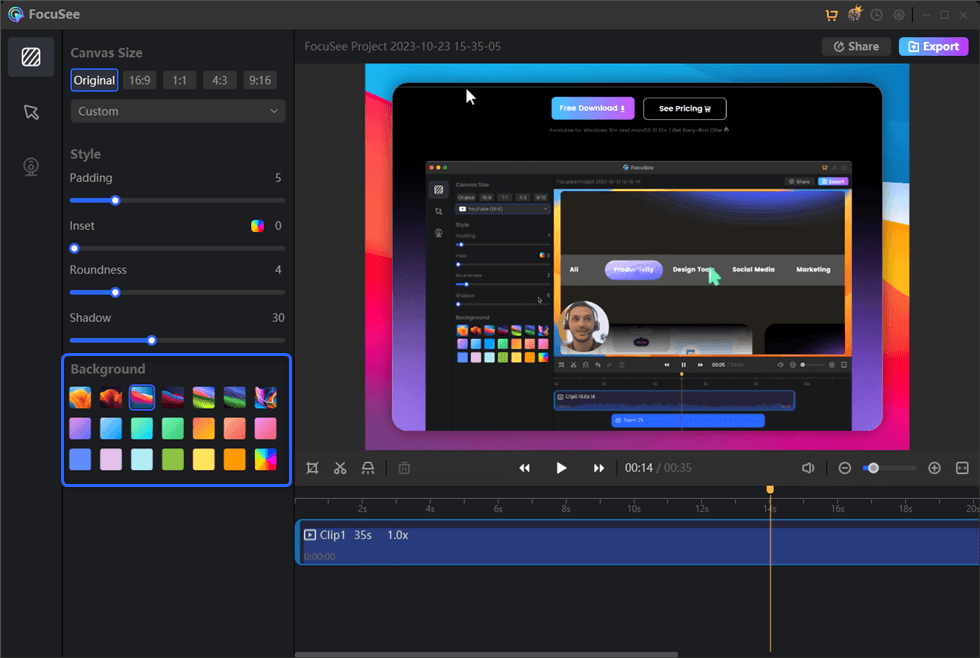
Step 6: Use FocuSee’s built-in editor to trim the recording, add zoom effects, or generate subtitles.

Edit the Recording
Step 7: Export the trimmed video to your desired location.
Trim a Teams Recording with Shotcut
Shotcut is a free, open-source video editor that offers a more advanced way of trimming Teams videos. Although FocuSee requires more technical know-how, it provides greater control and a more comprehensive range of editing features.
Key Features of Shotcut:
- Non-Linear Editing: Edit your recordings non-linearly, meaning you can rearrange clips, add transitions, and apply effects without affecting the original footage.
- Precise Trimming: Use the timeline and cutting tools to accurately trim your recordings.
- Advanced Audio and Video Effects: Unlock filters, transitions, and effects to enhance your recordings.
- Multiple Export Options: Save your trimmed recordings in various formats and resolutions to suit your needs.
How to Trim a Teams Recording with Shotcut:
Step 1: Download and install Shotcut.

Download and install Shotcut
Step 2: Import your Teams recording into Shotcut.
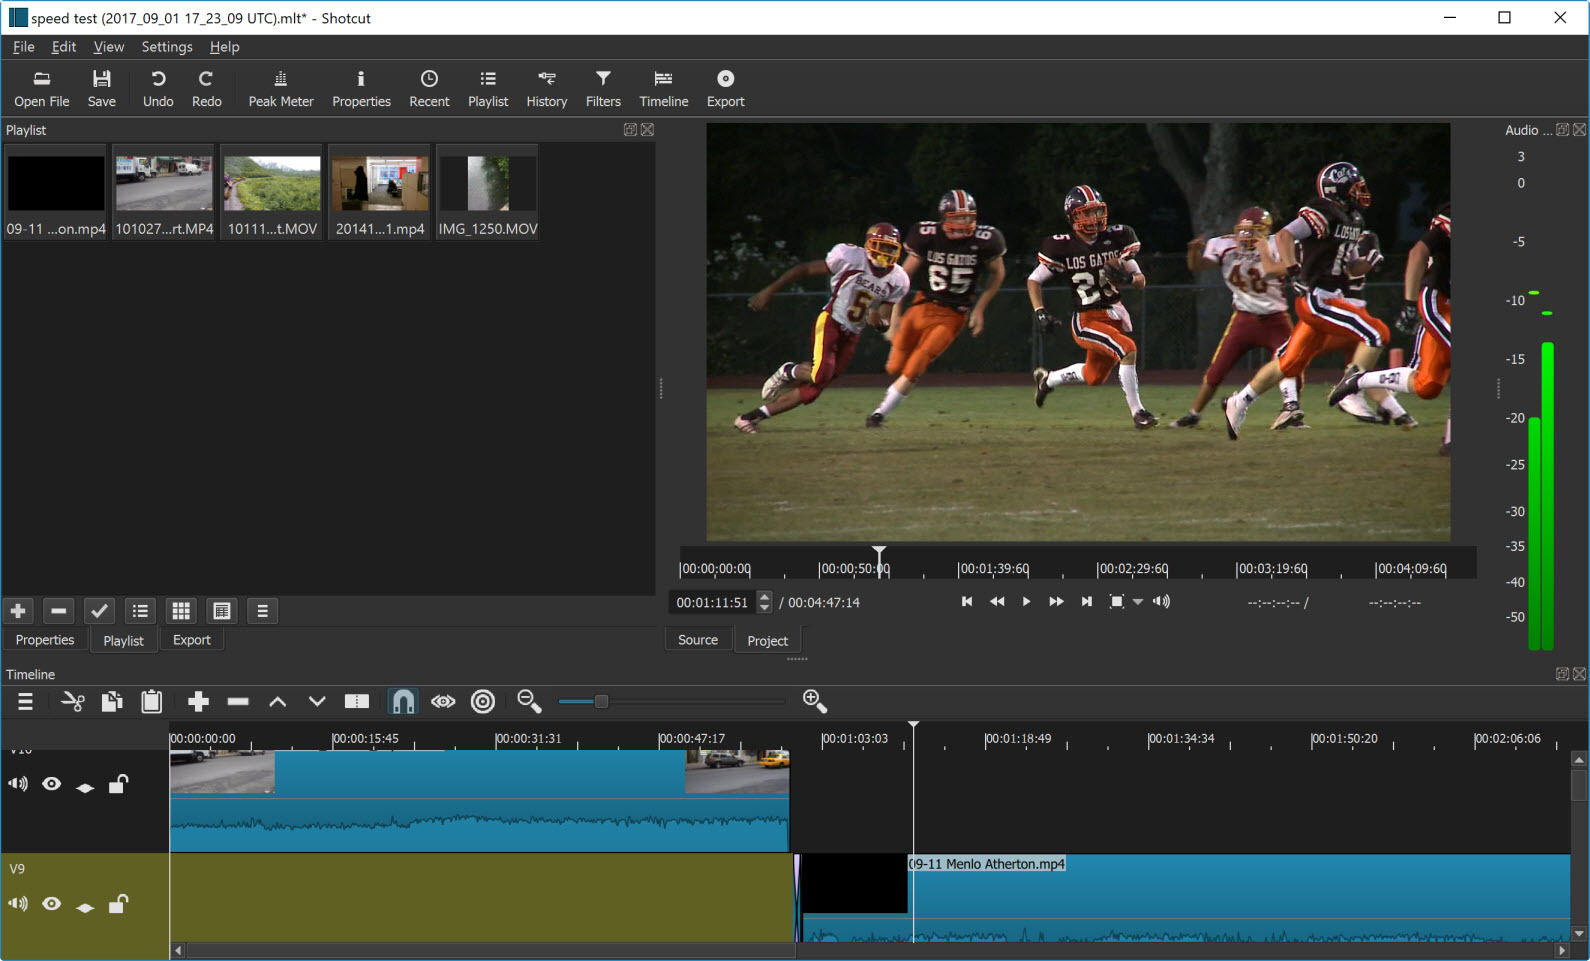
Step 3: Drag the recording onto the timeline.
Step 4: Use the cutting tools to trim the beginning and end of the video or remove any unwanted sections.
Step 6: Preview your trimmed recording and make any necessary adjustments.
Step 7: Export the trimmed video in your desired format and resolution.
Frequently Asked Questions
1. Can I trim a Teams recording on my phone?
Currently, Microsoft Stream’s trimming feature is not available on mobile devices. You’ll need a computer to trim your Teams recordings.
2. Can I undo a trim in Microsoft Stream?
Unfortunately, once you’ve applied a trim and saved the recording in Microsoft Stream, you can’t undo it. It’s always a good idea to save a copy of the original recording before making any edits.
3. What are the best free video editors for trimming Teams recordings?
Some excellent free video editors for trimming Teams recordings include:
- Shotcut: A powerful, open-source video editor with a wide range of features.
- OpenShot: A user-friendly video editor that’s great for beginners.
- Kapwing: A web-based video
- Clipchamp: Another web-based video editor with a free plan that includes trimming capabilities.
Conclusion
Trimming your Microsoft Teams recordings is a simple yet effective way to improve their clarity, conciseness, and impact. Whether you use Microsoft Stream’s built-in editor, a user-friendly tool like Focu
Don’t let those awkward silences and irrelevant tangents detract from your valuable meeting content. Take a few minutes to trim your Teams recordings and make them shine!


