Ever wonder how filmmakers make action sequences look so smooth and visually captivating? One of their secret weapons is motion blur, a subtle effect miming how our eyes perceive fast-moving objects in real life. Motion blur adds a touch of realism and professionalism to any video, making the action flow seamlessly.
While some cameras naturally capture motion blur, you might need to enhance or create it from scratch during editing. Thankfully, Final Cut Pro makes adding or enhancing motion blur to your videos incredibly easy, even for beginners!
This guide will walk you through three simple yet effective methods to add motion blur in Final Cut Pro, empowering you to achieve that cinematic look you’ve always wanted.
Table of Contents: hide
Method 1: Add “Motion Blur” in the Inspector
Method 2: Using the “Blur” Effects
Method 1: Add “Motion Blur” in the Inspector
Final Cut Pro offers a super-fast and convenient way to add basic motion blur with a single click. Let’s dive in:
Add “Motion Blur” in the Inspector
Step 1: Select Your Clip
Import your footage into Final Cut Pro and select the clip you want to enhance with motion blur in the timeline.
Step 1: Open the Video Inspector
Head over to the Inspector window (if you don’t see it, go to “Window” > “Show Inspector”).
Step 1: Enable “Motion Blur”
In the Video Inspector, look for the “Motion Blur” checkbox under the “Compositing” section. Check the box to enable it.
And that’s it! Final Cut Pro will automatically analyze your footage and apply a basic level of motion blur.
Limitations: This method is incredibly convenient but offers limited control over the intensity and type of Blur. It’s a great starting point, but let’s explore other methods for more control.
Method 2: Using the “Blur” Effects
Final Cut Pro offers dedicated blur effects that give you more control over the intensity, direction, and style of motion blur.
Gaussian Blur: Your Go-To for General Blurring
Using the “Blur” Effects
Step 1: Apply the Effect
In the Effects Browser (go to “Window” > “Show Effects Browser”), search for “Gaussian Blur” and drag and drop it onto your clip in the timeline.
Step 2: Adjust the “Blurriness”
In the Video Inspector, locate the “Gaussian Blur” settings. The critical parameter is “Blurriness.” Increase this value to create a more pronounced blur. Start small and preview your changes to avoid overdoing it.
Directional Blur: Simulating Movement Direction
Step 1: Apply the Effect
Similar to Gaussian Blur, locate “Directional Blur” in the Effects Browser and apply it to your clip.
Step 2: Set the “Angle”
Find the “Directional Blur” settings in the Effect Controls. The “Angle” parameter controls the direction of the Blur. Adjust this value to match the direction of motion in your footage or to create a stylized effect.
Step 3: Adjust the “Amount”
The “Amount” parameter controls the intensity of the Blur. Experiment with different values to find what looks best for your footage.
Method 3: The “Retiming” and “Optical Flow” Trick
This method slows down your footage to create a natural-looking motion blur effect. It’s particularly effective for short segments or when you want to emphasize a fast action.

The “Retiming” and “Optical Flow” Trick
Step 1: Retime Your Clip
Select the clip in the timeline and go to “Retime” > “Slow” (or use the keyboard shortcut: Command + R). Choose a slower speed, such as 50% or 25%, depending on the desired blur intensity.
Step 2: Enable “Optical Flow”
Make sure “Optical Flow” is enabled in the retiming settings. This helps create smoother slow-motion footage, resulting in more natural-looking motion blur.
Step 3: Fine-Tune and Experiment
Preview your footage and, fine-tune the speed and experiment with different retiming options (like “Smooth” or “Sharp”) to achieve the desired look.
Bonus Tip: Add Motion Blur to Your Screen Recordings with FocuSee
Want to add a touch of cinematic smoothness to your screen recordings without the hassle of post-processing? FocuSee makes it incredibly easy! This powerful yet user-friendly screen recording software offers built-in motion blur effects, so you can capture professional-looking footage right from the start.
Key Features of FocuSee:
- Intuitive Interface: FocuSee is designed for ease of use, making screen recording a breeze for any skill level.
- Multiple Recording Modes: Choose from full screen, window, or region recording to capture exactly what you need.
- Built-in Motion Blur: Select from three distinct motion blur effects (Screen Zoom, Screen Movement, Cursor Movement) that are automatically applied during recording.
- Basic Editing Tools: Trim, crop, and enhance your recordings with FocuSee’s built-in video editor.
Here’s how to add motion blur to your screen recordings using FocuSee:
Step 1. Free install FocuSee and run it on your computer. Choose a recording mode like Custom.

Choose the Custom Recording Mode
Step 2. Click the REC button and frame the area you’d like to record. FocuSee will automatically apply the motion blur effects.
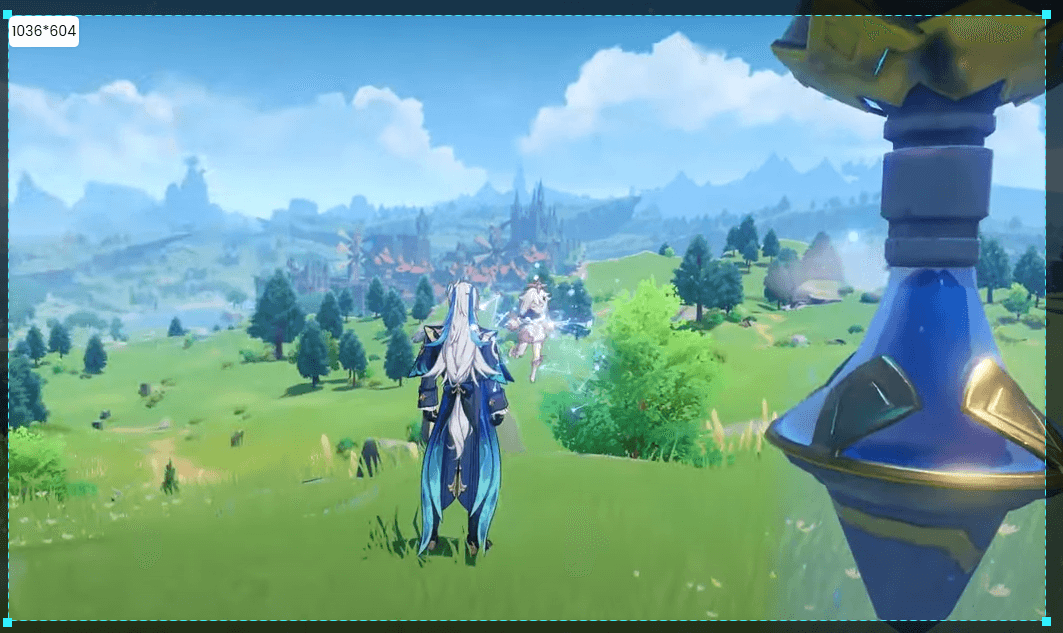
Frame the Recording Area
Step 3. After recording, go to the video editing interface, where you can adjust the intensity of the motion blur effect.
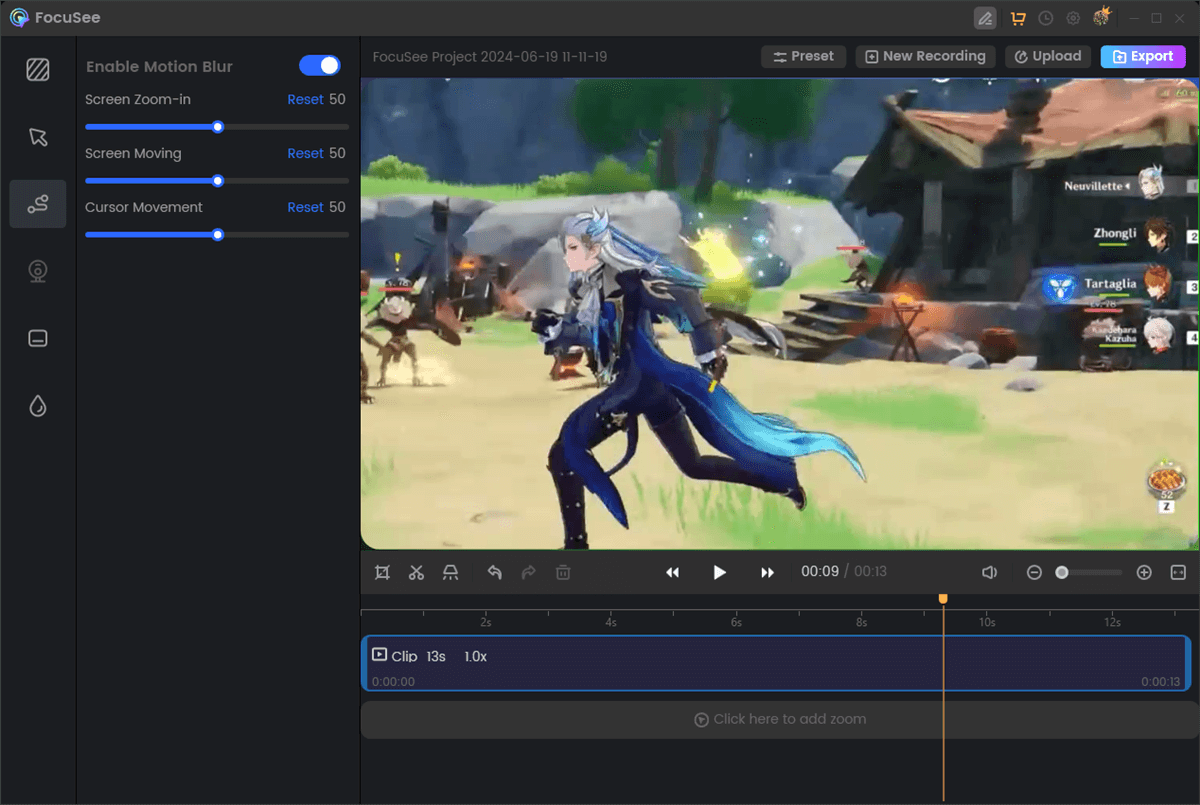
Add Motion Blur Effect to Video
Tips for Achieving Cinematic Motion Blur in Final Cut Pro
- Subtlety is Key: Avoid overusing motion blur. Start with subtle adjustments and gradually increase the intensity until you look natural. Too much Blur can make your footage appear unrealistic and blurry.
- Match the Blur to the Movement: Use “Directional Blur” to enhance or create a Blur in a specific direction. For general blurring, “Gaussian Blur” is a great choice.
- Experiment with Keyframes: Use keyframes to create dynamic motion blur that changes over time. Set blur intensity values at different points in your clip to control how the Blur evolves.
Conclusion
Adding motion blur in Final Cut Pro is easier than you think! Whether you choose the one-click “Motion Blur” option, explore the customizable “Blur” effects, or get creative with “Retiming” and “Optical Flow,” you now have the tools to add that professional, cinematic touch to your videos. Experiment, have fun, and watch your footage come alive with smooth, captivating motion.