It’s very important to use the most optimal format for storing your media content, as this ensures maximum of quality and universal compatibility while keeping the file size reasonable. Because of this file conversion is a necessary procedure that can make it possible to re-use the same material in a different context and derive even more value from it.
How to Convert MP4 to MP3 File on a Mac
In particular, MP3 and MP4 formats are similar enough for an easy conversion, yet each of them has a specific set of advantages. Lots of software tools let you freely translate one into another, and the process is very simple and nearly automatic. We will look into several possibilities for the conversion of MP4 to MP3, and provide detailed guidance for each method, thus helping inexperienced users to adopt this simple technical skill.
Table of Contents: hide
Why Is the a Difference between MP4 and MP3 formats?
3 Ways to Convert MP4 into MP3
Method #1 – Conversion with free online software – Clippa
Method #2 – Using Quick Time with iTunes to Convert MP4 to MP3
Why Is the a Difference between MP4 and MP3 formats?
Non-technical users are often oblivious to file formats and their advantages. Different extensions such as MP3 or MP4 are viewed simply as labels, without trying to understand their unique properties and main reasons to exist. It’s especially common to mix up these two formats, as they are mutually related and have very similar names. However, they are absolutely not the same and despite being essentially the upgraded version of MP3, MP4 serves a completely different function.
The main difference between them is the type of content they can store – while MP4 is a truly multimedia format and is suitable for saving video, images, text, or audio, MP3 is an audio-only format. Thus, MP4 is much more versatile and more broadly applicable, which is why today it represents the golden standard in many fields. MP3 on the other hand still retains its value, especially since it’s playable on many older devices and apps.
3 Ways to Convert MP4 into MP3
If you have audio content in MP4 format but would like to transfer it to a less demanding and more readily played form, there are several different routes you could take. Mac computer owners could choose to complete the conversion with tools from the Apple ecosystem they already have installed, go online and search for a cloud-based converter, or use specialized video conversion software. We will elaborate on each of the possibilities, and provide a step-by-step guide for the proposed methods.
Method #1 – Conversion with free online software – Clippa
Clippa is a versatile online video editor that is designed to effortlessly convert MP4 video files into high-quality MP3 audio files. This user-friendly converter offers a seamless conversion process, allowing users to extract audio tracks from MP4 videos with just a few clicks. Whether you wish to extract the audio from a music video, a podcast, or any other MP4 file, Clippa Converter provides a convenient solution for quickly and efficiently converting the desired content into an audio format that can be easily played on various devices.
With its intuitive interface and reliable performance, Clippa offers a hassle-free solution for anyone seeking to convert MP4 videos into MP3 audio files. The procedure for converting the file with a free online converter involves the following steps:
Step 1. Visit the visit the Clippa website. You can access it through your preferred web browser.
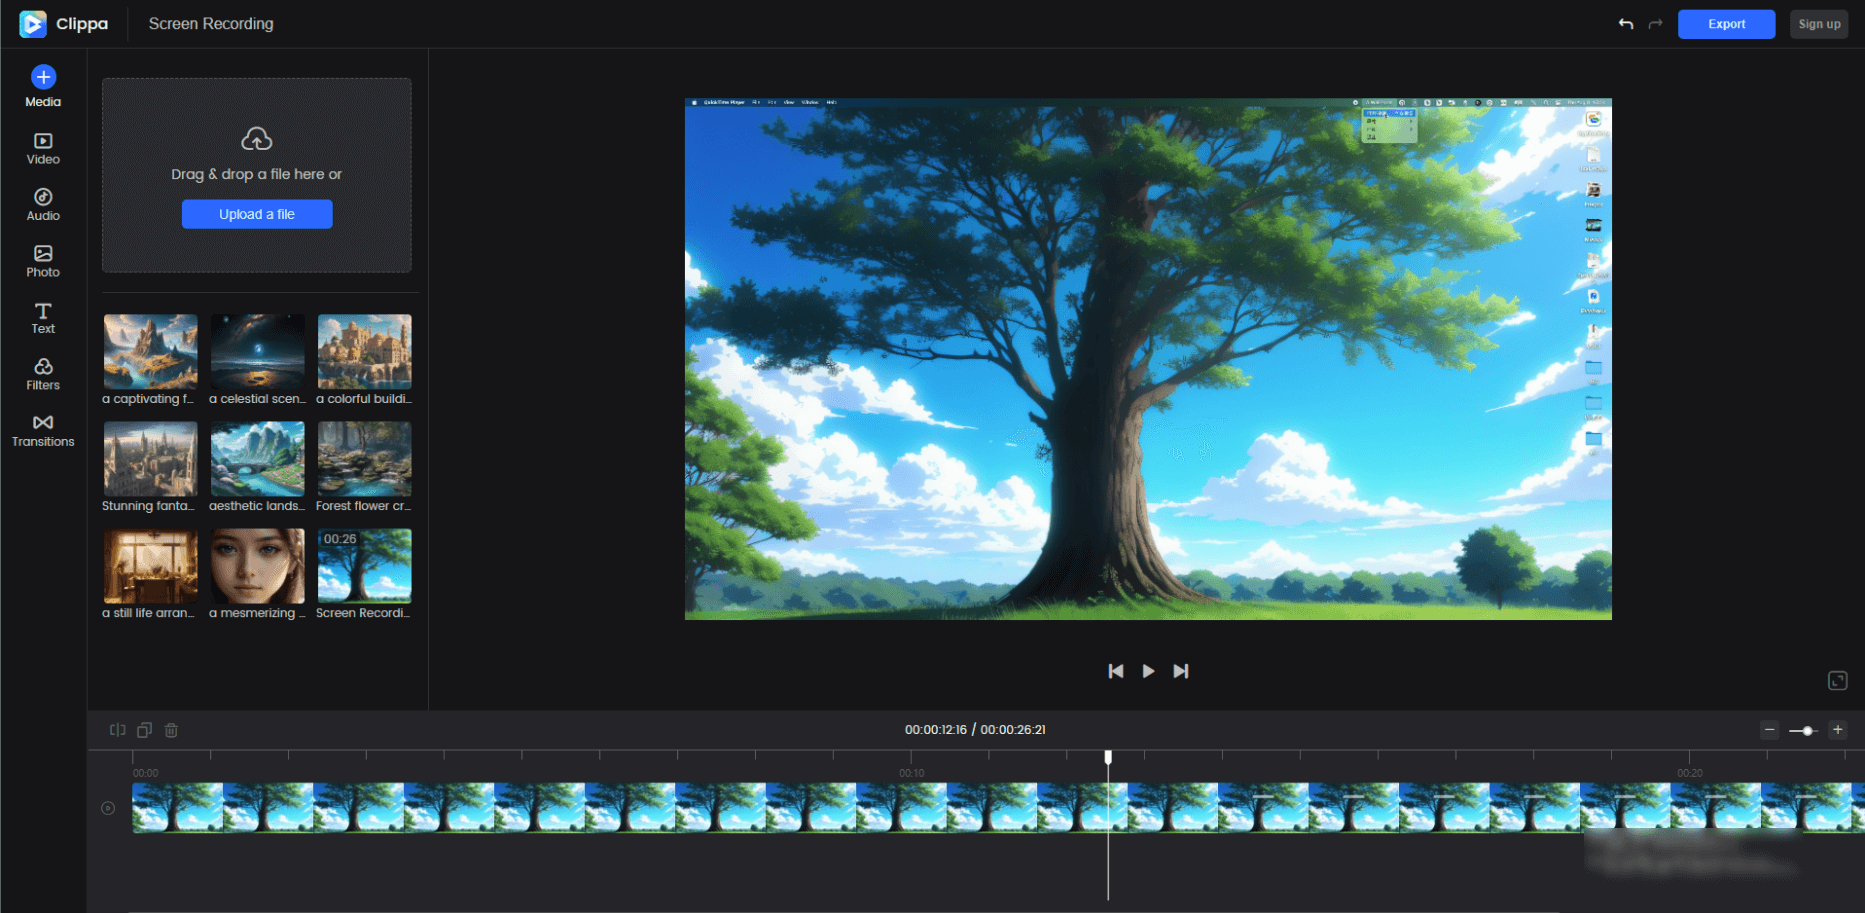
The Interface of Clippa
Step 2: Click on the “Upload” button or drag and drop your MP4 file directly into the Clippa interface.
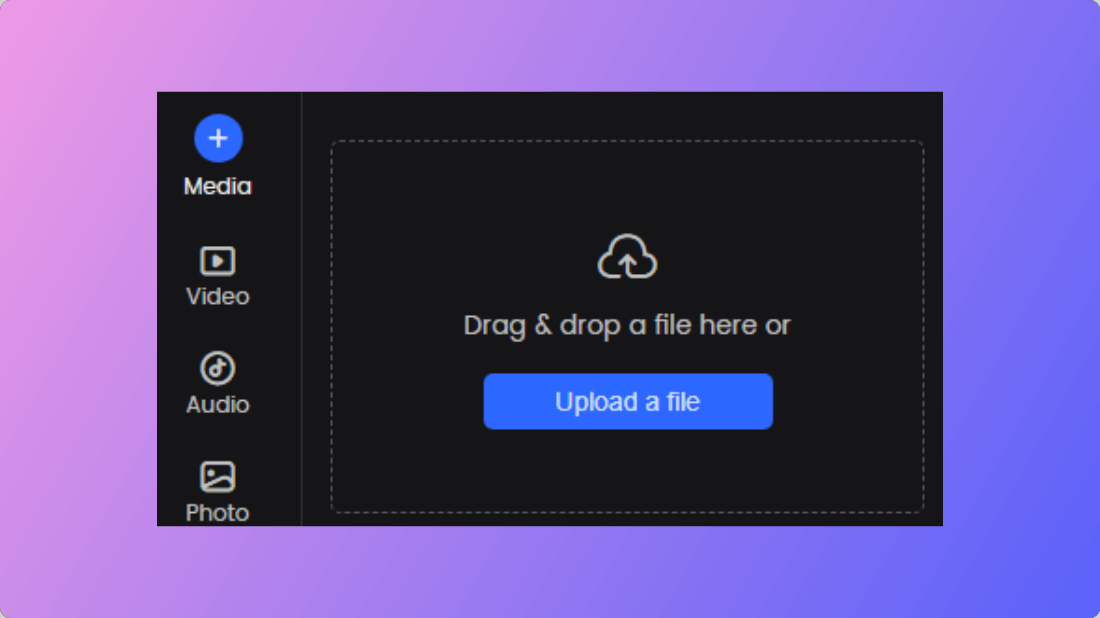
How to Upload a File
Step 3: Once the file is uploaded, you will have the option to select specific sections or trim the video if needed. This step is optional, and you can skip it if you want to convert the entire video.
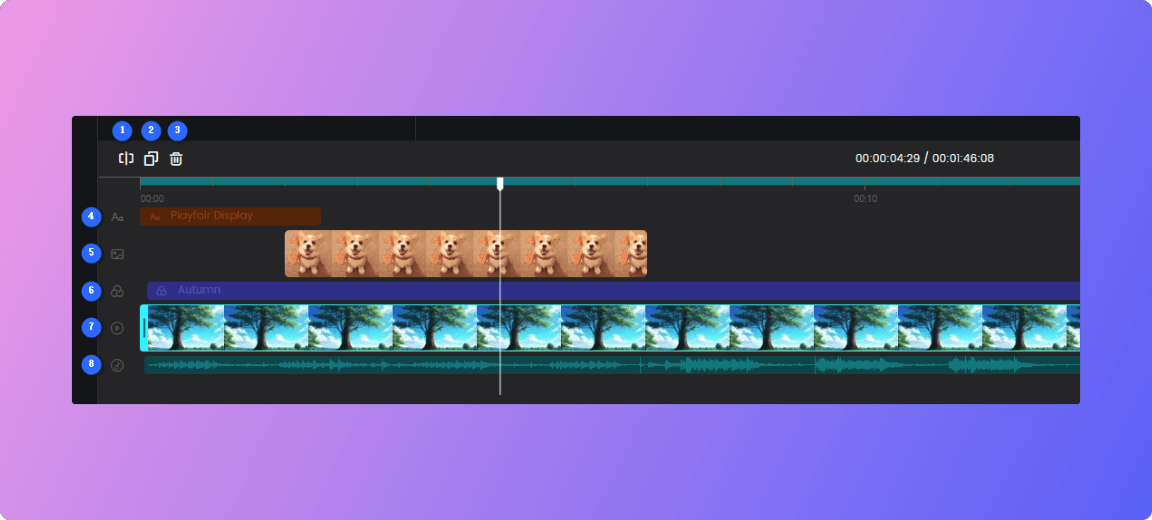
Clippa Tracks Editing
Step 4: After finishing the editing process, please choose the output format as MP3.
Step 5: Once the conversion is complete, you also can click the “Copy Link” button to share the converted MP3 audio with others you like.
Method #2 – Using Quick Time with iTunes to Convert MP4 to MP3
For many Mac owners, using native software feels more comfortable than experimenting with online converters. They can afford to think this way since a combination of QuickTime and iTunes can do the trick and effectively convert MP4 files to MP3. With this combo, you can effectively export the content of the file to a more suitable format and simultaneously move your new audio file into your online library. Here are the steps you need to take.
Step 1: Run QuickTime on your Mac and open the MP4 file slated for conversion
Step 2: Go to the File menu, select Export as, and choose Audio only item from the menu
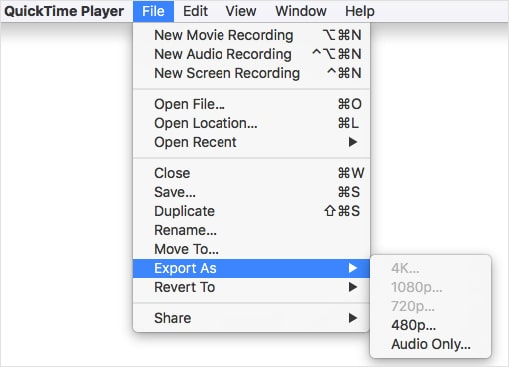
Choose Audio Only Item
Step 3: This will create an M4A file, which you can drag into an iTunes window
Step 4: in iTunes, go to Preferences, then select Files and finally Import settings
Step 5: Change the preferred format to MP3 and save your file
Method #3 – Converting MP4 Files to MP3 with VLC
VLC is a popular video player that also contains some other useful functions, namely the ability to convert multimedia files. Since VLC is compatible with MacOS, you can download it from the web and install it on your computer. This free software lets you easily execute the conversion from MP4 to MP3 with minimal loss of quality, so this is a great option if you want a one-stop shop for video playback, conversion, and other related tasks. Here is the procedure to follow.
Step 1: Start the VLC application on the computer
Step 2: Go to the Media tab, and select the Convert/Save option from the menu
Step 3: In the window that opens, navigate to the File tab, and click on the Add button
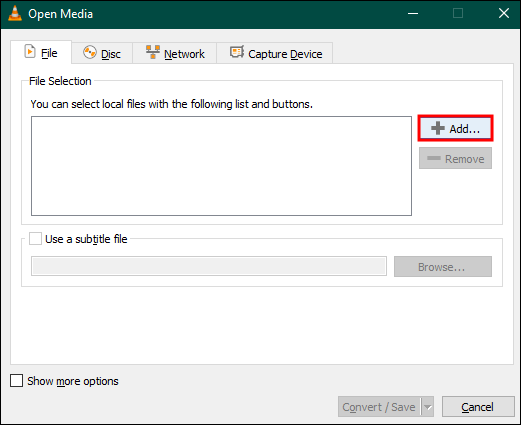
Click on the Add Button
Step 4: Choose the MP4 file that needs to be converted, click on Convert/Save again, and specify the target format (MP3) by clicking on the toggle button
Step 5: Select a destination for the converted file and initiate the conversion by clicking Start
Step 6: Wait for a few minutes for the process to complete, then find the file in the specified folder
Frequently Asked Questions about Conversion from MP4 to MP3
1. What are the main advantages of MP3 over MP4?
As a simpler format that has been in use for decades, MP3 has two distinct advantages over its successor, namely smaller file size and much broader applicability. On the flip side, MP3 is limited exclusively to audio content and can’t be used for any other media types.
2. Is the quality of sound the same after conversion to MP3?
Unfortunately, there is usually some loss of quality after MP4 audio is converted to MP3. This occurs because some information is lost during the compression phase. The exact amount of damage might depend on the software tool used to execute the conversion.
3. How long does it take to complete the conversion from MP4 to MP3 with the recommended tools?
The length of the audio and total file size affect the time needed for the conversion to run its course. It takes just a minute or two to give the proper commands, but the conversion itself might take a relatively long time if you are working with a huge file.
Final Thoughts
Understanding the most optimal uses for MP4 and MP3 formats is a condition for the efficient management of multimedia. When you need to save an audio-only clip, it’s usually better to keep it in MP3 format. Mac owners have a multitude of ways to manage their media files and transfer MP4 into MP3 with absolute ease. It’s probably a savvy idea to learn all of the recommended methods, before deciding which one to adopt as your go-to solution. If you already tried some of these methods, please share your opinions about them in the comments.


