How to add subtitles after uploading to youtube

Last Updated: Sep. 25, 2024 | FEATURED IN: Youtube 102 >
Uploading videos to YouTube with subtitles is a simple and effective way to reach a broader audience, especially those who speak different languages or watch videos in noisy environments. Subtitles not only enhance the viewing experience but also improve your video’s search ranking, attracting more international viewers. Here’s a quick guide on how to add subtitles and upload videos to YouTube.

how to add subtitles after uploading to youtube
1. Create a Subtitle File
Before uploading your video, you need to prepare a subtitle file. The most common formats are .srt or .txt, which include timestamps and corresponding text to ensure the subtitles are synced with the video.
How to Create a Subtitle File?
You can use various tools to create and edit subtitle files, such as:
- Aegisub: A powerful, open-source subtitle editor.
- Kapwing: An online subtitle generator and editor.
- Subtitle Workshop: A user-friendly subtitle software.
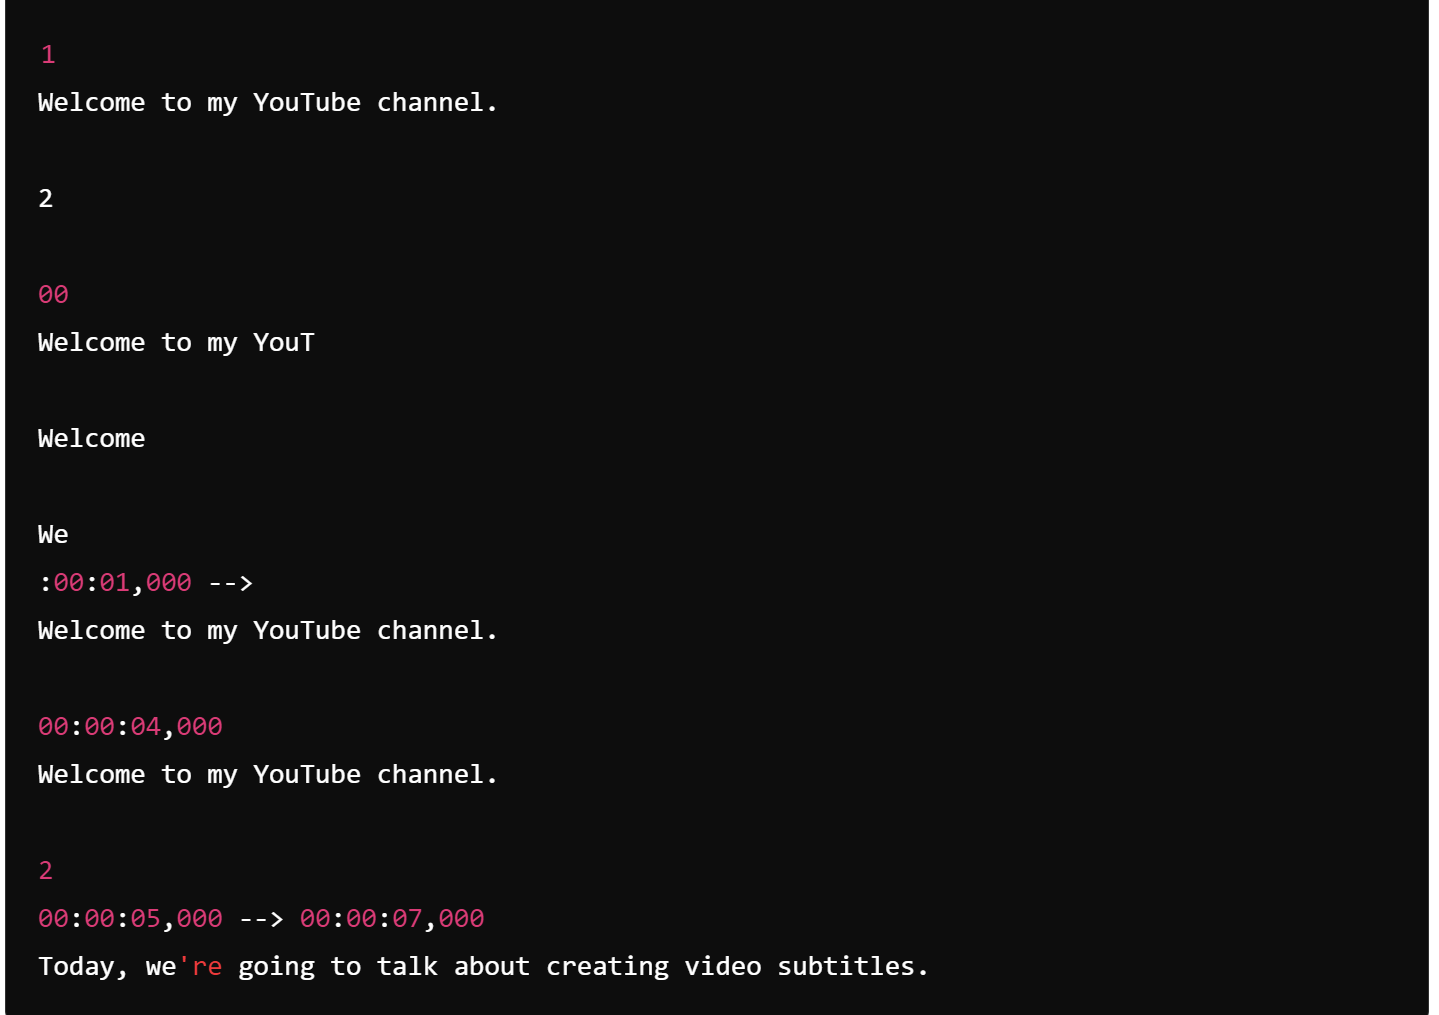
When creating the subtitle file, make sure to input the text according to the video’s dialogue or content and add timestamps accordingly. A typical subtitle file may look like this:

Create a Subtitle
Tips:
- Keep the text cl
- Ensure that the timestamps are precise, so the subtitles appear at the correct moment in the
2. Upl
Once your subtitle file is ready, you can upload your video and add the s
St
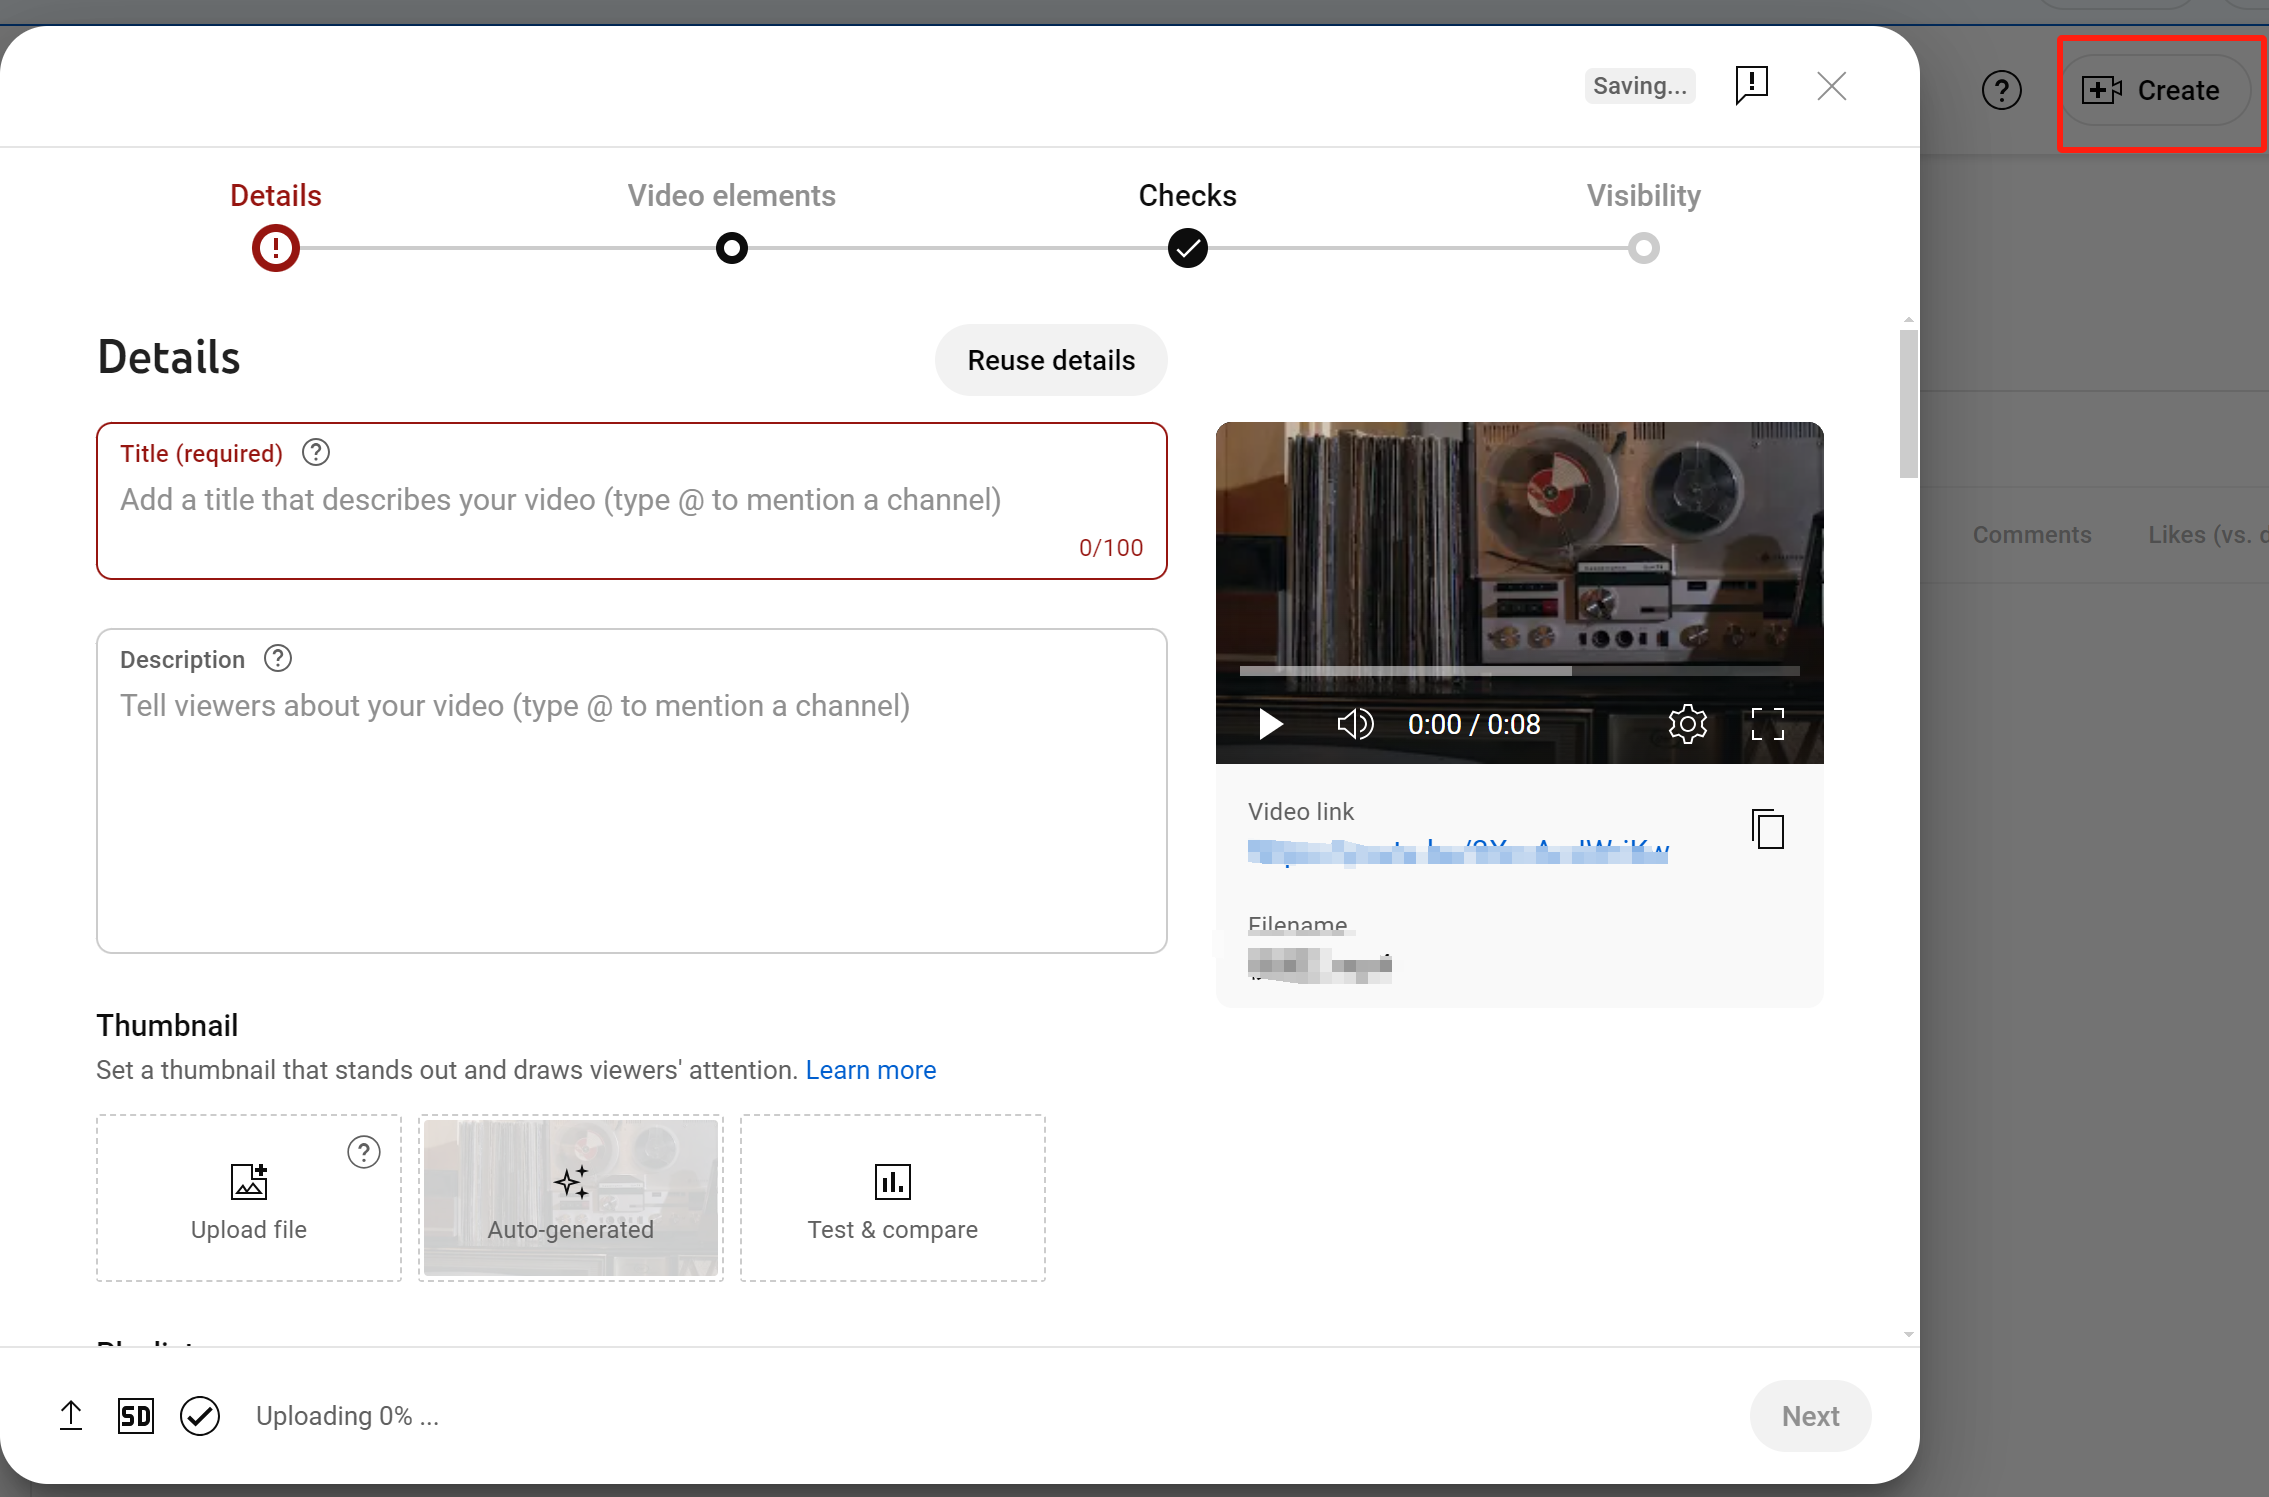
- Log in to your YouTube account.
- Click the camera icon in the upper-Upload Video.
- Choose the video file you want to upload and fill in the necessary details such as the title, descr
While the video is uploading, you can also set some advanced options, such as making the vid

making the vid
3. Add
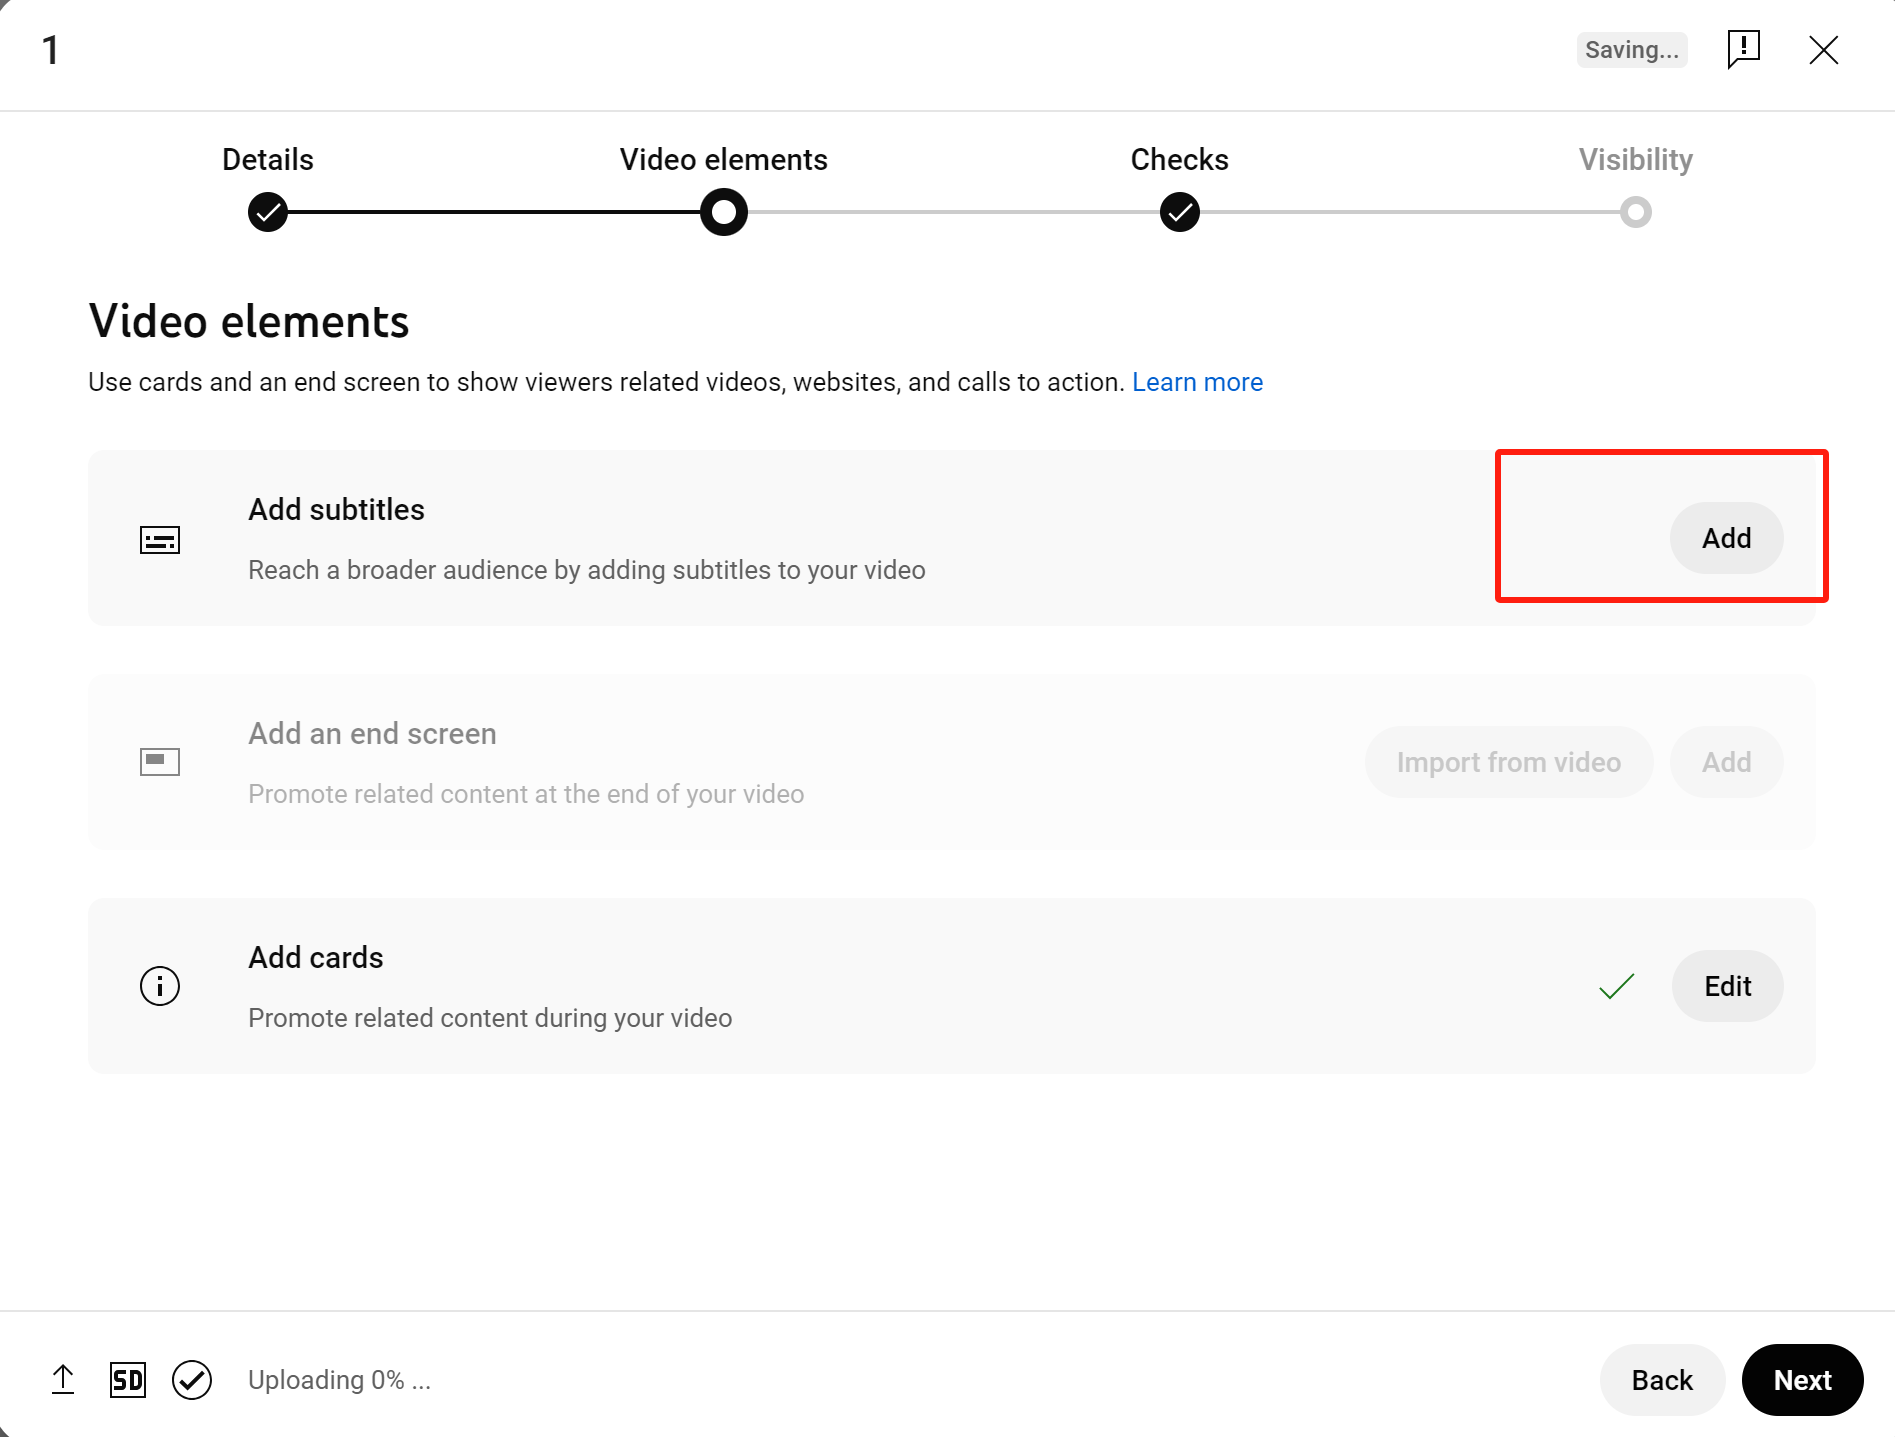
After uploading your video, there are two ways to add subtitles: uploading a pre-made subtitle fil
Meth
If
- Go to YouTube Studio, click Content tab,
- Click the edit icon (pencil) nSubtitles.
- Click Add Language and cho
- Click Add Subtitles, Upload File,.srt).
- Save the
Method
If
- Go to YouTube Studio, Edit.
- Select Subtitles, and Yo
- Click Edit Auto-Generated Subtitles
- Sav

Method
4. Preview and Publish Your Video
Once you’ve added subtitles, it’s a good idea to preview them before publishing. This ensures that the subtitles are synchronized with the video content. If everything looks good, go ahead and publish the video.
Multi-language Subtitles
If your content is meant for a global audience, YouTube allows you to add subtitles in multiple languages. Simply repeat the above steps for different languages, uploading the corresponding subtitle files. This allows more viewers from around the world to enjoy and understand your content.
5. Benefits of Adding Subtitles
Adding subtitles to your video has multiple benefits beyond just reaching a broader audience. It enhances accessibility for viewers with hearing impairments and those who prefer watching videos without sound. YouTube’s algorithm also tends to favor videos with subtitles, as they help search engines better understand the content.
Subtitles improve the viewer experience. For example, many people watch videos without sound, and subtitles ensure they can still grasp the information. For educational or technical videos, subtitles also help viewers follow the content more easily and can be useful for note-taking or translation.
Conclusion
Adding subtitles to your YouTube videos not only enhances the viewing experience but also expands your audience reach, especially to those who don’t speak your language or have hearing impairments. Subtitles make your content more accessible and easier to discover, helping boost your video’s traffic and exposure. With just a few simple steps, you can add subtitles to your videos and take your YouTube channel to the next level.
Whether you’re a beginner or a seasoned YouTuber, adding subtitles is a technique worth trying. Give it a go on your next video and see how it improves your channel!


