How to improve audio quality in YouTube videos?

Last Updated: Sep. 14, 2024 | FEATURED IN: Youtube 101 >
When creating YouTube videos, viewers not only focus on video quality, but audio quality is equally important. Poor audio can distract viewers and make it hard for them to continue watching, even if the video is visually clear. This article will share common practices YouTube creators use to improve audio quality in their videos. The following tips will help you achieve a more professional sound and enhance your YouTube audio quality.

How to improve audio quality in YouTube videos?
1. Choose a High-Quality Microphone
Using an external microphone is the first step to improving sound quality. Built-in microphones on phones or cameras often can’t eliminate background noise and environmental sounds, while external microphones can focus on capturing your voice clearly. Choose the right microphone based on your needs:
- Lapel Microphone: Ideal for daily commentary, vlogs, and interviews. It’s portable and captures clear sound. Since they clip to your clothing, make sure the microphone is close to your mouth.
- Shotgun Microphone: Perfect for outdoor shooting, it effectively blocks environmental noise and focuses on the subject’s voice, improving YouTube audio quality in challenging environments.
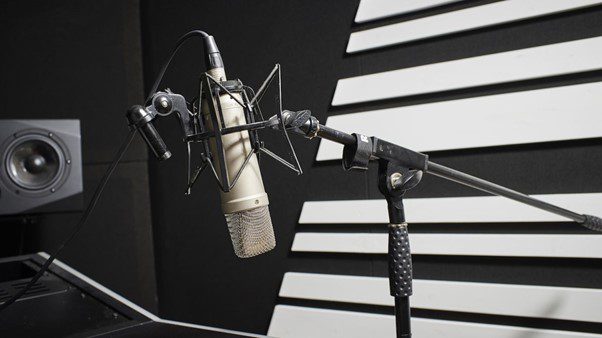
- Condenser Microphone: Suitable for indoor recording, capturing more details, and making the sound fuller and clearer, providing a professional sound.
- USB Microphone: This option plugs directly into your computer, offering a simple yet high-quality recording solution for YouTube videos.
Place the microphone close to your mouth without touching it to avoid producing popping sounds. Different types of microphones suit different video styles, so choose based on your content’s focus and your goal to improve YouTube sound quality.

Connect The Microphones
2. Maintain Audio Consistency
Consistency is key to improving audio quality in YouTube videos. The following points should not be overlooked:
- Fixed Microphone Position: Ensure the microphone always stays at the same distance from your mouth during recording to avoid inconsistent sound levels.
- Avoid Audio Drops: When recording for long periods, constantly check that the microphone is positioned correctly to ensure consistent sound quality.
- Keep Volume Consistent: Whether it’s narration or background music, make sure the volume remains stable throughout the video. Use audio leveling tools in post-production to avoid noticeable fluctuations in volume.
3. Optimize the Recording Environment
Choosing a quiet environment to record in can significantly reduce background noise interference:
- Eliminate Background Noise: Record in a quiet space, avoiding noises from wind, traffic, or other distractions. Indoors, use sound-absorbing materials like blankets, curtains, or foam panels to reduce echo and create clearer sound, which is key to improving YouTube audio quality.
- Use a Windscreen: If recording outdoors, a microphone windscreen is recommended to reduce wind noise and ensure clear recordings.

recording environment
4. Post-Production Audio Processing
Post-production is an essential part of enhancing YouTube audio and can fix issues that occurred during recording. Balancing background music with narration is critical, and audio editing tools can significantly improve your video’s sound quality:
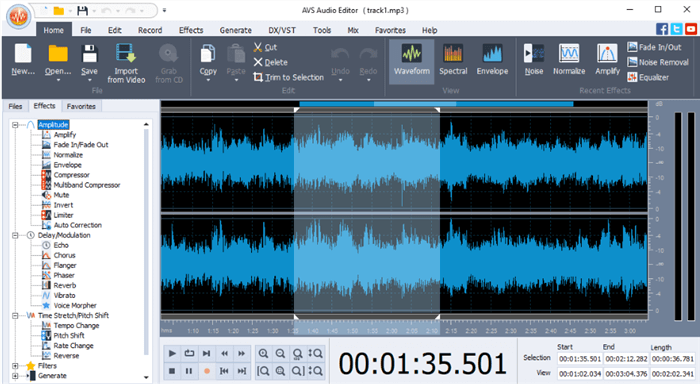
1.Noise Removal: Edit your audio track with software like Audacity or Adobe Audition to remove unwanted background noise and static. Use noise reduction tools to eliminate hums or hissing sounds, which greatly enhances YouTube sound quality.
2.Audio Compression and Equalization: Use compression to balance the volume and avoid overly loud or quiet sections. Equalizers adjust audio frequencies to ensure a well-balanced, natural sound that will enhance the professional sound quality of your videos.
3.Balance Background Music with Narration: The volume of background music should always be lower than the narration so that viewers can clearly hear the main content. This is key to creating a video with high-quality sound.

Audio Processing
5. Use Tools and Resources
Portable Recorders: Devices like the Zoom H1n or Tascam DR-05x provide high-quality audio recording on the go, making them great tools for improving audio quality in YouTube videos.
Online Tutorials: If you want to further improve your audio recording and video editing skills, you can find a wealth of tutorials on YouTube to help you optimize your setup and enhance your YouTube sound quality.
6. Suggestions
Regularly test your audio setup to ensure optimal results. Engage with your audience and gather feedback on your audio quality, adjusting as necessary.
Conclusion
Improving the audio quality of YouTube videos involves more than just choosing the right equipment—it requires attention to your recording environment, techniques, and post-production processes. Clear and stable audio can make your content more professional, helping to retain viewers and increase your YouTube channel’s success.


