Home >
Blog >
How to Record Screen on Mac and Enhance Your Presentation Effects
How to Record Screen on Mac and Enhance Your Presentation Effects

The Gemoo Team Last Updated: Aug. 09, 2024 | FEATURED IN: Blog
Whether you’re preparing for a business meeting, presenting a course, or working on creative design, knowing how to record screen on Mac is crucial. Many people face challenges like tight schedules and technical issues with screen recording on a Mac.
This article will guide you on how to record screen on Mac, enhance your presentation effects, and make your videos both professional and engaging, all without the hassle of complex recording and editing processes.
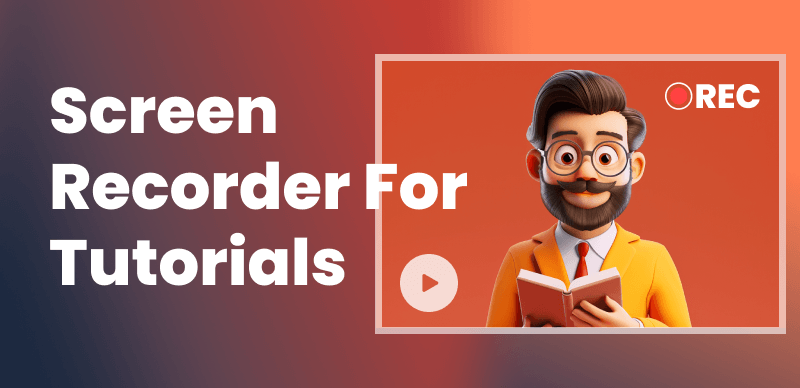
Screen Recorders for Tutorials
1. How to Avoid Lag Issues When Screen Recording on a Mac
Experiencing lag during screen recording on a Mac is a common issue for many users. Here are effective methods to prevent stuttering in your recordings:
Close Unnecessary Applications: Before you start recording, shut down non-essential apps and background processes to free up system resources.
Optimize System Performance: Ensure your Mac is updated to the latest version and perform routine maintenance such as disk cleanup and startup item optimization.
Choose the Right Recording Settings: Based on your Mac’s performance, select the appropriate video resolution and frame rate. Don’t overly pursue high resolution; choose wisely according to your Mac’s capabilities to reduce system load.

1080p vs 4K
Optimize Internet Connection: If your screen recording involves online resources (such as online videos or live streams), ensure you have a stable and high-bandwidth internet connection.
By following these methods, you can minimize lag issues during Mac screen recording and ensure smooth playback.
2. How to Solve the Problem of Blurry Screen Recording Quality
Many people struggle with how to record their screen on a Mac to achieve high-quality visuals. Often, the screen recording on a Mac looks fine during the process, but after recording, the video turns out to be blurry and unusable.
Adjust Resolution: Before recording, make sure to select the highest available resolution for the clearest video quality. This should be within the highest capabilities of your Mac’s performance.
Reduce Recording Area: Reducing the area being recorded at the same time can improve clarity. If you’re focusing on a specific area, choose dimensions to ensure your visuals are sharp.
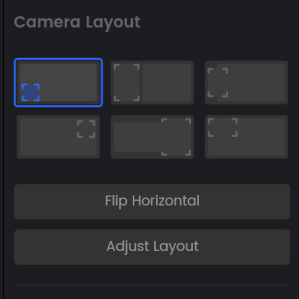
Choose Adjust Layout
Use Professional Screen Recording Software: Professional software often provides more settings options. For example, FocuSee allows you to adjust recording parameters for optimal picture quality.
By combining these methods, you can significantly enhance the quality of your Mac screen recordings, ensuring the visuals you present are clear and smooth.
3. Choosing the Right Professional Mac Screen Recording Tool
After recording your screen on a Mac, the editing part is even more critical, which is the core of ensuring video quality. Therefore, choosing the right professional Mac screen recording tool can alleviate a lot of your confusion.
With FocuSee’s quick screen recording and video editing features, you can easily trim and adjust videos, solving most post-production editing issues.
Download FocuSee: Click “Customize” or “Window” to select the recording area or window, and adjust camera, microphone, and system audio settings as needed.
Free download
High-Quality Video and Audio: FocuSee ensures not only the best recording quality but also top-notch audio. It eliminates the problem of blurry images, making it suitable for product demonstrations or educational videos.
Auto Focus and Zoom: It follows the trajectory of your mouse demonstration, and the video will automatically display zoom effects, highlighting and clarifying key content on your screen.
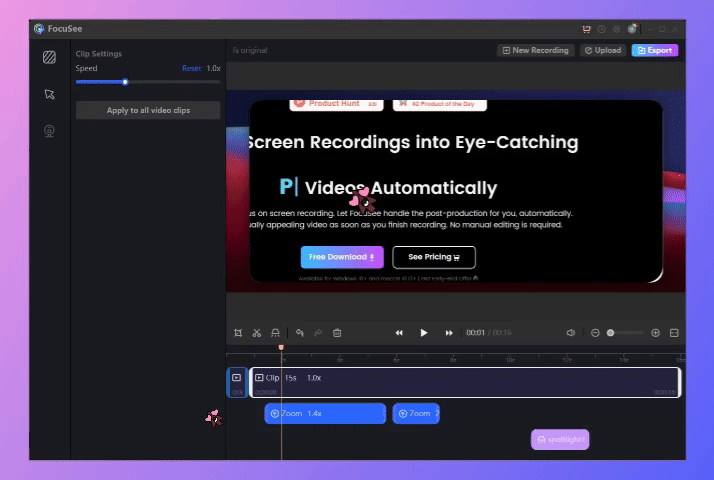
Auto Zoom Effect
Personalized Settings and Editing Options: In FocuSee, you can change the video editing interface to a virtual background and adjust settings such as fill, insert, roundness, and shadow as needed. This allows you to add more personalized elements to your videos, making them more aligned with your presentation style or educational needs.
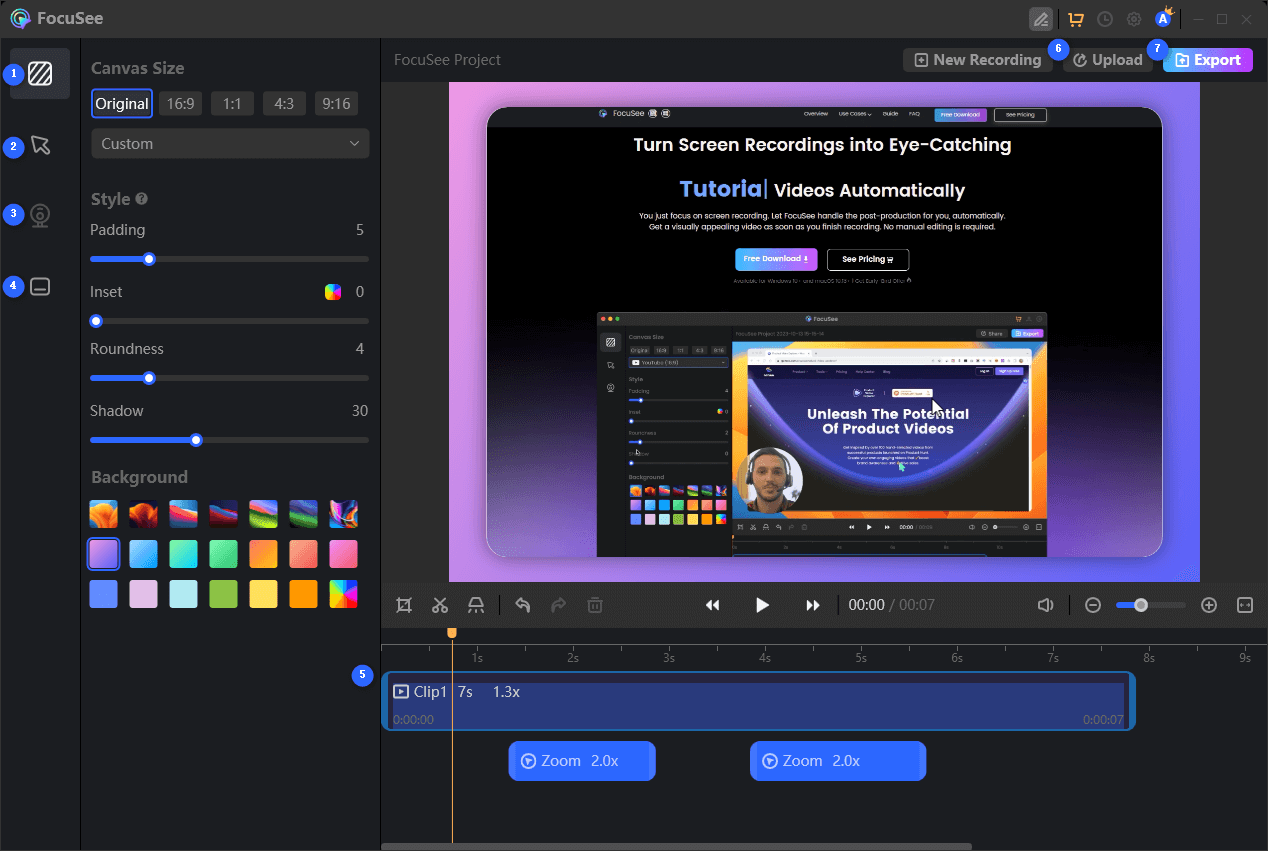
Features Overview of FocuSee
Tip: Use a high-quality microphone, avoid background noise, and test the audio before recording.
Of course, enhancing presentation effects relies not only on technical tools but also on how effectively you utilize the features of FocuSee.Its powerful capabilities simplify the recording and editing process, making your presentation videos more professional and engaging.
I hope the tips in this article can help you solve the problems encountered when recording your Mac screen and showcase the best effects of your presentations. With these strategies and tools, you’ll learn how to record screen on Mac efficiently and effectively, boosting the quality of your work.
The Gemoo Team Let everyone enjoy a simplified workflow of video creating, editing, and sharing.