
How to Adjust White Balance for Videos
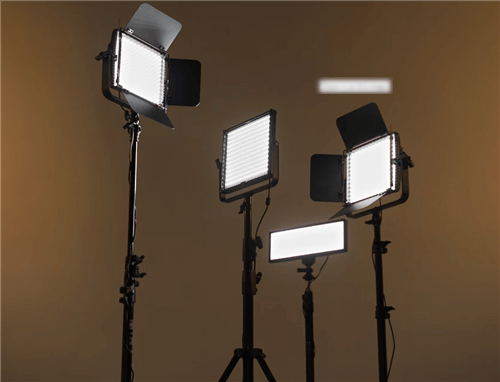
White balance is a crucial aspect of videography that can make or break the quality of your footage. It refers to adjusting the colors in your video to ensure that white objects appear truly white and that all other colors are accurately represented. Improper white balance can result in videos with unnatural color casts, making your footage look amateur and unprofessional. In this guide, we’ll dive deep into the world of white balance and provide you with actionable tips and techniques to achieve stunning, color-accurate videos.
What is White Balance?
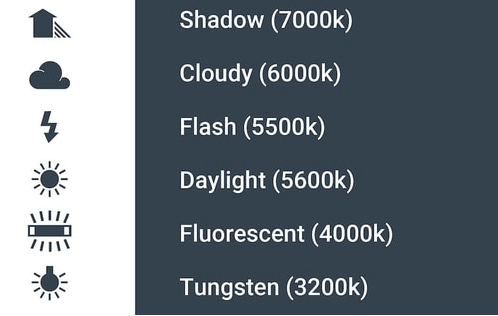
Before we delve into the how-to, let’s first understand what white balance is and why it’s essential. White balance is the camera’s ability to adjust its color temperature settings to accommodate different lighting conditions. Each light source’s color temperature is measured in Kelvin (K). For example, daylight has a color temperature of around 5600K, while tungsten bulbs have a lower color temperature of about 3200K.
What is White Balance
When you set your camera’s white balance, tell it what color temperature the light source is so it can adjust the colors accordingly. If the white balance is set incorrectly, your footage may have a color cast, such as a blue tint in daylight or an orange tint under tungsten light.
Types of White Balance Settings
Most cameras offer three main types of white balance settings:
- Auto White Balance (AWB): In this mode, the camera automatically detects the scene’s color temperature and adjusts the white balance accordingly. While AWB can be convenient, it’s only sometimes accurate, especially in mixed lighting conditions.
- Preset White Balance: Most cameras have preset white balance options for everyday lighting situations, such as daylight, cloudy, tungsten, fluorescent, and flash. These presets are pre-calibrated for specific color temperatures and can be a good starting point for getting accurate colors.
- Custom White Balance: For the most accurate white balance, you can use a white balance card or gray card to manually set the white balance. This involves taking a reference photo of the card under the current lighting conditions and using it to set the custom white balance in your camera.
White Balance Settings
Using White Balance Cards
White balance cards, also known as gray cards, are essential for achieving accurate white balance. These cards are designed to reflect light evenly across the visible spectrum, providing a neutral reference point for setting your white balance.

White Balance Cards
To use a white balance card:
- Hold it before your camera and fill the frame with the card.
- Make sure the card is evenly lit and not in shadow.
- Please take a photo of the card and use it to set your camera’s custom white balance.
Most cameras have a custom white balance option in the menu, which allows you to use a reference photo to set the white balance.
Adjusting White Balance in Post-Production
While it’s always best to get the white balance right in-camera, sometimes you may need to adjust it in post-production. Most video editing software, such as Adobe Premiere Pro or Final Cut Pro, has white balance correction tools that allow you to fine-tune the colors of your footage.
To adjust the white balance in post-production:
- Start by finding a neutral reference point in your footage, such as a white or gray object.
- Use the white balance tool to sample that reference point and adjust the colors accordingly.
- Be careful to adjust sparingly, as this can result in unnatural-looking colors.
Common White Balance Mistakes
- It’s not white balancing, resulting in footage with color casts.
- Relying too heavily on auto white balance can be inconsistent.
- Not re-white balancing when the lighting conditions change.
- Using the wrong white balance preset for the current lighting situation.
- Overcompensating for color casts in post-production leads to unnatural colors.
FAQs on Video White Balance
Q: What is the best white balance setting for outdoor shooting?
A: The daylight preset (around 5600K) is usually a good starting point for outdoor shooting in daylight. However, the exact color temperature can vary depending on the time of day, weather conditions, and location. Using a white balance card will give you the most accurate results.
Q: Can I fix white balance issues in post-production?
A: Yes, most video editing software has white balance correction tools that allow you to adjust the colors of your footage. However, getting the white balance right in-camera is always best to save time and ensure the best possible quality.
Q: What’s the difference between a white balance card and a gray card?
A: White and gray balance cards serve the same purpose – providing a neutral reference point for setting your camera’s white balance. The main difference is that white balance cards are pure white, while gray cards are neutral gray. Both are effective for achieving accurate white balance.
Conclusion
Mastering white balance is a critical skill for any videographer looking to create stunning, professional-quality footage. By understanding the different types of white balance settings, using white balance cards, and following best practices, you can ensure that your videos have accurate, natural-looking colors. Remember, taking the time to set your white balance in-camera properly will save you time and frustration in post-production and result in better overall video quality. So, the next time you’re out shooting, take control of your white balance and create footage that truly shines.
