How to Stabilize Shaky Video Footage with Final Cut Pro

In the world of video production, shaky footage can be a frustrating and distracting problem that detracts from the overall quality of your movie. Whether you’re shooting handheld or using a stabilizer, it’s not always possible to achieve perfectly smooth shots. This is where Final Cut Pro’s powerful stabilization feature comes in. With just a few clicks, you can transform even the most unsteady footage into a seamless and professional-looking video. In this comprehensive guide, we’ll take a deep dive into the stabilization process in Final Cut Pro, from preparing your clips to fine-tuning the settings for the best possible results. We’ll also cover some pro tips and troubleshooting techniques to help you overcome common stabilization challenges and take your video editing skills to the next level.
Table of Contents: hide
How to Automatically Stabilize Footage in Final Cut Pro
How to Automatically Stabilize Footage in Final Cut Pro
Prepare the Clip
The first step in stabilizing your footage is to prepare the clip for analysis. This involves loading the clip into the Timeline and trimming any unnecessary parts. By removing any unwanted sections of the video, you can help Final Cut Pro focus on the important parts of the clip and ensure that the stabilization process is as efficient and effective as possible. To trim your clip, simply drag the start and end points of the clip in the Timeline until you’ve removed any excess footage. You can also use the Blade tool to make precise cuts and remove specific sections of the video.
Auto-Stabilization
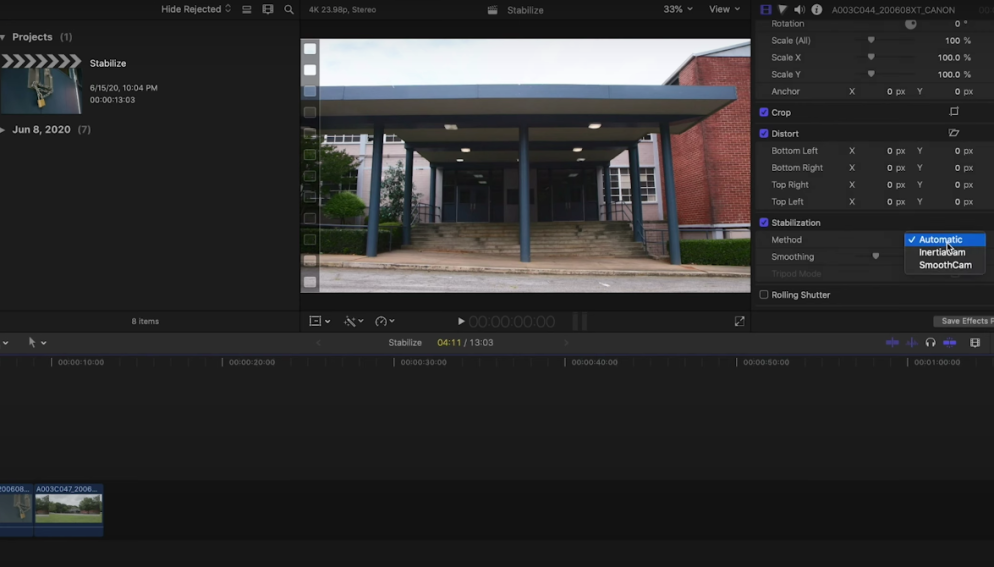
The default stabilization method in Final Cut Pro is Automatic, which will choose a stabilization method for you. However, you can further refine the stabilization settings or even change the stabilization method entirely to achieve the best results for your specific footage.
Auto-Stabilization
InertiaCam
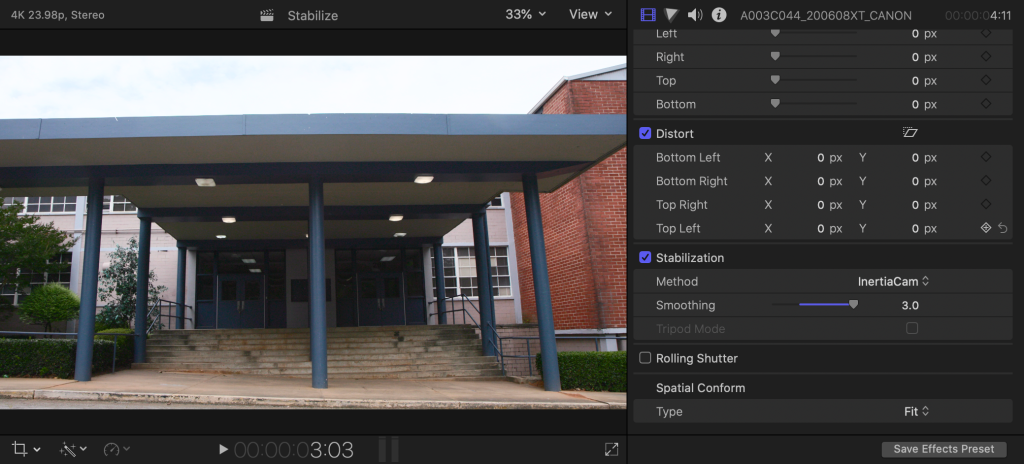
When to use: If your clip features camera movement such as panning or zooming, you should choose the InertiaCam stabilization method.
How it works: InertiaCam stabilizes the footage according to the camera’s dominant motion, preserving the intended camera movement while reducing unwanted shake.
Adjusting settings: You can control the amount of stabilization by adjusting the Smoothing amount. A higher value will result in smoother footage but may introduce some cropping. Lowering the value will preserve more of the original footage but may not eliminate all the shake.
Tripod Mode: If your camera is stationary, you can select the Tripod Mode option to further improve the stabilization results.
InertiaCam
SmoothCam
When to use: If your clip does not feature intentional camera movement, then SmoothCam is the ideal choice.
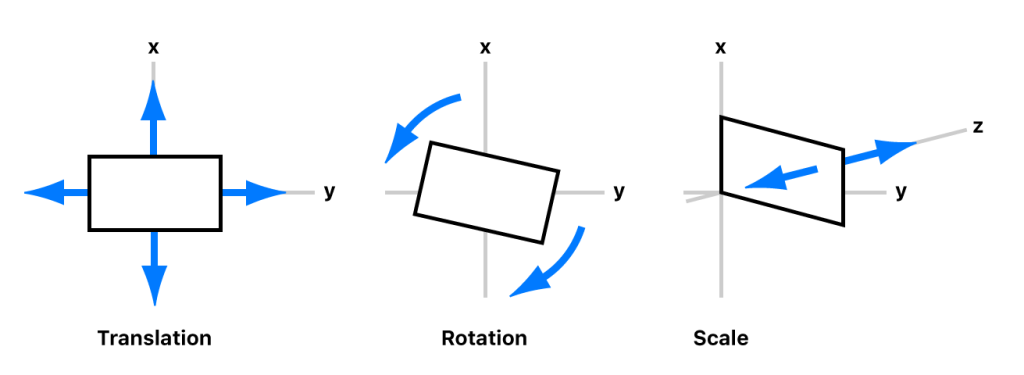
How it works: SmoothCam stabilizes Translation (position), Rotation, and Scaling (zoom) independently, allowing for finer control over the stabilization process.
Adjusting settings: With SmoothCam, you can individually adjust the Translation Smooth, Rotation Smooth, and Scale Smooth parameters. Experiment with these settings to find the right balance between stability and preserving the original footage.
SmoothCam
Achieving the best results:
Experiment with different stabilization methods and settings to find the optimal configuration for your specific footage. If you’re having trouble achieving satisfactory results, try breaking your footage into smaller clips and stabilizing each one individually.
In most cases, following the steps outlined above will yield satisfactory results. However, if your footage is particularly challenging due to excessive shake or rolling shutter distortion, be sure to check out the pro tips section below for more advanced techniques.
Part 2: Pro Tips and Troubleshooting
Scaling Up to Avoid Black Bars
One of the most common issues that can arise when stabilizing footage is the appearance of black bars around the edges of the frame. This happens when Final Cut Pro needs to crop the edges of the clip in order to compensate for extreme camera movement or shake. While this is sometimes unavoidable, there are a few things you can do to minimize the impact of these black bars. The first thing to try is adjusting the stabilization strength and smoothing parameters. By finding the right balance between these two settings, you may be able to reduce the amount of cropping required and minimize the appearance of black bars. If that doesn’t work, you may need to zoom in on the clip slightly to fill the frame. This can be done using the Scale parameter in the Video Inspector, or by using the Transform tool to manually adjust the size and position of the clip.
Rolling Shutter Compensation
Another common issue that can occur when stabilizing footage is rolling shutter distortion. This is a type of distortion that occurs when the camera’s sensor is not able to capture all of the pixels in a single frame at the same time, resulting in skewed or distorted objects and movements. This is particularly noticeable when shooting with a CMOS sensor or when panning or tilting the camera quickly. To correct this problem, Final Cut Pro includes a specialized Rolling Shutter Repair option in the Video Inspector. When enabled, this feature will analyze the clip and apply a specialized algorithm to remove any rolling shutter artifacts, resulting in a more natural and distortion-free shot.
Conclusion
Stabilizing shaky footage is an essential skill for any video editor, and Final Cut Pro makes it easier than ever to achieve professional-looking results with just a few clicks. By following the steps outlined in this guide and experimenting with the various stabilization options and settings, you’ll be able to salvage even the most unsteady shots and keep your editing projects moving forward. Whether you’re shooting handheld or using a stabilizer, Final Cut Pro’s stabilization feature can help you achieve smooth and stable footage that will impress your viewers and take your videos to the next level. So don’t let shaky footage hold you back – give Final Cut Pro’s stabilization features a try and see the difference for yourself!