Home >
Blog >
Do You Really Master Screen Recording on Mac? Essential Tips and Tricks
Do You Really Master Screen Recording on Mac? Essential Tips and Tricks

The Gemoo Team Last Updated: Aug. 09, 2024 | FEATURED IN: Blog
When you’re set to showcase your product, you’ve got an engaging presentation all planned out. However, when you start screen recording on Mac, you might find yourself frustrated with blurry visuals and choppy audio. Despite your best efforts, technical issues can derail your high-quality presentation.
Does this sound familiar? Today, let’s dive into how to effectively record your screen on a Mac, use the right tools to enhance your demonstration videos, and apply practical tips for better results.

Do You Really Master Screen Recording on Mac
1. Common Issues in Screen Recording on Mac
- Poor audio quality can make it hard for viewers to understand your product features.
- Blurry visuals fail to clearly show the details of your product.
- Complicated processes for recording and editing can be time-consuming and labor-intensive.
- Uninspired video content can lack creativity and fail to engage your audience.
- Difficulty adapting to multiple platforms due to varying video format and size requirements.
2. How to Solve These Problems
Using a specialized tool like FocuSee can address many of these issues. FocuSee is an efficient screen recording tool designed for both Windows and Mac users, handling the challenges mentioned above with ease.
Free download
Download and Start FocuSeeFocuSee: Open the tool and select your recording mode.
High-Definition Screen Recording on Mac: Customize recording sizes and camera settings to ensure clear visuals and sound, showcasing the most accurate product experience.

Three Recording Modes of FocuSee
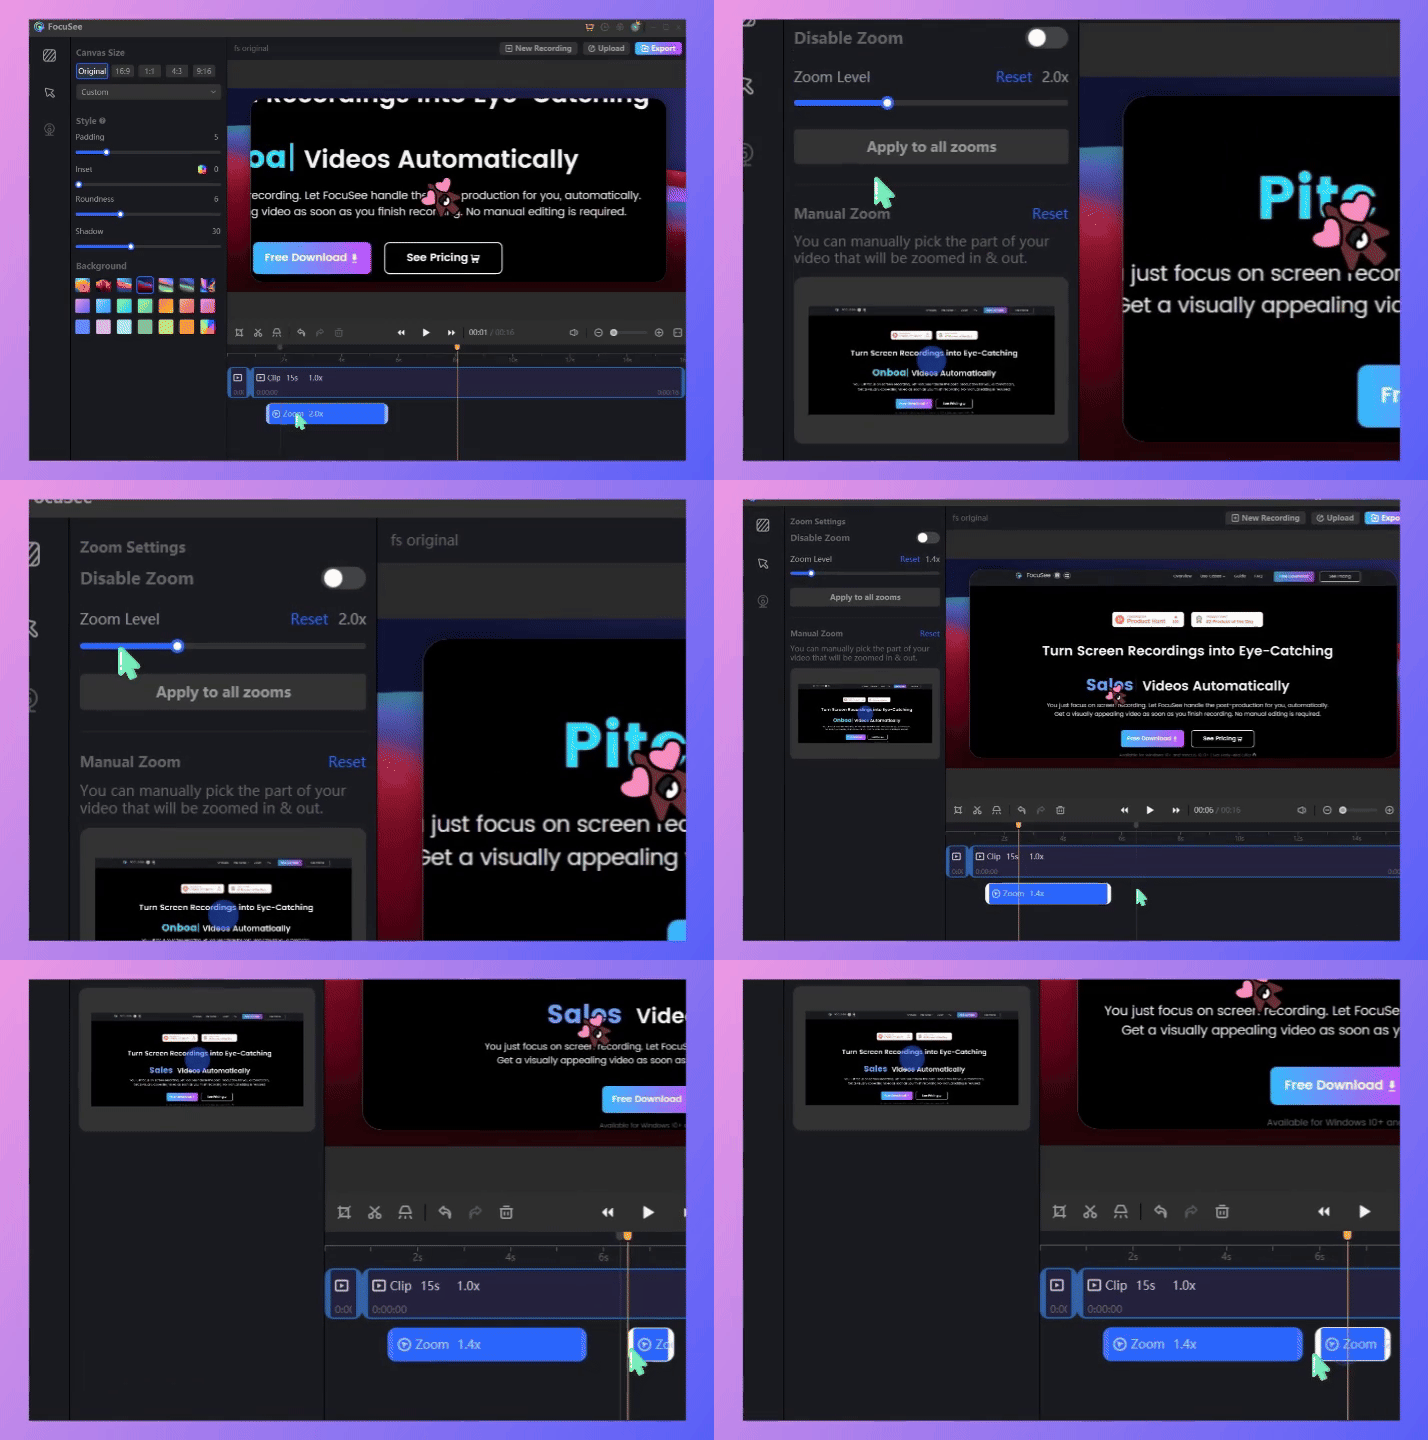
Auto-Focus:FocuSee automatically tracks mouse movements and smoothly zooms in on key parts of your screen, minimizing the need for complex post-editing while allowing you to adjust zoom levels easily.

Auto Zoom Effect
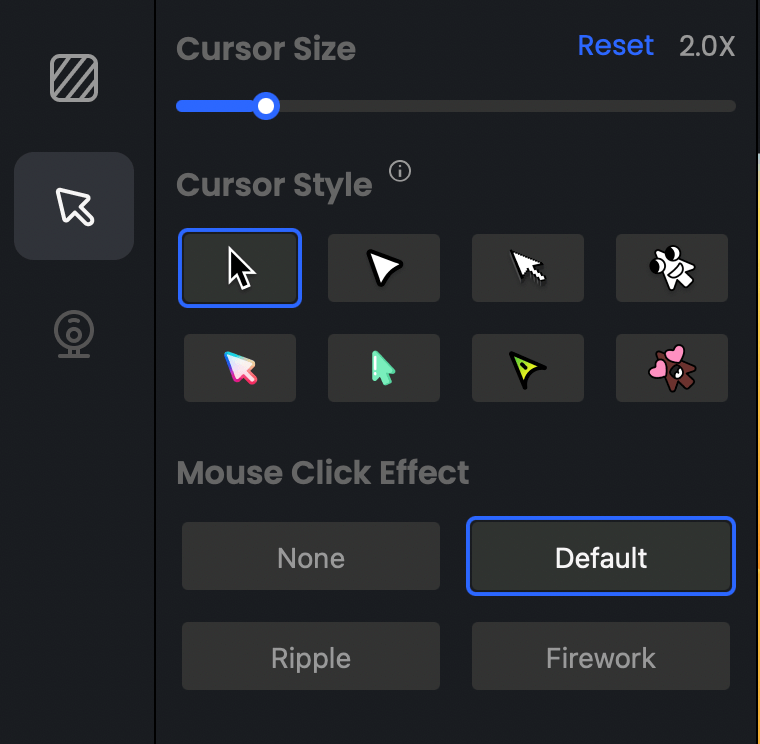
Mouse Effects and Virtual Backgrounds:Customize mouse size, click effects, and styles to enhance visual appeal. You can also change the virtual background in the editing interface, adjusting fill, insertion, roundness, and shadows as needed.

Mouse Cursor Settings
Automatic Subtitles:Generate subtitles in multiple languages to make your video more accessible, especially if you’re targeting a broad audience or planning to share it on social media.
Multi-Platform Support: Adjust video formats according to platform requirements and export with one click to share across various social media platforms.
3. Practical Tips for Improving Product Demos on Mac
In addition to choosing the right screen recording tool for Mac, these practical screen recording tips can help you boost your demo efficiency and video quality:
Plan Ahead: Create a script or outline before recording. This helps you present your ideas clearly and keeps your demo organized, avoiding unexpected issues and extending your recording time.
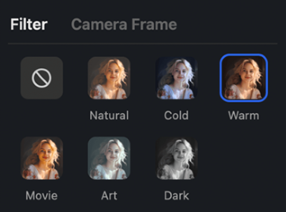
Prepare Your Environment:Choose a quiet recording space and use high-quality microphones and cameras to enhance your presentation.

Webcam Filters
Record in Segments: For longer videos, break them into smaller segments to make editing easier and reduce the likelihood of errors, providing more flexibility in post-production.
In summary, by using these tips and screen recording software on Mac, you can boost your productivity and focus on showcasing your product. With this guide on screen recording on Mac, you’ll create standout demonstrations and effectively engage your audience.
By applying these screen recording strategies on Mac, Focusee not only ensures that your presentations are professional, clear, and engaging, but also helps you stand out in business collaboration scenarios.

The Gemoo Team Let everyone enjoy a simplified workflow of video creating, editing, and sharing.


