How to Record Part of and Entire Screen Windows 10?

Perhaps you’re a businessperson who has to record your screen for a presentation, a software developer creating a how-to video, or someone who just wants to share a useful YouTube video clip. If you can record part of screen Windows 10 on your computer or the entire screen, you may quickly express your point of view. And it’s also possible to incorporate comments, mouse pointers, effects, filters, and shapes during screen recording. You can even show your screen to your audience in real time with a screen recorder.

Record Part of and Entire Screen Windows 10
Therefore, screen recording is such a useful feature that may be used for a number of activities, like lesson development. If a picture is worth a thousand words, screen recording on computer is even better. Although Windows has built-in screen-capture capabilities, there is also third-party screen-capture software available.
People frequently ask how to record a specific part of the screen of Windows 10. Or how to display full-screen Windows and record the entire screen of Windows 10 with ease, swiftness, and precision. It is doable, and in the coming sections of this article, we will show you how. To get started, keep reading till the last word of this study.
Table of Contents:
How to Record Part of and Entire Screen Windows 10
How to Record Part of Screen Windows 10?
Way 1. Record Part of Screen Windows 10 via OBS Studio
Way 2. Record Part of Screen Windows 10 via Free Cam
How to Record Entire Screen Windows 10?
Way 1. Record Entire Screen Windows 10 via PowerPoint
How to Record Part of and Entire Screen Windows 10
Have you ever experienced the trouble that you can only record the whole screen or only a part of the screen? Now, everything is different. With Gemoo Recorder, you can record part of and the entire screen freely. Just navigate to the area of the screen you want to record, capture the entire screen to be more comprehensive, or focus on a specific application window to show your point of view, or just record a tab in your browser.
In addition, Gemoo Recorder has many wonderful features as follows:
- Annotate Recorded Video – Just draw or shape on the screen with a colored brush, you can emphasize a certain part of the screen to express yourself logically. The tool will record drawing on screen while you recording the screen.
- Attract Attention – Just catch your audience’s attention and keep them entertained with all the popular GIFs in Gemoo Recorder.
- Upload to Cloud – Store and organize videos in Gemoo to make complex information clearer.
- Share it Easily – Share recorded videos with one click, spread your ideas, and get instant feedback.
Please free download Gemoo Recorder to start the wonderful video recording experience with it.
Step 1. Launch Gemoo Recorder on the computer and enter your account and password to log in Gemoo Recorder (Or you can log in with your Google Account).
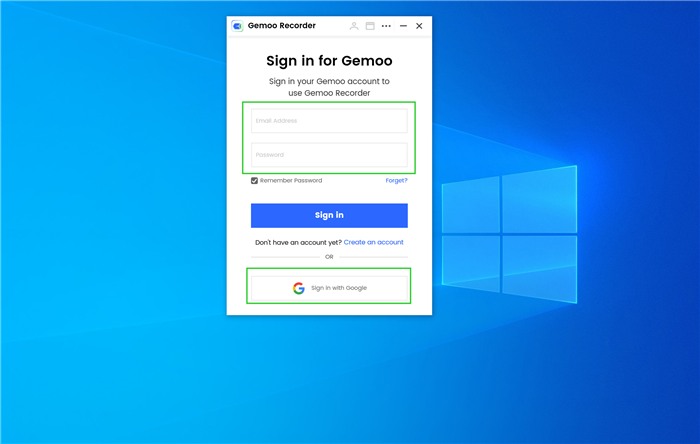
Sign in Gemoo
Step 2. Gemoo Recorder supports 4 recording modes, “Screen & Camera”, “Camera Only”, “Screen Only” and “Audio Only”. You can choose the one your want to start recording.
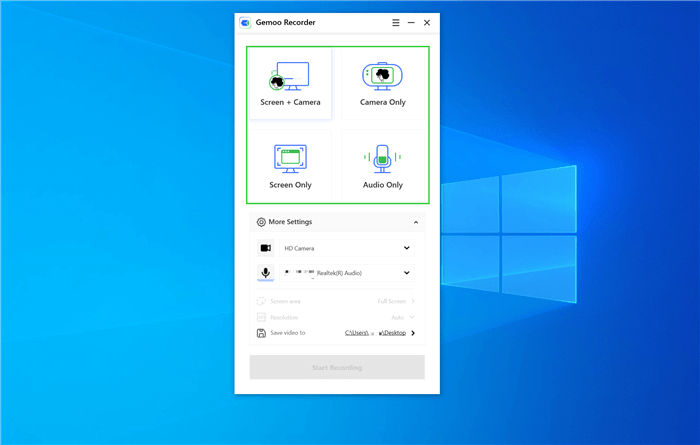
Select Recording Modes
Step 3. After choosing the recording mode, please hit on the Start Recording button.
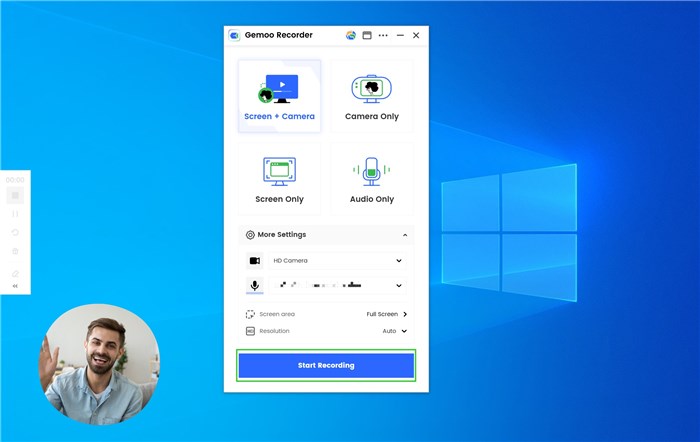
Hit the “Start Recording” Button
Step 4. When beginning to record, you can control your recording process by tapping on the control panel in the left sidebar: View recording consuming time, finish/pause/resume recording, restart recording, delete the recording and add annotations.
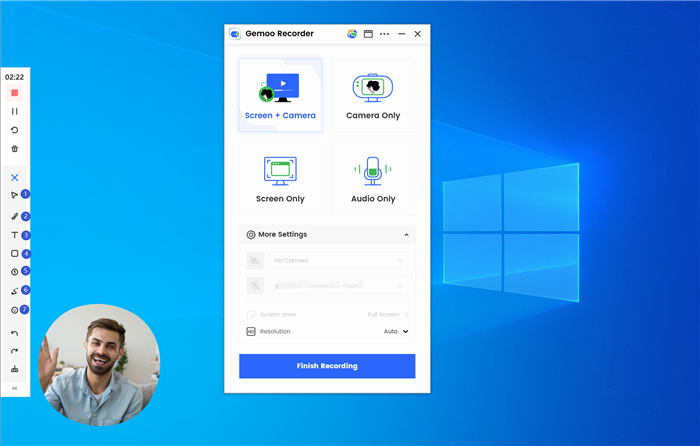
Annotate the Screen
Step 5. After recording, your video will be automatically uploaded to Gemoo. All your videos will be stored in the cloud. It is safe and secure. You can sort videos by different views and cards to arrange your messages freely. Also, feel free to share and interact with your teammates to facilitate communication.
Upload Succeeded
How to Record Part of Screen Windows 10?
Debugging, networking, and training may all benefit from screen recording. It is simple and basic to make a screen record or capture it on your computer for any reason. However, you may just need to record a section of the screen rather than the entire screen on Windows 10. By recording a portion of your display rather than the entire display, you can reduce the file size and make video transmission and reception faster and easier for yourself and the recipient. If you don’t want anything on your screen to show up in your video, this is also a great option. Plus, this is a wonderful alternative if you want to record a specific window on your PC but don’t want other applications, such as chatting, internet browsing, or other activities, to appear in the video.
In this part, we will demonstrate 2 different ways to record a specific part of screen Windows 10:
Way 1. Record Part of Screen Windows 10 via OBS Studio
OBS Studio, often known as Open Screencast Software, is a popular open-source, cross-platform broadcasting and screen-recording program that is used by millions of people all over the globe. OBS includes a number of advanced and user-friendly setup options. You can rapidly add new sources, replicate old ones, and change their properties by selecting those options.
This application enables you to create extraordinarily high-quality recordings by giving you unique professional tools. Transitions, for example, may be used to add interest to your scenes by choosing from a number of various and configurable transitions. OBS Studio is a wonderful video recording tool. There are no watermarks or time constraints on your work, and it’s open-source and free. It also comes with a slew of useful editing tools. It is also a common choice for live 60-frame-per-second broadcasting. You must first download OBS Studio from their website before you can begin. Because this is a full-featured software, you need to go over some essential setup and settings before getting started.
Following the processes indicated below to record a specific part of screen Windows 10, you may begin with basic screen capture after you’ve done all of the setups.
Step 1. A white box will display when you run OBS Studio and select the “Sub-Region” button.
Step 2. To customize the recording area, drag the edges and sides of this box. Then press Enter/ESC or click outside the box to allow the recording location you selected.
Step 3. To begin recording anything you want, click “Start Recording.” And then click the “Stop Recording” button when you’re ready to save the recording.

Click Start Recording Button
Way 2. Record Part of Screen Windows 10 via Free Cam
Free Cam is a screen recorder for Windows 10 with no intrusive pop-up advertising. This program includes video and audio editors, making it simple to make adjustments to the screen recording data. The Free Cam application is simple to use since it is created in a straightforward manner. It is possible to capture a specified spot, such as a single window, the full screen, or a specific region. It can also highlight your mouse, which is useful.
In addition, Free Cam has a well-known user interface. Because it is so basic, it is undoubtful that no one will encounter any difficulties. There isn’t much to configure before you start utilizing it. In addition to video, it can record voiceovers, system sounds, background music, and other things as well.
To begin with, recording the specific part, the following is the step-by-step guide to assist you for the same:
Step 1. Launch Free Cam on your computer. Then choose the “New Recording” option.
Step 2. On the main interface, you have the option of recording the full screen or a part of the screen. Just click “Select area.”
Step 3. Start recording your activity by pressing the red record button. If you finish recording, you only need to tap on “Stop to Record” and save the recorded video on your computer.

Record Screen with Free Cam
If needed, you can also make edits to your screencast using the built-in sound/video checker after you’ve finished recording. In addition, the tool directly uploads those recorded videos to YouTube.
How to Record Entire Screen Windows 10?
If you want to record the entire screen on Windows 10, you’ll need a video recording solution that’s up to the task. In this part, we will focus on the best tools to record the entire screen of Windows 10 effortlessly and quickly, and the following are the step-by-step tutorials for each tool.
Way 1. Record Entire Screen Windows 10 via PowerPoint
For making slideshows and giving presentations, Microsoft PowerPoint is a popular office tool. PowerPoint has a feature that allows you to record your screen, which may surprise you. With this software, you may easily record the entire screen on Windows 10. Because it does not slow down the performance of your computer, screen recording with PowerPoint is great for laptop users.
Here is a step-by-step guide for screen recording in Windows 10 with PowerPoint:
Step 1. On your Windows 10 computer, launch PowerPoint and click on the “Insert” and then “Screen Recording.”

Click Screen Recording on PowerPoint
Step 2. A new window will open after you click the “Screen Recording” button. Select the “Select area” button to select the entire screen of your computer. Alternatively, press Windows+Shift+F to capture the full screen.

Select Area with PowerPoint
Step 3. The “record” button will appear after you’ve completed the above steps. And then, to start and stop the recordings, click “record.”
Step 4. To save your recordings on your computer, right-click on the video in PowerPoint and select “Save Media As…”.
Way 2. Record Entire Screen Windows 10 via Game Bar
Make sure this application is open on your Windows 10 computer before you start using it. Generally, this software is turned on by default. If you wish to use it, you may do so by following the instructions below:
Step 1. Launch the Game Bar on your PC. The simplest method is to use the keyboard shortcut “Windows Key + G.”
Note: It’s possible that the “Windows Key + G” combination isn’t working because the Windows 10 Game Bar hasn’t been turned on yet. To use it, navigate to the “Game Bar Settings” menu and choose it. Then turn on the switch next to “Enable Xbox Game Bar.”
Step 2. When the Game Bar starts, a window labeled “Capture” should open on the left, displaying a variety of recording options.

Open Xbox Game Bar
Step 3. Click the white circle symbol to start recording, and a small bar will occur on the right side of the screen, indicating the length of the recording. Press the microphone button to record sound on computer.

Press Microphone Button
Step 4. To end the recording, just click the stop icon or the recording timer when you’re done.
Way 3. Record Entire Screen Windows 10 via OBS Studio
OBS Studio is a streaming video recorder that can record entire screen Windows 10 as well. This Windows 10 full-screen capture tool is also open-source for all users, with a basic user interface. It allows you to quickly and easily record the entire screen on Windows 10.
The following tutorial will show you how to use OBS to record entire screen Windows 10:

Run OBS Studio on Your Computer
Step 1. On your Windows 10 device, download and run this software, then click the “+” in the “Source” section on the left.
Step 2. Click “Display Capture,” choose a name for the new recording under “Create New,” and then click “OK.” Following that, a new window will appear. The recording area is set to full screen by default.
Step 3. To begin recording, click the “Start Recording” button, and to stop it, click the “Stop Recording” button. To see the video, click “File” when the process is completed.
Final Words
This article examined how to record a specific part of screen Windows 10 as well as record entire screen Windows 10. We also discussed how to record the screen using both built-in and third-party applications. Whether you’re making videos for a small school project, for thousands of subscribers, or just for fun, knowing how to record screens on Windows 10 may make a big impact. There are a number of solutions that may fulfill your demands, depending on whatever features are most essential to you, and there’s no reason why you shouldn’t be able to create a fantastic video.